How to install mac Minecraft mods and enable gamma

Enabling gamma
To enable gamma you are only required to follow a couple of steps. These steps are easy to follow and this guide will show you how.
1. Go into finder, and press shift-command-G together.
2. Copy this into the bar on screen ~/Library/Application Support/
3. Click on application support and scroll down until you find a folder called Minecraft
If you are pre-1.7 follow the instructions below if you are post 1.7 follow the ones further down
4. Click on the folder, then scroll down until you find this options.cfg
5. Click once on it the press enter and change it to this options.txt and click use .txt
6. Open the file with text edit (which comes with your mac) and four lines down it says gamma 1.0
7. Change the 1.0 to 1000.0 and press command-s
8. Once the file is saved close it
9. Click on the file options.txt and press enter and change it to options.cfg
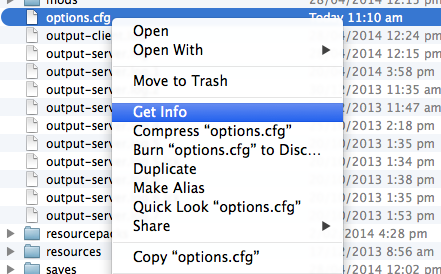
10. Then right click the options.cfg file and click get info (shown in the picture)
11. Go down to name and extension, then remove the .txt off the end and press use .cfg
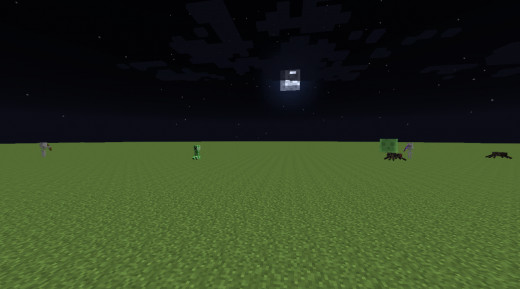
12. Open minecraft and you should see the world is bright all the time
If you are post 1.7 follow these
4. Open the file with called options.txt with text edit (which comes with your mac) and four lines down it says gamma 1.0
5. Change the 1.0 to 1000.0 and press command-s
6. Once the file is saved close it.
7. Open minecraft and you should see the world is bright all the time
Installing mods
You need to do these things before you start.
1. Go to the websites below the first one is required to mod. The second one is their because that is the mod I will be demonstrating.
- Minecraft Forge Downloads
To get minecraft forge - Pixelmon | The Amazing Pokémon Mod for Minecraft
Download pixelmonmod from here as I am demonstrating it
Installing
1. Go to your mod page and find out which version of minecraft it requires.
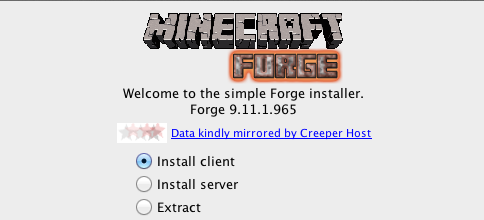
2. Pixelmon 3.0.4 needs 1.6.4 so I got to the forge page scroll down until I find 1.6.4 and I get the latest one 9.11.1.965 .
3. Click the installer link to the right and it starts to download
4. You will find the download in the downloads folder, in finder and you then need to double click the file
5. With the file open click install client and then ok.
6. Go into your minecraft and click new profile name the profile forge
7. Then the version of minecraft you need to use should be release (the minecraft version your mod needs) forge (then what ever version you downloaded)
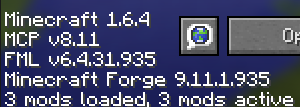
8. Load up that profile and on the minecraft and down the bottom it should say 3 mods installed.
9.Go into finder, and press shift-command-G together.
10. Copy this into the bar on screen ~/Library/Application Support/
11. Click on application support and scroll down until you find a folder called Minecraft
12. On your desktop create a folder called mods (no caps) then drag it into the folder.
13. Go to your mod website download the mod and put it the folder
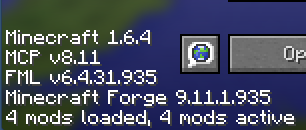
14. Open minecraft if you see the image to the right you are done (if you get and error report contact the mod makers.)
")
")


