10 Serenity Yoga Poses


Bend A Little!
Yoga is free! And it can be a calming activity. Below are 10 serene yoga poses that could help you get started with a simple and relaxing yoga practice. Go straight here to start: #1 Serene Yoga Pose.
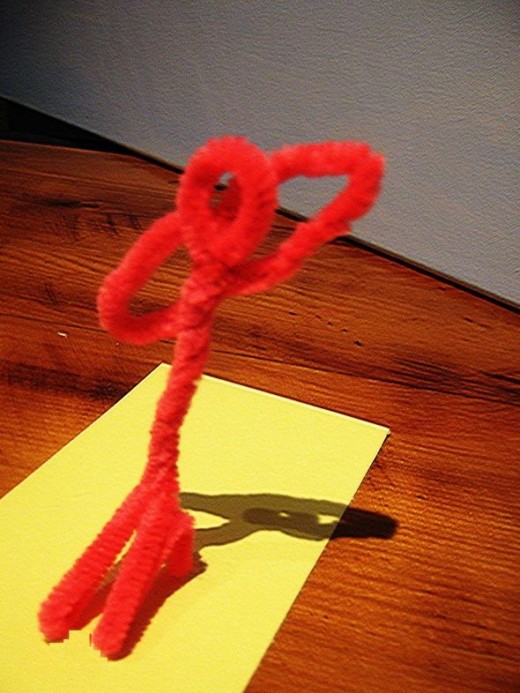
The photo to the left is Table Top or "neutral" pose when doing Cat Pose. Performing yoga can be a completely cost-free and calming experience. The instructions will help you get started and all of the yoga gear can help you feel stylish. This is a chance to give yourself room to breathe.
all photos on this page are copyright by Me -- Teapixie! :)
Yoga As A Stylish Practice
Is Yoga Part Of Your Life?
Yoga Mat
To start your yoga practice, you will want an affordable yoga mat. If your mat is on order, don't fret -- you can start today without a mat. Yoga mats are great for creating safe traction bases upon which to be a yoga stickman.
Long deep inhale on exertion/long deep exhale when relaxed - don't hold your breath. Always breathe!
#1 Serene Yoga Pose - Half Moon

a) Standing tall on your yoga mat, push your pelvis forward (ala Elvis, but a little less pronounced)
b) Keep your knees soft
c) Raise your arms over your head.
d) The key, at this point, is to pull your shoulders away from your ears, not scrunch up like you're stressed. At first, this might sound ludicrous, but it will eventually make sense. Yoga is all about isolating muscles and that's what you'll need to do with your shoulders here.
e) Once your arms are over your head, flex slightly to your right so that you feel a slight stretch in your left side. This is not intended to be a "no pain, no gain" type of movement -- it's intended to be soft and gentle.
f) Hold this for 15 seconds.
g) Then straighten.
h) Then flex to your left side and hold for 15 seconds.
i) Then straighten and bring your arms slowly to your sides.
Yoga Block
Yoga blocks are used to support your body. In one class, we use the yoga block to push our pelvis forward while sitting cross-legged on the floor. In another, we will use two blocks to support each leg while sitting cross-legged. There are a multitude of uses for blocks.
#2 Serene Yoga Pose - Seated Pose

a) Place your block in the middle of your mat.
b) Sit at the very front tip of your block with legs crossed. Your arse-end or 'sitting bones' should be straddled between the mat and block. This sounds weird, but it helps to push your pelvis forward as you sit -- and increases your positive posture.
c) Assess your legs. If your knees are sitting high, place a rolled up blanket or bolster under each thigh as a support. There is no need to over-state the position. The more you do this pose, the more flexible you will become, but don't strain to do it.
d) Place your hands, palms facing up, on your knees.
e) Close your eyes.
f) Stay in this position as long as you are able. Your back will tire, so be gentle and allow yourself to pull out of this pose at any time.
g) Remove the block and any extra supports from your activity area, as you are now finished using it.
#3 Serene Yoga Pose - Arm Stretch
a) Sit on your knees with your sitting bones on your heels.
b) Place your right hand behind your head with your elbow pointing to the ceiling (palm facing head).
c) Link your left hand into your right hand with your left elbow pointing to the floor.
d) Keep boths hands behind your head but allow your left arm and elbow to be in front of your left shoulder.
e) Hold this pose for 15 seconds and repeat this stretch on the other side.
f) Literally shift the position of your hands so that the right elbow is pointing to the floor, and the left pointing to the ceiling.
g) Hold this pose for 15 more seconds.
#4 Serene Yoga Pose - Seated Stretch

a) Still kneeling on the floor with your sitting bones on your heels.
b) Lift your arms over your head. Ensure you are relaxing your shoulders.
c) Link fingers together with palms facing ceiling (this is a neutral pose)
d) Push the seat of the palm of your left hand towards the ceiling. Feel the stretch in your left arm and left side of your body.
e) Hold this for 15 seconds.
f) Return your hands to neutral.
g) Push the seat of the palm of your right hand towards the ceiling. Feel the stretch in your right arm and right side of your body.
#5 Serene Yoga Pose - Wall Pose

a) Lay on the floor with your legs up against the wall. Push your bottom as close to the wall as possible.
b) Really push your bottom towards the wall, it will help with the stretch.
c) Hold this pose for at least 2 minutes.
#6 Serene Yoga Pose - Cat Pose

a) Go down onto all fours -- place hands and knees shoulder-width apart. Really, your shoulders aren`t that far apart!
b) Make your back flat, like a table -- this is neutral pose (see the photo at the beginning of this lens).
c) Allow your back to droop with your tailbone and head reaching to the ceiling. Your tailbone should lead your vertebrae into this pose very gently (there isn't a photo of this part of the pose).
d) Hold this for 5 seconds.
e) Leading with your tailbone, draw your back towards the ceiling and allow your tailbone and head to point toward the floor (this part of the pose is in the photo above).
f) Hold this for 5 seconds.
g) Repeat these two poses 4 more times.
What Is Your Opinion????
Do you think Yoga is satisfying if practiced alone at home?
#7 Serene Yoga Pose - Balance Pose

a) Start in the neutral position from Cat Pose (neutral position is the photo at the beginning of this lens).
b) Lift and straighten your right arm.
c) Lift and straighten your left leg. You should now have only one arm and one leg on the floor.
d) Pick a spot ahead of you and stare at it. This will help you hold your position.
e) Hold this position for 15 seconds.
f) Repeat this pose with the left arm and right leg.
Child's Pose - A Useful Tool!
When my toddler misbehaved, I would fold up into Child's Pose on the living room floor. Instead of my child asking for attention, her response would be, "Mummy? Are you okay?" I would respond that I was "taking a time out." This way it was actually a "time in" together.
#8 Serene Yoga Pose - Child`s Pose

This is a very special pose. It`s special because you can use it as punctuation between every single yoga pose you do. In fact, I find my yoga experience to be so much more rejuvenating if I use this pose in this way.
a) In a kneeling position, flatten out your feet so that your toes are flat on the floor.
b) Move your knees apart about 18 inches (approximately!) and keep your toes touching.
c) Slowly fall forward so that your head touches the floor and your shoulders, chest, and stomach hang freely between your thighs -- try to keep your sitting bones close to your heels.
d) Gently stretch your ams forward.
e) Hold this pose for as long as you wish.
Yoga Kit
Sometimes it's easier (and cheaper) to buy the capsule. It's a great way to start out with yoga gear. Just remember -- you don't need much to get started. In fact, if all you have is dirt, you can sit/stand in the dirt and do yoga. It's really that simple.
A capsule of yoga gear is something that does help with creating a sense of calm.
#9 Serene Yoga Pose - Knees to Chest

a) Lay on your back.
b) Stretch your legs out.
c) Pull up your right leg so that it folds at the knee on your chest and hold it there with your arms.
d) Lift your left leg 20 degrees (keeping the leg straight).
e) Hold for 15 seconds.
f) Replace left leg on the floor and follow with right leg.
f) Repeat on the right side.
g) Pull up your left leg so that it folds at the knee on your chest and hold it there with your arms.
h) Lift your right leg 20 degrees.
i) Hold for 15 seconds.
j) Replace right leg on the floor and follow with the left leg.
Elegant Yoga Attire
#10 Serene Yoga Pose - Relaxing Pose

I do all of the other yoga poses so that I can finish my practice with this one. I love this relaxing pose -- it`s when my mind clears and I can see the purpose of my day.
a) Lay on the floor.
b) Spread your legs approximately 18 inches apart.
c) Place your arms perpendicular to your sides with palms open and facing the sky.
d) Inch your shoulder blades toward each other, opening up your shoulders.
e) Inch your sitting bones toward each other, opening up your hips (your feet will fall outward).
f) Begin focussing on your breathing. If you can, take longer breaths and then return to relaxed breathing.
f) Hold this position quitely for at least 5 minutes.
If you find laying down creates too much pressure on your lower back - consider using a bolster under your knees. I usually place a blanket over myself when I do this pose because I get cold. Keeping warm is very important. If you fall asleep during this pose, don`t worry -- your body is telling you that you need rest. Don`t fight it. If I allow myself to relax into this pose and focus on my breathing, the worries of the day fade away and I begin to think clearly. I get from the pose exactly what I need and, with practice, you will, too.
Yoga can sometimes seem imposing and the language can be difficult to remember (I never remember the proper names for poses). I suggest that every time you do a couple of poses, end your session with this:
Think about someone special and say, "Namaste" (na-ma-stay). It's a way of saying, "The spirit in me honours the spirit in you."
Please let me know if you've enjoyed reading through this and looking at my kooky photos. I know they're not perfect -- this is my first time doing something like this - but I had fun!
This content is accurate and true to the best of the author’s knowledge and is not meant to substitute for formal and individualized advice from a qualified professional.
© 2014 Tea Pixie


