Beaded Christmas Ornaments

Special ornaments for Christmas tree decorating!
You can make these as simple or elaborate as your creative genius takes you. If you are having younger children helping make beaded ornaments, get pipe cleaners and larger sized beads. It's easier for their little hands to work with.
I found some Hub pages which helped me in creating the ornaments you will see here.
I had found some tiny seed beads, some sequins, leftover pearl buttons and a spool of small gauge wire in my craft drawer when I went to sort and clean out stuff. There wasn't a lot of beads or sequins but there was enough make a few ornaments. And it cleared them out of the craft drawer. (Giving me some room to get more craft stuff!)
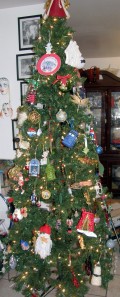
My completed beaded ornaments.

Other Hubpages for inspiration and instructions:
http://hubpages.com/search/beaded+ornaments
http://jamiebrock.hubpages.com/hub/DIY-Snowflake-Crafts#img_url_4235749
I found these and they encouraged me to use the stuff I found in my craft drawer. I found the Snowflake one especially helpful in setting up the wire framework to make the Snowflake ornament in my picture.
Many thanks to the writers of those!
Instructions
- Spiral ornament. 12 to 15" of wire. Using tweezers of needle nosed pliers, tightly coil end of wire 3 to 4 turns. This forms the bottom end of the ornament. String the beads on the wire leaving at least 3" of wire at the top end. Curve the end of the wire over to form a loop and wind the end a few times next to the top bead. That will secure the top end. Wind the beaded length of wire around a pencil and slide off. You can use a short length of cord or ribbon to create a hanger or just use a Christmas ornament hanger to place the ornament on the tree.
- Graduated Circle ornament. 24" of wire. Using tweezers of needle nosed pliers, tightly coil end of wire 3 to 4 turns. This forms one end of the ornament. String the beads on the wire leaving 1 & 1/2" at end. Tightly coil wire 3 to 4 turns next to last bead. Holding the bottom coiled end, loop the rest into graduated circles and bring the other coiled end to meet the 1st coiled end. use the rest of the wire to secure the circles into place at the top. I used a pearl button as a decorative accent at this point. You can use a 10" length of cord to create the hanger or just use a Christmas ornament hanger to place the ornament on the tree.
- Double Circle Ornament. 15" of wire. Fold wire in half. String a cluster of Pearl buttons or maybe one small bell or Jingle bell to the fold. Twist wire 3 to 4 turns to secure. On each side of the wire, string your beads leaving 3" of wire on each side. Bring the 2 sections of wire together at the top beads and twist 3 to 4 times to secure. String more beads on each side leaving 1" of wire on each end. Bring these 2 sections together at the top beads and twist 3 to 4 turns to secure. Shape the rest of the wire into a loop. This is where you can You can use a short length of cord to create the hanger or just use a Christmas ornament hanger to place the ornament on the tree. Place the ornament on a flat surface and shape into the 2 circles.
- Snowflake ornament. I used six 6" sections of wire and followed the instructions to shape into the snowflake shape from Hubpage: " http://www.craftster.org/forum/index.php?topic=17586.msg141901#msg141901 ". I used glass seed beads and sequins. From the snowflake center, doing one snowflake stem at a time, I strung the beads and sequins in the following order: 3 beads-1 sequin-4 beads- 1 sequin-5 beads-1 sequin-4 beads-1 sequin-3 beads- 1 sequin-2 beads-1 sequin-1 bead-1 sequin-1bead. Then using tweezers or small needle nosed pliers, tightly coiled end of each wire 3 to 4 turns. Using an additional 3" of wire I formed a loop to have as the hanger for the ornament. You can eliminate this step and just use a Christmas ornament hanger to place the ornament on the tree.