- HubPages»
- Technology»
- Computers & Software»
- Operating Systems
How to Add RAM (Memory) to iMac

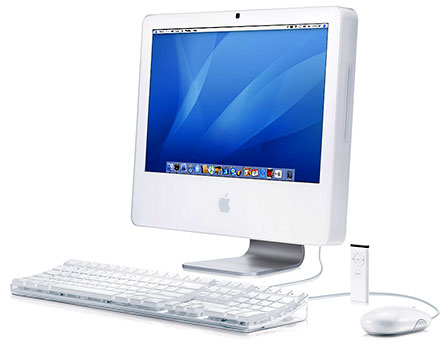
I have a late 2006 issue iMac which I love. It came with 1GB of RAM, which was fine for a quite a while, but recently became problematic due to how slow the computer was running. I'd tried all the tips and tricks for speeding my iMac up, but none of them made much of a difference. And then someone told me it was all to do with how little RAM (memory) my iMac had.
Being the computer expert that I obviously am not, I dismissed this as silliness. Until I couldn't take the constantly spinning rainbow wheel and decided to look into the claim. To make a long story short, he was right. And to make a short story a little bit longer, it was incredibly easy to add the RAM. Honestly, Aunt Bertha could do it with rollers in her hair and green gick on her face. So if you want to speed your iMac up, run out and get you some RAM, and follow these instructions.
The Kingston RAM I Used

How much RAM can you add?
And, obviously, how much it had it in when it you bought it.
- The early 2006 iMac can utilize a total 2GBs of RAM.
- The mid 2006 iMac can utilize a total of 2GBs of RAM.
- The late 2006 iMac can utilize a total of 3GBs of RAM.
So, if your early/mid 2006 iMac came with 1GB already installed, the most you can add is another GB. If your late 2006 iMac came with 1GB, like mine did, the most you can install is another 2GB.
RAM is cheap!
It cost me about 40 bucks to add 2GB to my iMac, bringing it to a total of 3GB.
Here are the specs Apple lists for replacing/adding RAM to your iMac: (Please note that you can also use the 2GB module, though it's not specifically mentioned here - it is mentioned on the apply site in other places, and is what I myself used)
DIMMs that are not supported contain the following characteristics:
- registers or buffers
- PLLs
- ECC
- parity
- EDO RAM
Small-outline dual inline memory modules (SO-DIMMS) of 512 MB or 1 GB that meet all of these criteria:
- PC2-5300
- unbuffered
- nonparity
- 200-pin
- 667 MHz DDR2 SDRAM
Now that you know how much RAM you need, let's look at how easy it is to install it:
Step 1: Turn your computer off, and unplug everything connected to it.
Step 2: Place a soft cloth on the desk and gently lay your iMac face down on it. The cloth is to prevent scratching the screen. You may want to have another person there with you when you do this, as it was a bit awkward and I was worried about setting it down to hard. If you've got two people, it's much easier to do -- but you certainly can do it solo if you need to.
Step 3: Using a small Phillips screwdriver, remove the two screws from the center panel on the bottom of the computer.
- Step 4: There are two little ejector arms partially covering the two card slots -- you want to push them outward until they unlock themselves. Let them rest against the outer edge of the slot.
More Apple Goodies

Step 5: My cards didn't just pop out, so I had to gently pry them from the slot. It wasn't hard to do, I'm just mentioning that they didn't eject like pop tarts, so don't worry if you have to pry yours out. Notice the way your memory cards are facing when you pull them out (if you're removing as opposed to just adding) because this is how the new ones will be going in.
Step 6: The RAM in my iMac happened to be facing sticker-down when I pulled them out, which happened to be the same way the new RAM needed to be when it went in. I cant guarantee this will be the case with yours as well, but it may be. (What you need to look for is the "keying" -- there's a little grove/indentation down the length of the card itself. That key should be closer to the left than to the right -- it's not right in the center -- and the little copper bits go in head first, so that ought to give you a good idea of how to install them.)
Step 7: Apple says you shouldn't use the ejector hands (the ones you opened in order to get the cards out) to push the new cards in, because this could damage the new RAM. Instead, push them in with your thumbs. They also say that you'll hear a little click when they're in place -- I did not hear this click either time, so don't worry if you don't hear it.
Step 8: When the cards are installed, close the ejector hands. They will snap shut.
Step 9. Re-attach the little door, screw it back on, set your computer back up, reconnect the cables, turn it on. Check your "About this Mac" thingie and it should show the new amount of RAM.
Step 10: Enjoy your speedy new iMac!
 computer")


