How to Crease Paper When Making Holiday Cards

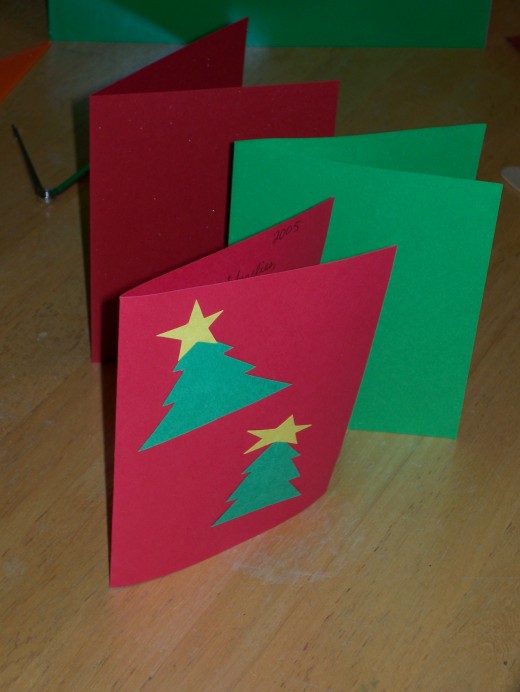
Whether you are making holiday cards, greeting cards, or small books, the perfect crease can make or break the quality of your project.
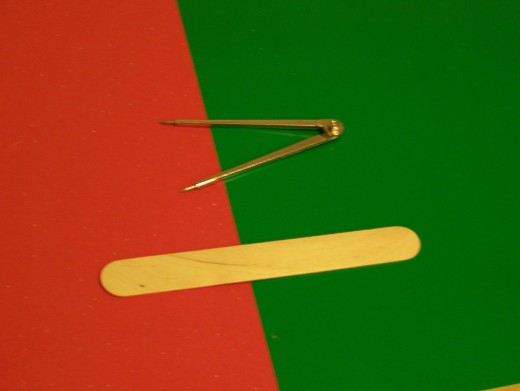
It is fairly easy to make the perfect crease as long as you have the tools to do it. The two most important things you need are a compass (or other tool with a point) and a folding tool (I use a smooth wooden piece, but you can also use a pencil).
These two small things will make a huge difference to the look and quality of your homemade card.
Gather Your Materials: Paper, Compass, Ruler, and a Folding Tool
It is important to test your paper to find the natural fold.
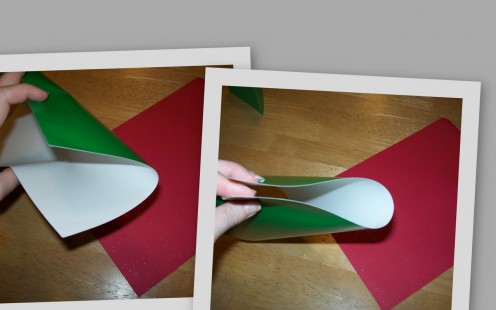
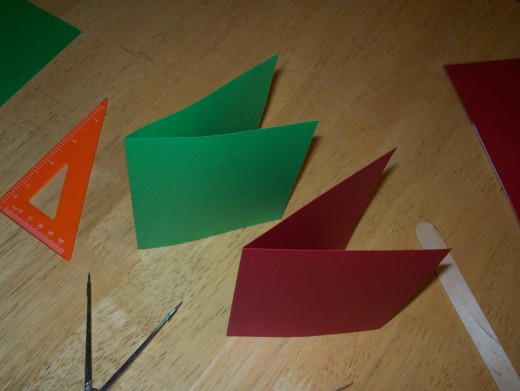
Without creasing, simply draw the edges of your paper together. If the sheet of paper offers a resistance to folding, as you see in the picture on the left above, this is not the natural way the paper wants to fold. You will need to try to draw the other ends together to find the natural fold. If it folds smoothly and easily, like in the picture on the right above, you have found the natural fold.
Every single sheet of paper has a natural fold, so you should always check. This will affect the crease and create a higher quality card. While some types of paper, like printer and copy paper, might be more difficult to see the natural fold in, it is there if you keep trying to find it.

Making the Crease
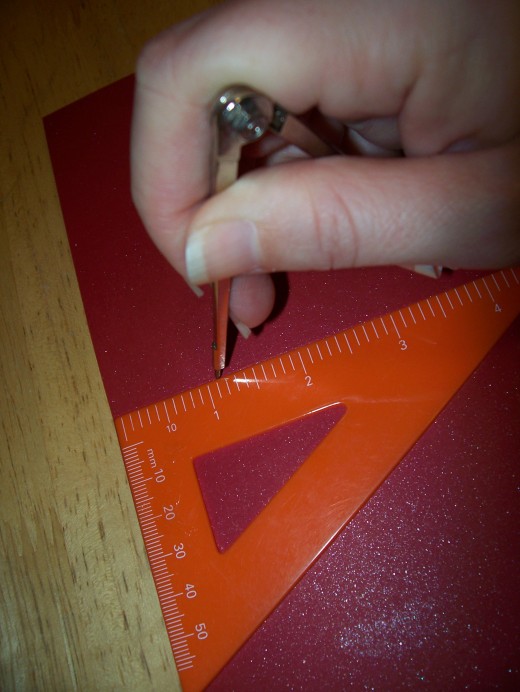
Once you have found the natural fold, use a ruler (or measuring grid) to find the halfway point where you want to create the crease.
Use the pointed end of the compass to make an indentation on the paper where the crease will be, by tracing along the edge of the ruler. This will help create a smooth, perfect crease.
Keep in mind that you don't want to press too hard because you don't want to pierce the paper.
◊◊ ◊◊ ◊◊ ◊◊ ◊◊ ◊◊ ◊◊ ◊◊ ◊◊ ◊◊ ◊◊ ◊◊ ◊◊ ◊◊ ◊◊ ◊◊ ◊◊ ◊◊ ◊◊ ◊◊ ◊◊ ◊◊ ◊◊ ◊◊ ◊◊ ◊◊
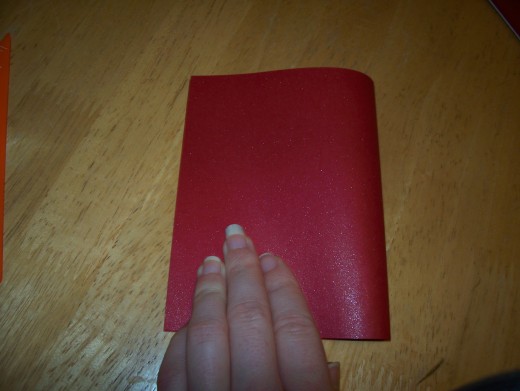
Next, pull the edges of the card together. You want to match the corners together before attempting to make the crease.
Keep a hold of the corners to keep the paper from moving.
◊◊ ◊◊ ◊◊ ◊◊ ◊◊ ◊◊ ◊◊ ◊◊ ◊◊ ◊◊ ◊◊ ◊◊ ◊◊ ◊◊ ◊◊ ◊◊ ◊◊ ◊◊ ◊◊ ◊◊ ◊◊ ◊◊ ◊◊ ◊◊ ◊◊ ◊◊
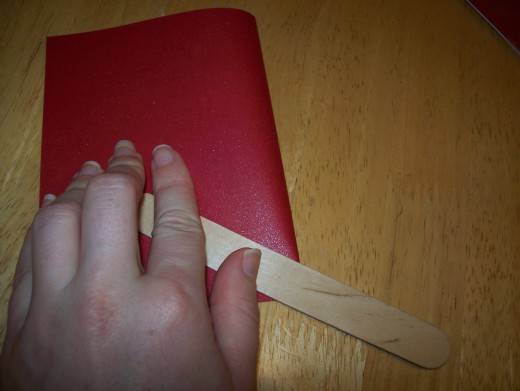
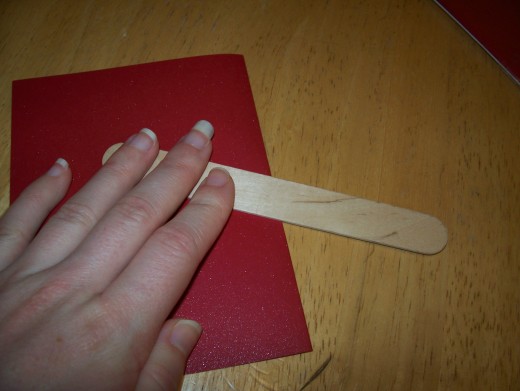
Now, use the folding tool to create the crease. Simply run the tool along the paper slowly to avoid any mistakes.
It is good to oil your tool (whether it is a pencil or like mine), so that it works more smoothly with the paper. You can use oil and a cloth, rub it between your palms to absorb natural oil, or run it against the side of your nose for the oil (it sounds weird, but it works).
Run the folding tool against the new crease a couple of times to make sure it is smooth. Open the card, then close it and run the tool over the crease one more time.
◊◊ ◊◊ ◊◊ ◊◊ ◊◊ ◊◊ ◊◊ ◊◊ ◊◊ ◊◊ ◊◊ ◊◊ ◊◊ ◊◊ ◊◊ ◊◊ ◊◊ ◊◊ ◊◊ ◊◊ ◊◊ ◊◊ ◊◊ ◊◊ ◊◊ ◊◊
There you are: you have now created the perfect crease for your card!
Now, you get to decorate the card, which is, of course, the most fun part of making your own cards.
Order a preassembled kit today, or you can make your own by collecting the tools described above.


")
