How to lay tile

You can do it!
You have to admit: tile looks really great in homes these days. It's durable and doesn't get ruined as easily as wood floors, and it doesn't have to be that expensive.
However, it can be an intimidating task to take on, especially without the help of a professional. What if you want to save money by doing it yourself?
Though it is one of many home improvement projects that may seem daunting, laying tile is not impossible or even very difficult. It just takes time.
You should be excited about it because, though it may cost a lot of money, you can redesign your kitchen, bathroom and/or other areas of the home and recreate it. You can choose from ceramic, stone, vinyl or even glass tile to add a new mood to the room.
Read through these instructions and tips to understand and maybe even start tackling laying down tile in your home!
Tile types
- Glass tiles - These have become popular field and accent tiles due to recent technological breakthroughs as well as the tile’s properties, specifically to impart rich color and reflect light as well as their repulsion of water.
Glass in tile is difficult to work with because glass is more rigid than ceramic or porcelain tile, so glass tiles break more readily under the duress of substrate shifts.
- Marble tiles - Marble is used because it imparts stiffness, impact strength, dimensional stability and thermal conductivity. It is also a good filler and extender, has high brightness and is weather resistant.
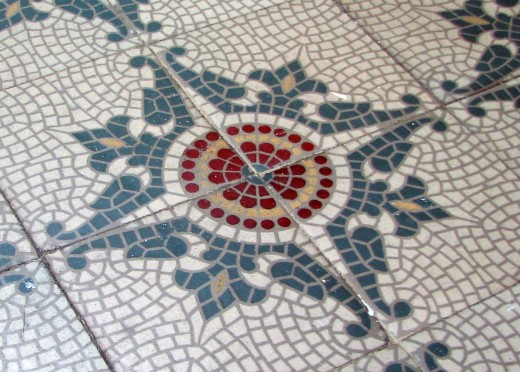
- Mosaic tiles - Mosaic is the art of decoration with small pieces of colored glass, stone or other material.
- Porcelain tiles - They are ceramic tiles with a water absorption rate of less than 0.5 percent and are used to cover floors and walls. They can either be unglazed or glazed.
- Quarry tiles - They are used most for floors because they are so durable indoors and outdoors. Quarry tile is also used less often as a wall finish and is sometimes used for countertops, although the wide grout joints can make cleaning the counters difficult.
For floors, quarry tile is usually set in a thick bed of cement-like mortar. For wall use it can be set in either a thick bed of cementitious mortar or a thin bed of mastic. For both floors and walls, the joints between tiles are usually grouted with cementitious grout.
- Slate tiles - These are often used for both indoor and outdoor walls and floors because they are good electrical insulators and are fireproof; they also have two lines of breakability so they're easy to cut. Tiles are installed and set on mortar and grouted along the edges. Tiles are often sold gauged, meaning that the back surface is ground for easy installation. Chemical sealants can be used to prevent stains, improve durability and add smoothness.
Washroom Renovations Part A: Prepare to lay tile
What you'll need
- Tile - There are so many sizes and patterns to choose from! The basic sizes are 4 inch x 4 inch, 8 inch x 8 inch, and 12 inch x 12 inch. Don't be afraid to get different sizes.
Tiles can also be laid in different patterns. Get as many tiles as you'll need depending on the size and pattern you want. It's a good idea for first-timers to buy extra tiles in case if tiles are damaged, cut improperly or broken... an extra pack or two of tiles is probably sufficient. When laying tile diagonally, a lot of material is wasted as cutoffs. A rule of thumb: buy 15 percent more tile than you will buy to fill the space on the floor/wall.
And, of course, there are a myriad of colors available, but make sure they go with the grout color. Typically dark grout and light tiles clash as well as light grout with dark tiles. This is based on your individual tastes. And make sure the rest of the family agrees with you... you'll hopefully have the tile for a while!
- Tile adhesive or "mastic." Make sure you have the right kind of adhesive; you'll need a different type if you're laying tile in a kitchen or for a pool room... sometimes you'll need waterproof adhesive. Even well-fitted tiles can let some water through to the adhesive, which means it will crumble and break.
- A notched trowel
- A tile saw or a tile scorer
- A diamond hole saw to cut out radiator pipes and other holes
- Grout - This is the "filler" that goes in the spaces between tiles. Commonly grout is gray, white or terra cotta.
- Rubber float - This is a rubber foam rectangle with metal backing and a wooden handle. (Don't use a putty knife; it will scratch the tile face of tiles)
- Tape measure (or digital laser tape)
- Bucket (with warm water)
- Sponge
- Level
- Chalk line
- Tile spacers
- Silicone sealant (optional)
Washroom Renovations Part B: Laying tile

Start laying tile
1. Use a tape measure or digital laser tape to measure the room's length and width. Multiply the length and width (basic area equation!) to see how many square feet the wall/floor is. Use this measurement to determine how many tiles you'll need. So, for instance, if a floor is five feet by eight feet, it is 40 square feet.
Start the layout of the tile by snapping chalk lines in quadrants. Measure where the center of the length and the width of the floor/wall is, then snap chalk lines (pulling the string of the chalk line from the center of a length/width to the opposite center of the length/width, then dropping or hitting the string on the floor/wall so it leaves a line of chalk). Do this so there is one line from the center of the length to the opposite center of the length and one from the center of the width to the opposite length of the width so you have equal quadrants. Where the two lines meet is the very center of the room.
2. To get ready for laying the tile, take off all baseboard along the floor. Makre sure that the entire surface is as smooth as possible. You'll probably need to use floor leveling compound (available at hardware stores) to float out any devits, holes or differences in surface heights; otherwise the tile will crack.
3. Begin laying tile in a dry run (without adhesive) to see how the tiles fit along the line you created with the chalk using spacers between each tile. You can purchase plastic spacers at just about any hardware or home improvement store or you can use any other object as long as the space created is the same for between each tile. Start from the center point and work your way out, keeping to the chalk lines so the tile is laid out straight.
You may need to drill holes into tile to fit over radiator or bath pipes and other obstacles. Draining the pipes may be necessary. You can use a diamond holesaw to drill perfect holes.
4. On the floor's surface, start spreading the adhesive with the notched trowel from the center point. Work in one quadrant first, applying small sections at a time. Spread the adhesive evenly with the notched edge and use a raking motion so grooves are not too deep or too shallow.
Set the first tile in the adhesive, not twisting it in but merely setting it down and pressing it softly but firmly. Set the tile spacer and continue adding tiles... add a spacer for each tile but remove them when a quadrant is done so it won't dry in the adhesive.
Make sure the tiles are even with a level. You can use a rubber mallet or hammer and wood block to tap tiles down. Also you can add more adhesive underneath. Let the tiles set overnight.
5. Mix the grout according to directions on the bag, then apply at a 45-degree angle with the rubber float to work grout into the spaces between the tiles. Don't do it too fast or the tiles might end up uneven. You may want to use caulk to get in the spaces at joints of wall and/or floor interfaces. Use a big sponge to wipe extra grout off the tops of the tiles as you go. Definitely get it soon before it dries. Let the grout and/or caulk set at least a week.
7. Go over the floor again with a damp sponge or sponge mop to clean over any remaining residue. You may want to use a silicone sealant to finish the job.
And there you have it :D
Scoring Tile With A Single Rail Ceramic Tile Cutter
You may need to cut tile, especially if you decide to lay tile out diagonally; when the tiles meet walls and/or floors pieces will have to be cut.
Try practicing a few times with scrap tile before cutting the actual tiles. Straight ceramic tile cutters are made to score (scratch the surface of) fired clay ceramic tiles with a thin porcelain coating (glaze) on their surface. Stone, fully vitrified porcelain tiles and some types of unglazed clay tiles may not cut properly with this type of cutter; in these cases you'll need a wet saw for tiles to make these types of cuts.
First mark where you want to cut the tile. Align the marked tile with the arrow on the tile cutter. Place the guide into position and tighten it so it holds tile in place. You can keep the guide in place if you need to make many cuts of the same size.
Hold the handle firmly and place the scoring wheel on the outermost edge of the tile. Push down a little and pull the handle toward you until the entire length of the tile has been scored. In other words, the ceramic tile should have an unbroken scratch from one edge to the other.
Now pull the handle forward to the top edge of tile and press down on the handle. The tile should break along the score.
Additional information and sources
- 10 Tile Mistakes, What Not to Do to Your Tile
Tile surfaces can bring interest and value to your home. A lot of the time, they get a bad wrap as far as how easy they are to maintain. There are a lot of mistakes that people make when cleaning their tile surfaces. Here are 10 you don't want to mak - How to lay tile at DoItYourself.com
This is the perfect site for instructions on laying tile in the home. There are step-by-step directions with accompanying pictures as well as a checklist and tips for care when the project is done. - How to Lay a Ceramic or Porcelain Tile Floor
This article from WikiHow is another handy how-to page but with more written detail and fewer pictures. There are also additional notes and tips as well as links to other flooring instructions. - Installing floor tile
As would be expected from a Lowes Web page, this is extremely detailed and includes step-by-step directions as well as pictures and images (ground-level and aerial, photos and illustrations) to help you out. You’ll learn to lay tile and prepare it as - Your Guide to Ceramic Tile Design and Installation
This nifty site is all about ceramic tile. It tells you how to prepare and lay the tile as well as how to design the tile and information on floor warming, a state-of-the-art system for warming those cold things. - The Tile Shop: Welcome!
This is a good place to start looking for tile. The site features stone and other tiles for floors and walls, fusion systems, tools and other supplies as well as a gallery of styles for different rooms. - Tile - Wikipedia, the free encyclopedia
This page actually has a lot of information on tile, including its history, different kinds of tile (including decorative tile), the mathematics of tile and other links to sites on tile, especially those of other cultures. - Best Tile
This is a good site for the import tile company with information on selecting, buying, designing, installing and maintaining tile. There is also a square-foot calculator and information on buying tile from them. - Cool Tiles
Cool Tiles has a selection of interesting tile like mosaic tile, metal accent tile and stone tile from companies around the world. There is also a gallery, a Favorites section and information on hardware and décor to accompany the tile.


")

