Magimix 1.1 Ice Cream Maker Review


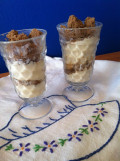
Home Made Ice Cream
I absolutely adore ice cream, but there is something in shop bought tubs which don’t agree with my 10 year old son. The artificial colours or flavourings make him hyperactive. I don’t like him to miss out, so I recently requested an ice cream maker as a wedding present.
I received the Magimix 1.1 Le Glacier Ice Cream Maker and so far I have made 5 different recipes.


Instruction Manual
The Magimix 1.1 is quite simple to put together. It comes with a heavy bowl with liquid inside the casing, a lid with the plug (motor unit) and a plastic paddle which stirs the ice cream mixture.
The bowl is a white plastic on the outside and metallic on the inside.
As I had never used an ice cream maker before, I was actually surprised at how small it is! I was expecting to make up tubs in bulk to store in my freezer. Instead you can only make about 1 ½ pints of liquid in the machine.
It also comes with a booklet with instructions and some handy recipes for ice cream and sorbet.


Setting up the Ice Cream Maker
If you want to get started straight away and make your ice cream, you’ll be disappointed. The bowl needs to go in the freezer for at least 12 hours so that the liquid freezes. This is how the ice cream is made.
It needs to be stored upright in the freezer, otherwise the liquid won’t freeze evenly inside and will affect how the ice cream sets.
The booklet suggests that you always keep your bowl in the freezer so that it’s always ready when you want to make ice cream. As soon as I have made my ice cream I wash out the bowl and put it back in the freezer.
A helpful hint would be to ensure the bowl is fully dried. The second time I used it I couldn't fit the lid onto it because the grooves were frozen!
Making the Ice Cream
The ice cream mixture needs to be made up and put in a jug. Once the lid is on the Magimix, you turn it on at the mains for the paddle to turn round. The mixture is then poured though quite a small opening (so use a jug to pour it!) and let it churn for 20 – 25 minutes.
I tried out 4 of the recipes in the booklet and a recipe of my own. They all had slightly different results.
Some are ‘custard’ based and some just with milk and cream.
For custard based ice cream, you must heat up milk and add egg yolks and sugar. You then have to let it cool right down before adding it to the maker to be churned.
I made the Rum and Raisin recipe, which also meant soaking raisins in rum for several hours. So along with the time spent freezing the bowl, soaking the raisins and making the custard then letting it cool, thinking it only takes 20 minutes to make the ice cream is a slight misconception.
However, after pouring the Rum and Raisin ice cream mixture into the bowl, it began to freeze after 5 – 10 minutes. I allowed it to churn for 25 minutes, after which I was left with a thick and creamy ice cream.
The ice cream was very soft, so it did need a further hour or so in the freezer, but I was happy with it.
I also made a golden syrup ice cream, which is not featured in the booklet. The recipe was fine, but it didn’t freeze very successfully in the magimix 1.1.
There could have been a number of reasons for this:
- I made too much liquid to go in the machine for it to freeze
- The bowl wasn’t left in the freezer long enough
- When making the custard, I didn’t heat it long enough to thicken up
I also made the milk chocolate ice cream which didn’t have a custard base. This didn’t freeze at all, so I had to put it in the freezer.
This could have happened because I made it straight after the rum and raisin (so the bowl may have defrosted a bit) or again, there was too much liquid.
Even after freezing in the freezer, this recipe contained a lot of ice crystals.


Vanilla Ice Cream Recipe
The custard based vanilla ice cream recipe from the booklet was a very nice ice cream.
Ingredients:
- 4 egg yolks
- 100g caster sugar
- 300ml milk
- 300ml double cream
- 2 teaspoons vanilla essence
Method:
- Pour the milk into a saucepan and bring to the boil slowly. Beat the egg yolks and sugar in a bowl, then pour over the milk whilst still beating.
- Return to the heat, stirring continuously until the mixture makes a film over the back of a wooden spoon.
- Do not allow it to boil, otherwise it may curdle.
- Remove from the heat, and allow to cool completely.
- Stir in the cream and vanilla essence and add to the ice cream maker.
Again, this needed to firm up in the freezer. The ice cream was very rich with all the cream but was the best so far.
There is a selection of children’s ice cream at the back of the booklet and I made the vanilla ice cream with condensed milk.
Even my son found it incredibly sweet!
I haven’t yet tried to make sorbet but I’m guessing it may also need to harden up in the freezer, unless you want a slush puppy.

Tips on Using the Magimix 1.1
- Ensure the bowl is kept in the freezer so it is ready to use.
- Use the bowl to store ice cubes if you are having a party.
- If the ice cream freezes to the side of the bowl in use, stop the motor and scrape with a plastic spatula.
- Do not use more mixture than it states, or overfill the bowl.
- Always make sure the mixture is cold when it goes in the ice cream maker.
My Verdict
I love the recipes which come with it. You can make sauces as well to go on top of your ice cream.
The ice cream maker is really easy to set up and small enough to store.
It isn’t too noisy and the freezing process is quick, although to harden up your ice cream it may take a couple of extra hours in the freezer.
The ice cream it makes is lovely, soft Italian tasting ice cream.
It is less off putting to make ice cream in the ice cream maker than it would be to make it in the freezer (where it needs to be stirred every hour or so).
It makes less ice cream than I would have liked, but it is okay for my small family.
You can vary the recipes if you find them a bit rich and try other recipes too.
Rating
Conclusion
Because you need to harden up the ice cream after you make it in the machine, I rate the Magimix 1.1 Ice Cream maker 3/5.


")