Porch Renovation DIY Project

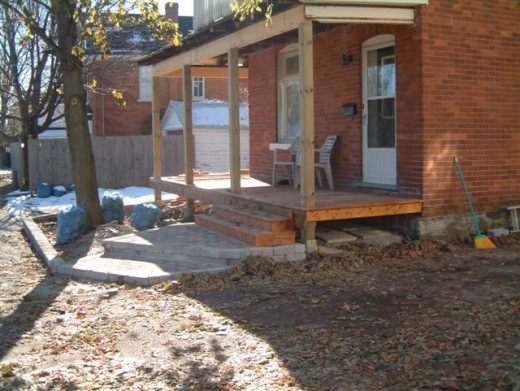
Before the Renovation

After the Renovation


The Million Dollar Porch
Renovating around our house for any large do it yourself projects are sometimes a difficult task. My husband has been in the building business for thirty years now and is the son of a builder, so he started fairly young. The problem with getting him to do anything around the home is like pulling teeth. It is like when you are a mechanic you hate coming home to work on your own vehicles.
The biggest project that we did to our home was started about nine years ago. It took three years to complete, as my husband is a workaholic, and most days he was at work and had little time to spend on our porch renovation.
Renovating our wrap around porch was a big job, but five of us all pitched in and even had help from my mother in law when it came to landscaping around the porch, and the staining of the wood. We also had lots of help from my sons’ friends when it came to demolishing the old porch. Kids just love to swing those sledgehammers.
Drawing and Submitting Plans When Renovating
The first thing that Al my husband did was to draw a plan of how the porch would look once it was finished. This had to be submitted to the building department when applying for a work permit. Once that was all done we sat down and figured out our materials such as wood, pickets, nails, deck screws, posts, lighting fixtures, paint and stain, tools that we may need to purchase and the costs that were involved. There were also bricks, stone, and sod to be considered for finishing once the porch was completed.
Budgeting Tip
Whenever doing a project I suggest that you always build in a slush fund and overestimate what the job is going to actually cost you. You just never know when a tool may break or you happen to cut a piece of wood incorrectly, and have to go out and make additional purchases.
Following Building Code
Because we were changing the porch itself we had to put in pickets as the building code had changed since the first porch was originally built. That was okay, as we wanted pickets. The second story portion of the porch was also renovated with a new floor, posts, and pickets.
Concrete Removal
Remembering back one of the most frustrating parts of this job was the removal of the front steps and the walkway from the sidewalk to the steps. We rented a jackhammer and much to our surprise the steps were solid concrete. I think this took about two solid days to remove with everyone taking turns. Should have rented a larger jackhammer. Live and learn.
Garbage Removal
One of my jobs was to load the van with the debris and do the dump runs. I cannot recall how many trips I took to the dump but I am sure it was way over thirty. A large garbage bin may have come in handy but we thought that we could save money by doing removing all the construction garbage ourselves.
Other Tidbits to the Renovation
Holes for the posts had to be dug and tubes had to be put into the ground and filled with concrete for the posts to sit in.
Underneath the porch floor, we had to put the stone in for proper drainage.
All the pickets were rough sanded, primed and painted by me. We set up a spot that was tented off in our backyard. In this area, we stood the pickets up leaning against benches. I used a paint gun to prime and paint all the pickets. This worked out really well and I recommend a paint sprayer for time savings and for saving your back.
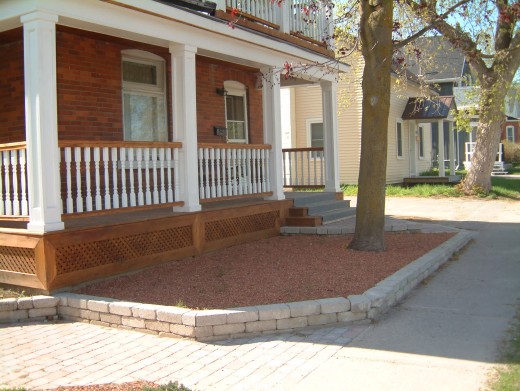
Handrails, Posts, Porch Ceiling, Pot lights and more
It is a good thing that we removed the old round posts as we found a few of them were rotted and eaten by ants. My husband handmade all the handrails and designed the posts. This did take quite a bit of time to do but he knew what he wanted, and I think they came out quite nice.
Through various stages, we had to have a building inspector come and make sure that everything was being done to code. Usually, it was the same guy that would come by each time and he was always pleased with how the job was coming along.
You cannot see from the pictures, but the ceiling of the porch is cedar and has pot lights all the way around. We also installed a dimmer switch on the lights.
Even though this renovation did take three years to complete we are very happy with the results. I remember while working outside we would have people slow down in their vehicles and yell out comments to us. It was pretty entertaining and would break up the monotony.
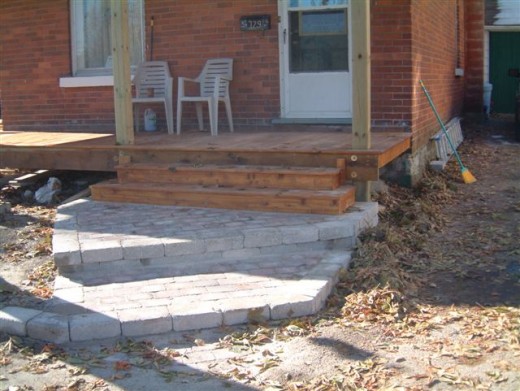
Stonework
Putting in the stone pathway, the stone steps leading up to the porch and the retaining wall, was a cold job as this part was done in late October. We had a wet saw set up in the drive to cut all the stones for the retaining wall. I remember at one point my sons coming inside to run their hands under warm water as they were freezing. We all survived the cold and finished the stonework.
Million Dollars ... really?
The reason that I call this the million-dollar porch is it did cost quite a large sum of money to complete. I have no idea exactly because I have never added up all the receipts. I think it would probably make me sick if I did.
Once again this summer we will need to stain the deck, paint the posts and pickets and the roof needs shingles. Oh, joy Oh fun!
Hope that you enjoyed my Million Dollar Porch hub.
© 2011 Susan Zutautas


