Nail Art Designs:Create Your Own


Nail Art
I like nail art! Evidently, I’m not alone. Since manicures and pedicures have become so popular, nail art was sure to follow. I don’t use it so much on my fingernails, but I use it often on my toes. I often wear sandals, flip-flops, and open-toed shoes, so my toenail art is often visible. My granddaughters, on the other hand, like art on their fingernails and on their toenails. I’m over fifty, though, so for me, a little goes a long way. While I usually prefer simple embellishments on my nails, some people prefer more complicated nail art designs, and some of these can be really elaborate. I can’t imagine how long it must take to create some of those designs! I’ve actually seen some that were like mini portraits. If I had something like that on my fingernails, I’d be afraid to use my hands!
Nail Art Designs
Nail art designs are limited only by your imagination. Even if you don’t have much artistic ability, you can create attractive fingernails and toenails with decals, stickers, simple patterns, and stencils. Some popular nail art deigns include rainbows, zebra stripes, leopard spots, polka-dots, and flowers. Freestyle patterns like whorls and marbleizing are fairly easy to accomplish with a little practice. And believe me – practice is important!
Before you actually start applying art to your nails, decide exactly what you want. You might want to draw the design on paper first, using a pencil. Once you’ve decided on the design and colors you want to use, purchase your materials. Next, use the actual polishes or paint on paper before applying them to your nails. This will give you a “feel” of the brushes or pens, and it will provide you with practice.
Nail Art Ideas
Nail Art Ideas
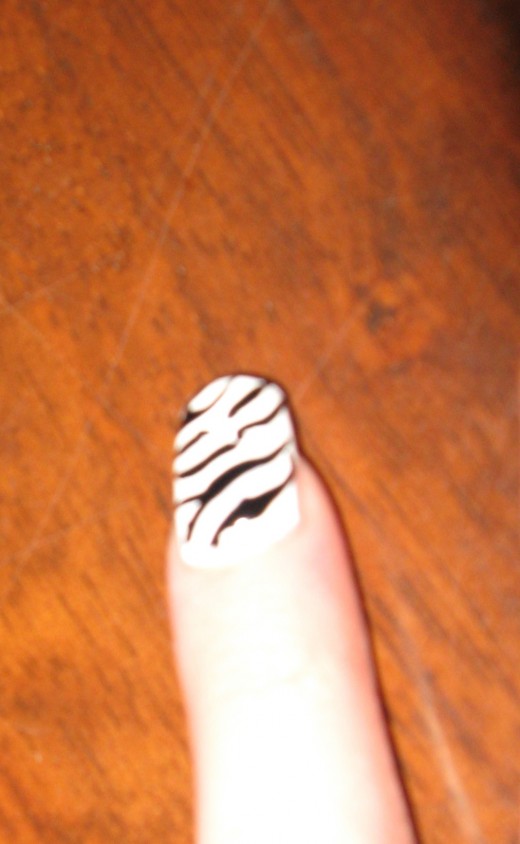
Zebra stripes – Paint your nails with two coats of opaque white polish. If the paint isn’t perfectly white, you might need a third coat. Use black polish, a black paint pen, or a black nail art pen to create the stripes. You don’t want the stripes to be too uniform. Use a mixture of short stripes and longer stripes. For best results, look at a photo of a real zebra to observe actual zebra stripes.
Polka-dots – Polka-dots done in a regular pattern usually look better than those placed randomly. Create a horizontal line of dots across your nail: . . . . .
Make the dots on the next line centered between the dots on the previous line, and continue this pattern:

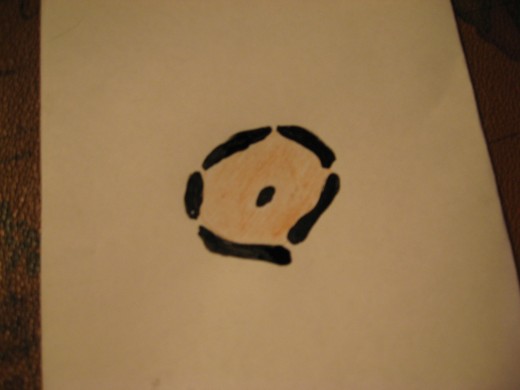
Leopard spots – For a leopard spot nail design, you’ll need a base coat of yellow or light tan, along with a light brown and a black pen for the spots. Leopard spots are basically irregular shapes with a single black spot in the middle. Around the edges of the big spot are oblong black spots:
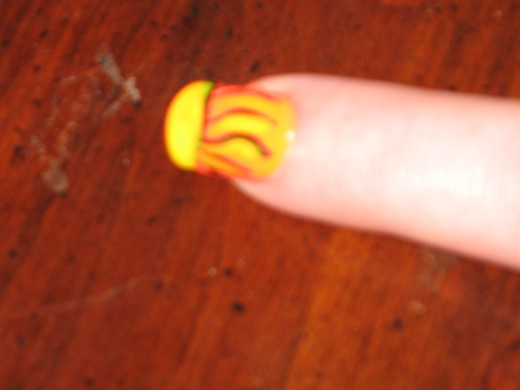
Sunburst – Use orange and/or yellow polish, paint pens, or nail art pens. Make a tiny dot for the center of the sun. Create straight or wavy rays in orange and/or red. Place a small drop of glue in the center, and affix a small rhinestone.
Flower – A flower can be easily made with paint or with rhinestones, or you can use both. You’ll find that with most acrylic paint pens, they’ll form a perfect dot when pressed the right way, so just practice first on some paper before applying the paint to your nails.
Palm tree – For this, you’ll need green and brown polish, paint pens, or nail art pens. Use the brown to make the trunk of the tree, then use the green to make five or six fronds. While the green paint is still wet, drag some of it from one side of each frond to create some individual leaves. I use a toothpick for the dragging. If you like, place two or three round dots on the tree for coconuts.
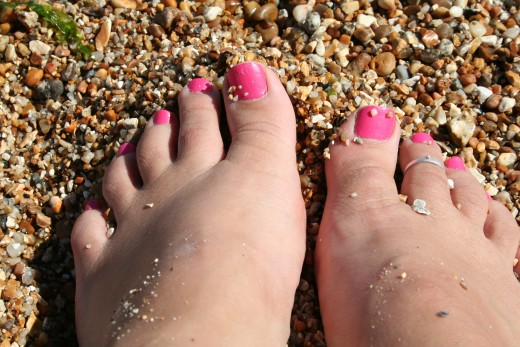
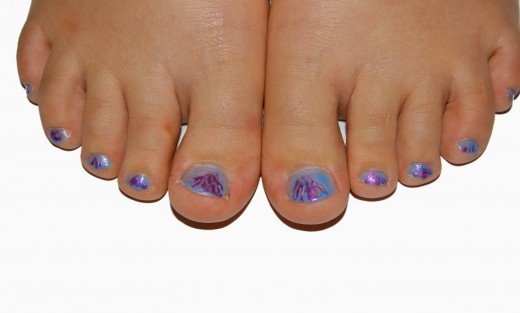
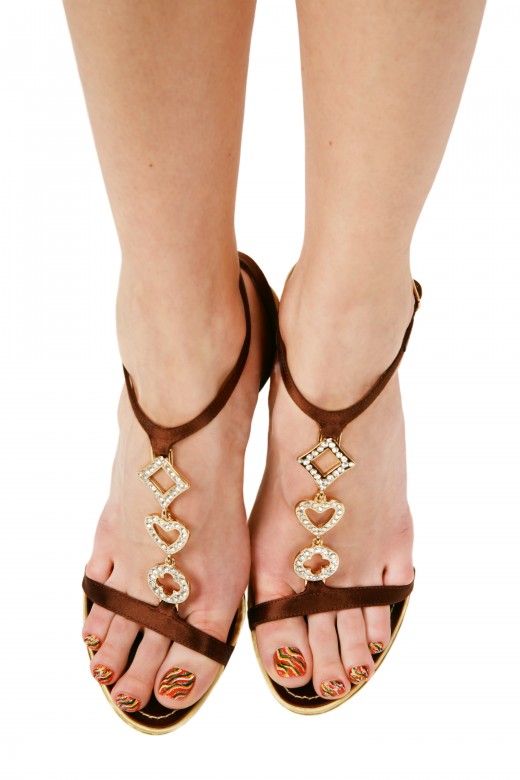
Toe Nail Art
Toe nail art includes even more choices because toenails are wider than fingernails. Many girls and women enjoy having their feet look nice in sandal weather, when their tootsies are “on display,” and toe nail art is one way to add some pizzazz to your feet. Before creating any artwork on your toenails, it’s best to get a pedicure first. Your toenails should be clean, neatly trimmed, and nicely shaped. Once all that’s accomplished, you can start creating your toe nail art.
Start with a good base coat of color – you’ll probably need two coats. Dry each coat completely before applying another. When both coats are dry, create your desired design. If you’re going to use a rhinestone as the center of your design, add it last – after the design paint has dried. After the glue and painted design have dried, apply clear acrylic polish. It’s best to use two coats of the protective polish on your toes because they might have to endure more “wear and tear” than your fingernails do.

Nail Art Supplies – Nail Art Tools
Some nail art supplies and nail art tools you’ll find useful include different colors of polish, wooden toothpicks, a tiny paintbrush, and paint pens. If you want glitter designs, you’ll need glitter polish or glitter acrylic paint. From my experience, the brushes that are included in most bottles of nail polish are too large to create detailed, intricate nail art designs. Instead, I take an artist’s brush – the smallest one I can find – and pull all but a few hairs out of the end of the paint brush. If you decide to do this, just make sure the remaining hairs are close together. Also, toothpicks with fine points can often be used as nail art tools instead of brushes for creating nail designs.
Other nail art supplies you might need are rhinestones. These can add a lot of “bling” to your nail art designs, especially if you use genuine Swarovski stones. E6000 glue is great to use for this purpose. To use the glue, stick the tip of a toothpick in the E6000 and place it on the nail where you want the stone affixed. Place the stone and press firmly.
Other nail art tools you might want to try include stamps. This is a good way to go if you want intricate designs, or if you don’t have much drawing ability. As with the other methods of nail art, practice with the stamps on paper first.
Clear nail polish and a blow dryer are other nail art supplies you’ll find helpful. The hair dryer will help your polish and glue dry more quickly, and the clear polish will provide a sealant that protects your nails and their artwork. I like to coat my completed ail art with two coats of clear polish, drying each coat with the blow dryer.
Nail art tools - nail art supplies:


Nail Art Pens
Have you ever tried using nail art pens? Some people swear by them! They’re easier to use than brushes because the nail art pens are easier to control. If you can write with a ballpoint pen or pencil, you can use a nail art pen. Even if you don’t have talent for drawing, you can create simple nail art designs and freeform shapes.
Most nail art pens are similar to acrylic paint pens, only they usually have finer points. There are also special nail art pens that are used specifically for dots and for marbleizing. Some people prefer using pens for nails that are like old-fashioned fountain pens or pens that would typically be used for calligraphy or pen-and-ink art. I strongly suggest trying out a couple of different types of pens on paper until you discover which ones work best for you.
Nail Art Kits
If you don't want to buy everything separately, you can buy nail art kits that have everything you’ll need for creating dazzling nails. The kits differ, but they might include nail art pens, nail polish, a variety of brushes, stamps, decals, nail tips, stencils, and/or gel. Also, some nail art kits include the supplies you’ll need for specific designs, while others include supplies and tools that will allow you to make a wide variety of designs. Below, I’ve included some kits that you might enjoy using.
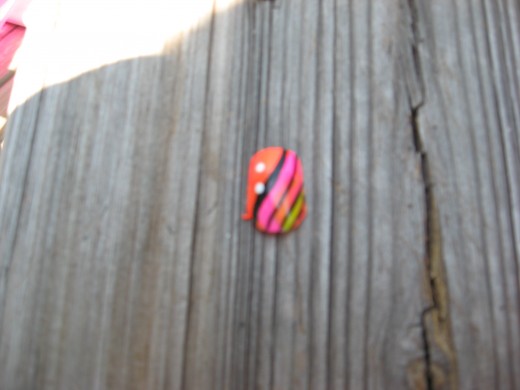
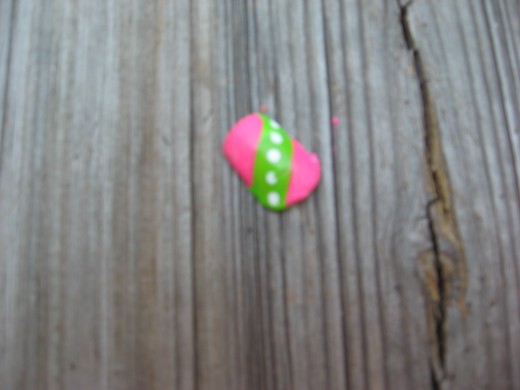
Nail Art Pictures
I’ve included some nail art pictures to hopefully give you some ideas for your creations. I created all but two of these, using one of my daughters as a guinea pig. She didn't mind. I apologize for the less-than-great nail art pictures, but we had a terrible time getting any decent shots. The next time I feel a creative urge, I’ll post some more nail art pictures, and hopefully, they'll be sharper!