Pectus Excavatum Surgery Procedure - The Nuss Surgery Detailed Explanation


Warning Graphic Images
1. The first step will be a course of antibiotics at the time of surgery to prevent infection and reduce the development of pneumonia. This surgery is performed under general anesthesia with a muscle relaxant and epidural block for both operation and pain control purposes.
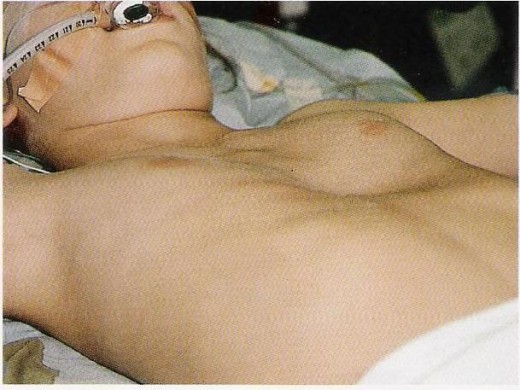
2. The patient is then positioned with both arms extended out sideways to allow better access to chest wall. Padding under the arms will prevent any neurologic injury.
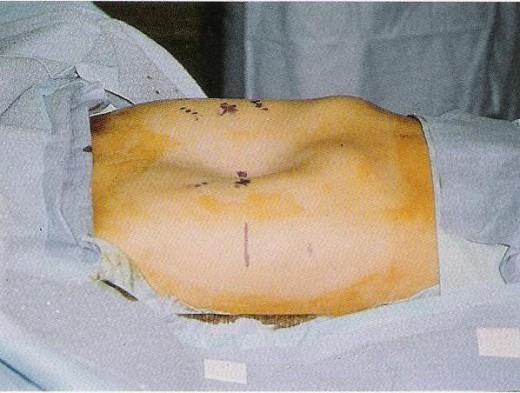
3. The patient is then draped, and the chest is marked and sterilized. The deepest section of the pectus is marked. If the deepest point of the pectus is inferiro to the sternum, then mark the lower end of the sternum. Using this point, establish a horizontal plane across the pectus area. Extend the horizontal plane to the lateral chest wall and mark between the anterior and midaxillary lines for transverse lateral incisions.
4. The preop chest measurements are then double chcked. And the proper bar is then selected for beind into the desired chest wall curvature. A bar will be chosen specifically for your chest that will give you maximum stability and correction.
5. Using the pectus bender, the bar is shaped from the center outward making small gradual bends. It may be necessary to exaggerate the curvature slightly to allow for chest wall pressure downward force on the sternum. Avoid bending the lateral ends of the bar.
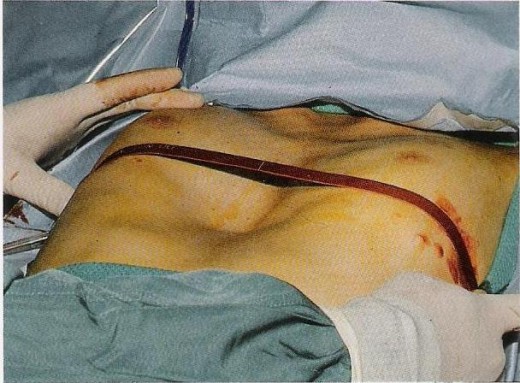
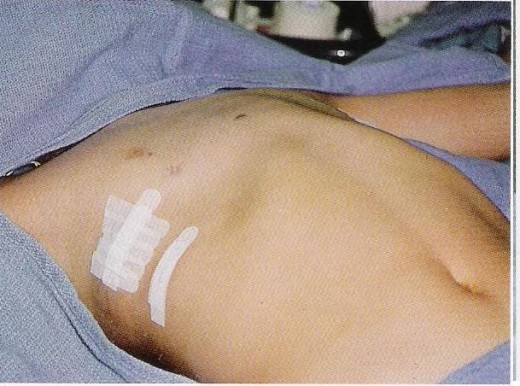
6. 2.5cm incisions are then made at the marks previously made. A skin tunnel is raised from both incisions to the top of the pectus ridge at previously selected space. The pectus bar then enters the chest slightly elevated from the pectus ridge.
7. A thoracoscope is used during the procedure to get an idea of where all the surrounding organs are in order not to damage them. The pectus bar is then entered from the patients right side with the proper pectus introducer in order to make a tunnel for the implant. Small introducers are used for patients 4 to 12 years old and the longer one for patients 13 - 20 or older.
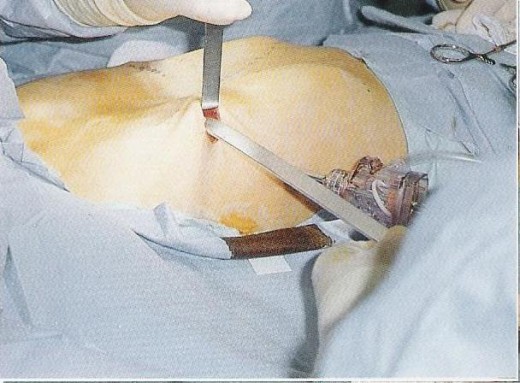
8. The introducer is slowly eased in through the side of chest and pushed through to the other side of the chest. From here the surgeons can begin elevating the sternum.

9. The sternum is then lifted into place from both sides. Pressure is applied above and below the sternum to obtain the desired curvature of the sternum. This process may be repeated a few times in order to stretch the connective tissue and correct the deformity prior to inserting the main bar. Two strangs of umbilical tape are then tied through each end of the hole this will be later used to guide the bar through the hole.
The bar is then inserted and flipped into a position that will push the sternum outwards to the desired position.

10. At this point the stability of the bar is checked. Depending on how stable the bar is it will dicatate if any stabilization need take place. Patients typically require one bar to achieve correction but some may have 2 or 3 for more severe deformities.
A stabalizer bar is then fitted to each end of the pectus bar. Patients 4 to 13 years have one stabilizer per bar , and 14 to 18 years of age have one or two depending on patients muscular development and activity level (sports , gym e,g)
11. The bar and stabilizer are then secured to each other and to the chest wall and the bar and stabilizer are covered up. The incisions are then closed up and a chest radiograph is obtained postop to check for pneumothorax and is an excellent way to see final bar placement.
thanks for reading, hope it helped you understand the procedure more if you need more information I can add it but my next hub shall be about postoperative care and things you need to do after your operation to maintain the benefits from the surgery.
More information on the Pectus Excavatum Surgery can be found at pesurgery.com , a friend started the site to help people decide if the surgery is for them or even if the surgeons will perform the surgery on you.
- Pectus Excavatum Surgery – The Nuss Procedure Benefits
Pectus Excavatum Plastic Surgery – Pectus Excavatum Insert
My other Pectus Excavatum related hubs
- Pectus Excavatum PostOperative Care
This hub will go through the details of post operative care. The things you should do after having the surgery to speed up recovery and to get the full benefit of the pectus excavatum surgery. Patients... - Pectus Excavatum Surgery
Pectus Excavatum Surgery covers the nuss procedure, plastic surgery options, and helps you choose the right surgeon and get insurance cover for your PE surgery - What is Pectus Excavatum
I have pectus excavatum and I'm writing this hub to help people understand what pectus excavatum is, what it involves and my general experience with the chest deformity and its overall effect on daily... - Pectus Excavatum Repair Part 1
This hub is about pectus excavatum repair and I will share some exercises and things you can do to improve the appearance of your chest wall without going for the surgery option. As the surgery can take a... - Pectus List - chest deformity help
PECTUS LIST - Find a Pectus Doctor on our Pectus Doctor Databse - Surgery Nuss Procedure Booklet ,Insurance Pectus Excavatum, tips and help getting insurance cover for pectus carinatum or pectus excavatum, pectus correction exercises, appeals, surger - Pectus Excavatum Surgery Introduction
Pectus excavatum is a chest disorder that effects approximately one in every 1000 people. The deformity is easily recognized by the concave , funnel shaped chest. The sunken sternum can apply pressure on...
Related

Pectus Excavatum: My Tips for Organizing Surgery and Finding an Insurance Cover

What Is Pectus Excavatum? Growing Up With PE, Causes, Surgery, and Exercise

Pectus Excavatum Repair Part 1 - Exercises to Improve Chest Appearance

My Cataract Surgery and How Much Crystalens Cost

Laser Eye Surgery Step-by-Step Guide to the Lasik Procedure


