Insulating Existing Homes the Right Way

Have you ever been in an old barn or house that has been deserted for several years and you walk around checking things out and notice that structurally, everything seems pretty solid? Then you catch yourself thinking, "Wow, they don't build them like this anymore." Well thank goodness for that.
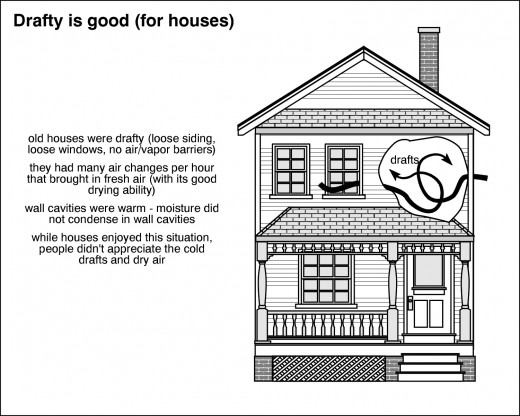
There were many houses built around the turn of the century that are still standing today. Some of them have been keep up well and show their craftsmanship and details that were so carefully laid by builders and laborers. The house in the above picture reminds me of my first home. It was 1350 square feet and had a porch just like the one in the picture. It was a great house. It was just a nightmare to heat and cool. So I spent several months picking at insulation projects and air sealing projects and eventually, got my energy bills down to a reasonable level. But I knew that drastic measures would have to be taken in order reap large savings... which I never did because I sold it.
This is a common battle between homes and home owners. So what energy improvements can you do to an older home that will not cause moisture problems do to tightness?
Dense Pack Cellulose Insulation in the Sidewalls
This method of insulation is performed by removing a piece of siding all the way around a house, drilling 2 inch holes in between the stud cavities, inserting a long tube up the wall and filling the cavity with cellulose insulation. By packing the cellulose insulation into the cavities, you will gain about an R-13 to R-15 if the wall framing members are 2x4 studs. After the cellulose fills the cavities completely, the holes are plugged with wood plugs and the siding nailed back into place. There may be instances where the siding cannot be removed and may need to be drilled through and plugged. This method will make your home much more efficient if there was nothing there to begin with. This costs roughly $1/ square foot.
If there is rock-wool or vermiculite in the cavities, then that material will have to be evacuated prior to insulation. Evacuation costs roughly $1/square foot unless the material contains asbestos in which case the material will be extremely expensive to evacuate and probably unaffordable.
Insulating Box Sills With Closed Cell Polyurethane Spray Foam Insulation
The box sill area (the area between the floor joists around the perimeter of a house) is one of the leakiest areas of a home. These can be air sealed and insulated with closed cell polyurethane spray foam insulation. If you have a block foundation, some of the cores of the blocks are hollow. It is a good practice to fill up as much of that core as possible with spray foam and then insulate the box sill into the block to lock off any heat transfer. Normal box sill insulation costs between $700 and $1,000. There are kits available for do-it-yourselfers for about $400 @ 200 board feet. What ever you do, DO NOT INSULATE BOX SILLS WITH FIBERGLASS!!! This causes moisture and mildew problems.
Insulate Your Attic With Blow-in Cellulose Insulation
This is probably the most common insulation project performed. The cellulose is the best performing insulation type for attics. Pneumatically placing cellulose insulation in attics on top of your existing insulation will greatly increase the efficiency of your attic.
There are a few things you need to do prior to insulation. The first is to look around your attic for any opening from pipes, wires, or lights that will need to be sealed. Seal these with can foam sealant. If you have can lights in the attic, make sure they are UL rated for direct contact with insulation, If they are not, protective covers will have to be assembled. Also, make sure that your bathroom fan vent is vented outside and does not just stop in the attic. It is always a good idea (whether there is soffit venting or not) to install air baffles between the roof rafters to allow ventilation.
Replace Single Pane Windows With Double Pane Windows
Windows are my least favorite energy upgrade because of their short life span. The average window only lasts 7-10 years and that's only if it is installed correctly. First off, you should never buy a window that does not have an ENERGYSTAR logo on it. If it has the logo, that means that the R-value is at least R-2.3 (this is actually good for a window), it has argon gas between the glass, it has a low E coating to reflect UV in the summer, and it has a UL rating of .35. All of these are minimums, but make a good window.
Windows should always be installed by professionals and cost between $250 and $600 per window for double hung vinyl windows. The biggest thing with new windows is not the R-value, but the air sealing.
AIr Recovery Ventilator
If you do multiple air sealing and insulation projects to your home, you may find that the air is stagnant and new odors may develop. This is a sign of lack of fresh air moving through the house. It is a good idea to have an Air Recovery Ventilator installed or ARV. An ARV brings fresh air from outside and distributes it into your home through it's own duct work or your HVAC duct work. At the same time it displaces any overly moist or stagnant air and exhausts it outside. This item must be professionally installed and costs between $500 and $2,500 depending on the size and complexity of the unit. When I say complexity, I am talking about heat exchangers and cooling cools, things of that nature.
Please note that all of the above projects should be performed by professionals. If you are not sure what projects you should do, hire an energy consultant. They will go through your house with you to identify any efficiency upgrades and give you a report to back it up. There may be rebates available for energy efficient upgrades depending on the state you live in.


