Creating a simple, weed-free garden

Planning your low maintenance garden
If you're like me and you don't like to spend hours out in the garden weeding (let's face it, a few hours pulling weeds is enough to give anyone a sore back), then this article is for you.
One of my projects this summer, after many failed attempts at getting my small, city garden under control, was to create a weed-free area by covering all my non-lawn (soil) areas with weed mat, pinning it down, then covering the whole space with grey river stone.
Here are the three simple steps to follow in creating your dream, hassle-free city garden (I'll explain them in more detail below):
1. Clear out your weeds by weeding or weed-spraying;
2. Lay and pin down your weed matting;
3. Put down your river stones/pebbles or other landscaping surface material.
The Master Plan

Step 1: Weeding or weed spraying
Preparing your garden for laying down the weed mat is in many ways the most critical step. If you lay weed mat on top of actively growing weeds without removing or killing off the roots, you're setting yourself up for headaches later on (as I discovered the hard way a few years ago).
Whether you choose to go the 'organic' route (clearing out your garden the old-fashioned way, by elbow grease rather than weed spray) is largely a matter of personal preference and how much energy and help you have. I chose to use a Gypsophate-based all purpose weed spray (G360), manufactured by NZ company NuFarm. It's cheap, and pretty effective for most types of common weed. If you have strong roots (say from rose bushes or other shrubs), you may need something stronger than Gysophate, such as 'Woody Weedkiller' (a Yates product). Woody weedkiller will kill any broadleaf type weeds (it's a selective weedkiller, meaning it won't kill everything), and it's also effective at killing tree roots.
If you're new to weedspraying you might feel a bit freaked out by the whole experience, and wonder if your kids are going to suffer chromosomal damage! Most modern weedkillers available for home gardens aren't strong enough to cause you any real harm, but you will want to avoid breathing in the vapour if you can, or getting the product onto your hands, face, eyes or skin. In order to ensure you keep it off yourself, I recommend using a long sleeved shirt and pants, garden gloves, and a paper painting mask (or dust mask if you want more protection, but it's harder to breathe through these).
Weed spraying equipment
")


Step 2: Purchase and lay your weed matting
Once your garden area has been cleared (per step 1), you now need to purchase two items from your local hardware or garden store. These are:
- One, two or three 20 x 1m rolls of woven black weedmat (depending on the area to be covered -I used 2.5 rolls for my smallish garden area, but it's a good idea to take some rough measurements first so you don't end up buying too much);
- Three or four packs of 20-30 stainless steel, galvanised weed mat pins
- You'll also need to buy a mallet if you don't have one for banging the weed mat pins in.
Other items you'll need for this step are a pair of scissors, and some bricks or other heavy items for weighing your matting down while you pin it.
It's best to lay the weed matting down during a period of calm, fine weather (you don't want rain, wind, or threat of it).
- Get your weed matting out from its plastic. At this stage you don't yet want to cut it. In fact one thing I've learnt from doing this a number of times is that the more you can avoid having to cut the weed mat, the better, because cutting it you end up with uneven pieces, and lots of small pieces pinned together. It's better to have larger pieces overlapping each other.
- If you're lucky enough to have long narrow garden strips like me (see photos), then your 1m wide weed mat is just perfect for this job. Start at one end of your garden strip with the end of the weed mat (don't cut it yet), and pin both ends down with the mallet and weed pins (one pin at each corner, and bang it right down into the soil). Ideally you want about 2-3cm of weed mat to overlap your path or lawn area, if you can manage that.
- Then what you need to do is roll the weed mat down as far as you can go before needing to stop for some obstruction (like a tree, shrub, or the end of the garden area). You can have the weed may going around trees and shrubs -it's more difficult, but simply involves cutting a strip in the weed mat to accommodate the 'obstruction', and then starting again with another piece on the other side.
- As you roll the weed mat down you want to pin it about every 1m, on both sides -but not in the middle.
- Once you get to the end with the roll, you can then cut it off at the end and pin the whole piece down at the end. Then start the same process again.
- When you need to overlap pieces of weed matting, put in a couple of pins where you've overlapped them, otherwise they're likely to blow away in the wind.
- For awkward shaped areas that aren't perfectly 'rectangular' you can cut the weed mat to size and shape, but try to avoid lots of little pieces if you can.
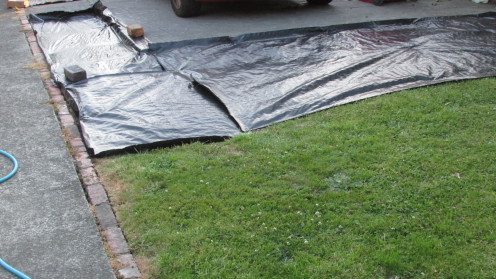
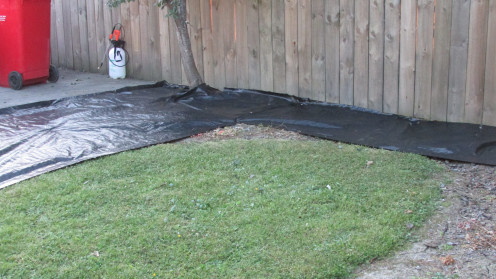
Weed matted areas, pinned down


Gardeners' Poll
Are you an expert gardener?
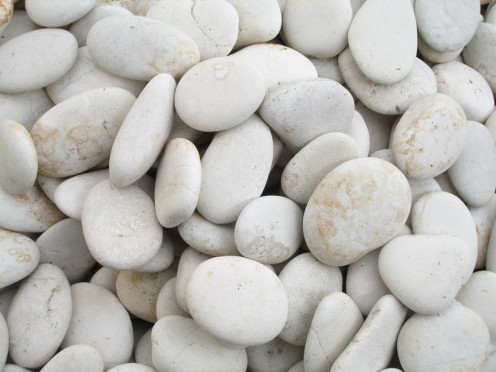
Step 3: Lay down your river stones or other material
For this step you'll need to have bought a large quantity of good quality river stones or pebbles, or other landscaping material. I love riverstones because I live close to a stream, and they seem to somehow fit the profile of my area, but you can use whatever you like the look of in your garden. Other options are:
- Bark nuggets
- Bark chips
- Pea straw (looks nice, but be wary, as it can act as an effective fertilizer and actually promote weed growth)!
- Artificially coloured pebbles (you can buy red or white ones)
Prices for this kind of material will vary according to where in the world you live, I suspect. Here in New Zealand I was able to source 1 cubic metre of river stones (that is two trailer loads, to cover about 30m2 in my garden), for a total of $150.00 including delivery charges. I thought that was pretty reasonable. Don't buy this kind of material in bags unless you only have a very small area, as it's much more expensive that way.
Once the material's been delivered you can simply spread it onto the newly matted area, making sure you cover the area generously (don't be tempted to skimp on the stones or bark, as you'll find some of it will get dispersed over time or blow away anyway).
Getting your material delivered and laid down

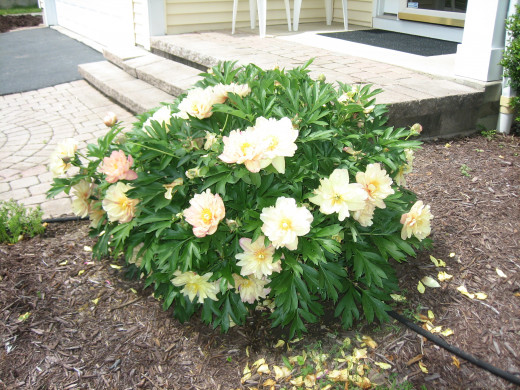
Step 4: Plant some shrubs and enjoy your hard work!
There's really a fourth and final step, and most of us won't want to simply finish with a rock or bark garden!
Even when you've laid down weed mat, you can still plant shrubs in your garden by clearing a patch in the river stone or bark, then cutting into the weed mat with a stanley knife or box cutter (only cut a small area, enough to dig a hole for the plant's roots).
Choose some flowering native shrubs, or even ornamental fruit trees, or non-flowering shrubs with interesting foliage, such as ferns.
Now make yourself a nice coffee, and sit back and enjoy your hassle free, low maintenance, rock garden!


")


