- HubPages»
- Home and Garden»
- Home Decorating»
- Wall Decor & Artworks
How to Hang Album Covers; Album Art to Wall Art

Stevie Ray's "BluesMasterpiece" framed!

Recently I decided to finally undertake hanging some more things up on our recreation room walls. It's kind of our catch all fun type room! There is a sound system, an air hockey table, a bar shuffleboard table, drums, a Peavey 5150 amp, and some guitars. Up until this point I had one wall hanging. A picture of the greatest baseball team ever, "The 1976 Cincinnati Reds autographed by Johnny Bench! Actually considering the greatness of this photo, it would really be enough to captivate anyone who entered the room! However, I thought I would add a few things for non-Reds fans.
I thought of maybe hanging more sports memorabilia, but decided any other sports items would pale in comparison to The Big Red Machine! So I started thinking about what I could do with all the wall space. I am a big music fan so I started thinking along that track. Then it hit me! I had a ton of Classic vinyl albums with some very cool covers! I really don't use them anymore so why not take a few and hang them as decorative wall art! Best of all they were already paid for and sitting in storage!!
If you are younger than me and don't know what a vinyl record album is it's kind of an old-timing compact disk! It was a big black vinyl disk with a continuous groove that contained several music tracks on each side! You would place it on a rubber pad on what was called a "record player". You then set a stylus which was attached to an arm in this continuous groove that contained several tracks of music that the stylus would magically convert to loud rock music!! These albums came in some pretty righteous cover and contained some pretty cool liner notes! Many of these covers are considered to be some pretty high quality artwork!
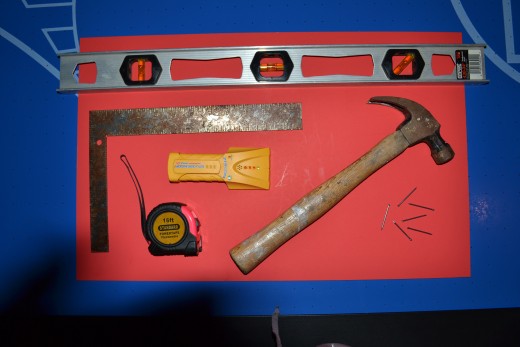
What you will need for this project
Record Album Covers
Frames
Level
Hammer
Nails
Tape Measure
Optional: Stud Finder, square

Let's get started on our project! First, figure out how big of a space you would like to cover. Record albums are roughly 12X12 and you need to account for some spacing in between your hangings. Now, you need some record albums! If you are not lucky enough to have some of your own, go to garage sales, antique stores, or shop Ebay until you find some quality pieces. The selection is really limitless! You can choose a grouping of your favorite band, genre of music, guitar heroes, or whatever you think looks good together! I chose a mix of some classic album art and some of my favorite musicians. You can personalize it however you want, just remember from a decorative and artistic perspective, balance is very important to your visual presentation.

Some Nice Frames


Second, you need to get some frames. Luckily, they make frames specifically for record albums! I would recommend buying the ready made frames since they fit perfectly, and it's very easy to insert the album and be ready for hanging in seconds with no matting etc. There is a pretty nice selection on Amazon and you can find then on Ebay too. Buying them in packages of four helps to bring the price down.
Third, get the rest of the tools you need together. Pretty basic stuff. I included a picture of everything you might need. The stud finder and square are optional. You can also use screws if you would like which would require the appropriate driver.
Fourth, put your albums in the frames. Once in the frames, arrange them on the floor until you get a visually appealing look that makes you happy. Make sure you take into account the size of your wall area here! I had a pretty large space to cover, so I bought a couple frames that would hold two albums. As I said before, keep spacing and balance in mind. Also, you generally want the center focus of your arrangement to be at eye level once it is displayed on the wall. Are you happy with your arrangement? Measure the approximate spacing of the frames on the floor and write it down so you can translate it to the wall. Draw a small diagram of your work with the measurements. This will make hanging easier! Let's move on!
Fifth, Find the center of the wall area you are using. Mark it with a nail around eye level. By eye level I mean the height of an average adult! Whatever you decide that is! Now step back and imagine your arrangement on the wall centered on this point! If you are happy, hang your first piece!
Finally, now that you have your visual center, build outward from there. Hopefully, you took my recommendation and drew a diagram with measurements. Measure once, measure twice. Pound in a few nails and start hanging!
Be creative!! make it your own work of art! I hope you can take this idea and create something that you enjoy as much as the arrangement I created! Have fun and enjoy!


