How to Make A Granite/Marble Counter Top For your Kitchen or Bath For Pennies

Granite/Marble Kitchen Counter Top


Getting Started BEFORE Removing Old Counter Top
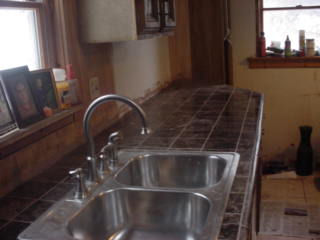
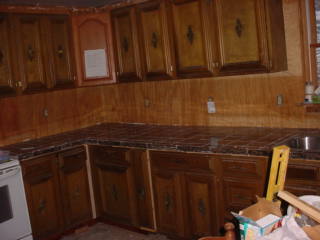
The top here that is shown is 20' 6" Long and 33" wide. I wanted to buy a Granite top and got 3 bids on them. The Cheapest was $4800.00. I Made this top in 27 Hours and spent Less then $1000.00 on it. The First thing that you want to do before anything else is to find the material that you want to use. In order to do that you must figure out how much Material that you are going to need. You need to measure the length and multiply it time’s the width. This gives you the square feet. In this case the pieces of tile were 6” square. I needed 4 pieces to make one square foot of counter top. So if the measurement you measure is 3’6” wide and 10’ long you will need 36 square feet or 144 tile. Always buy extra Tile. You can always return the unused tile,but some times if you don’t buy it all at once then the colors will not match. Also it is nice to have some spare pieces in case something would ever get dropped on top and you need to replace one. This is also one of the advantages of making it this way.
How to Remove The Old Counter Top
Counter tops are usually installed by two different methods. They are screwed in from the bottom and you have to remove the drawers and or reach up under the cabinet to get to the screws. If you pull up on the counter top as you remove the screws it help locate where they are. The other popular way is to use caulking in order to remove the top gently pull up on it and using a knife slowly cut out the old caulking, using a scraper or a knife remove all old caulking around the top of the cabinets. You want to have a level surface when building the new Top.
The sink is usually held in with clamps around the bottom of the sink. It too is sometime caulked in or has a bead of caulking to help make it waterproof. Turn off the water to the sink and remove the old drain lines and water lines, placing all the parts to one side for reuse.
Building The Base of the Counter Top
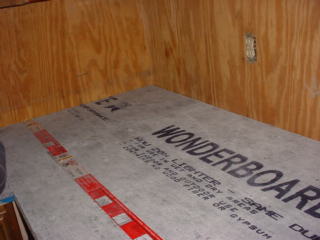
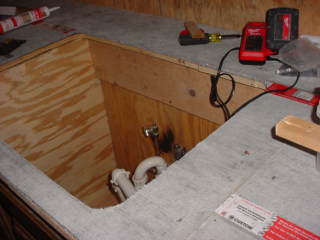
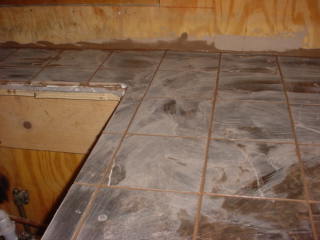
The First thing you want to do is install ¾ inch plywood onto the top of the sink. To know how much you need go back and figure the square Footage that you used to buy the tile. Plywood come in 4 x 8 Sheet which is 32 square foot per piece. Also get the cement board which is ¾ of an inch thick and usually 3’ x 5’ sheets. The plywood goes down first you should install this with screws from under the bottom using the same hole that you used when removing the old top. Make sure that the top is level. If not then shim as necessary. Leave an overhang in the front of the cabinet in this case I made it 1 ¾ inches. Also at this time make sure that the doors and drawers will open without hitting the plywood. Make sure that any screws that you put in do not go thru the top of the plywood. If they do then grind them off or file them flat. When you come to the sink leave a cut out for the sink. The easy way to do this unless you are also replacing the sink is to copy the old cutout with a piece of cardboard or scrap piece of plywood and then center and cut out where it will go. If you are installing a new sink then using the dimension of the sink (most times they have a cutout with the sink). I always dry fit the sink each time to make sure that it will fit. Nothing is worse than a finished project and the sink does not fit. Next install the Cement Board. I use an Electric Saw but wear a mask and eyeglasses. Use Manufactures directions for how many screws. I use 1 every 4 inches and make sure the heads are flush if they stick up then you will have problems installing the tile. Make sure when you are doing this that you don’t let the joint of the plywood and the cement board be in the same place. I always keep at least 12 inches from each seam. If you make the seams on top of each other then it be weak here and possibly crack at a later time. I always screw the cement board in from the top. Make sure that the screws do not go thru the bottom of the plywood. Again check the opening and closing of all drawers and doors. Seal the Cement board at the seams where they join together with mortar mix. This seals the joints.
How to Install Granite/Marble Tile
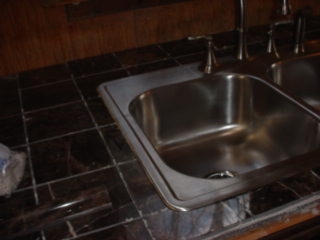
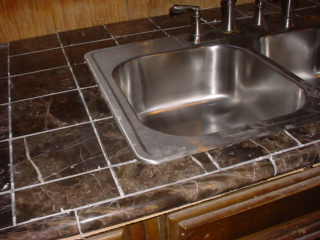
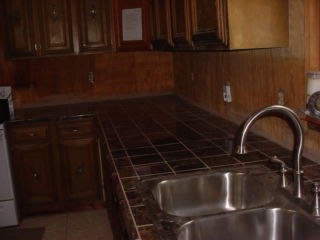
The first thing that you need to do is start at the sink. You need to dry fit all pieces before gluing. I made corner cuts see photo's. I used 1/8” Spacers between the tiles. I also used a Tile Saw with coolant. To cut the pieces. You need to start at the sink dry fitting the pieces to make sure that they are spaced around the sink correctly. I actually dry fitted and cut all pieces on this top before I glued them. If you start at an edge and go out then when you get to the sink it will not look right. If the tiles are evenly spaced around the sink then it will look better. I also make sure the sink fits in and the tile will go around the sink as tight as possible and not showing any gaps. The tile were evenly spaced on both sides of the sink. Continue to dry lay the pieces on the whole counter top using the spacers. Making sure that the seams of the Tile DO NOT line up with the Cement board underneath. If you cannot find a pieces to use for edging then leave the top piece overhang the edge the thickness of the tile plus the glue. If you don’t do this then when you look down on the counter top you will always see the edge. The Pieces I used for the edge I had to cut it for width. I also screwed a piece of wood along the bottom temporally so when I glued the edge it would help keep it from shifting down till the glue dried.
After Dry fitting the entire top Start at the Sink and Mix the Glue which should be Marble and Granite Medium Bed Mortar. I put it into a 5 gallon Bucket and using a mixer fitted onto a drill mix the glue to the manufactures Specification’s. Using a trowel that is recommended by the manufactures apply glue around the sink and glue the tile down using 1/8 spacers. Again checking to make sure that the sink fits in the hole and fits around the tile right. Work out one direction and leave the edging till last, but make sure that the spacing is still correct. I left the sink in the hole to maintain spacing. Use a level to make sure that the tiles are staying flat when laying. If one edge is down while it is still wet you can add a little bit of glue to bring it up to level.
.
Installing Granite/Marble Edges
After screwing strips of wood under the edges start installing them. Making sure they are square. You may need to cut to length with a wet saw. Cut any Angle that needs to be cut to get a good fit where you have corners. See Photos.
Grouting Granite/Marble Tile
Wait one day before starting to grout. Remove Spacers. You have to use a UN SANDED grout. I always like to use darker colors because they are easier to keep clean. Mixing up the Grout using the manufactures instruction. (Again I always us a 5 Gallon bucket with a mixer on an electric drill). Staring at one end push the grout into the space using a rubber squeegee. Let it start to dry. Use a Sponge and warm water to clean the excess off the top. Do small sections of counter top.
.
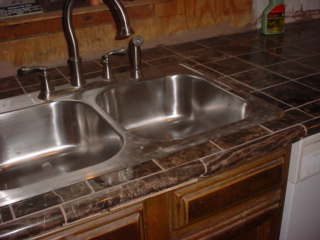
Installing The Kitchen Sink
This sink may not work with the clamps that came with it. So the easiest way to fix that is use tub and tile caulk and put a bead around the sink turn the sink right side up and push in the hole. Put cardboard in the bottom and put a concrete block into the sink to hold it in place let it sit for a day then remove block. Clean off excess glue.


