How to paint a room - Tips and ideas


It feels great to make your home your own by decorating to your taste. To stand back knowing that your have completed it all yourself is a great feeling. The thought of re-decorating your home may seem a little daunting, but with careful planning and following the correct proceedure, you will be amazed at the results you can achieve.
Ceilings;
Cover floor area with drop/dust sheets, if not available use old bed sheets (double up) or plastic sheeting. Apply masking tape to light fittings or even better have removed by a electrictian. Have yourself a decent quality lambswool short hair roller (avoid cheap) and an extension pole which will give a superior finish. Avoid cheap paint because it won't cover very well, this does not mean buy the most expensive, but something in the mid-price range. You wll also need some good quality brushes, again mid price range is fine.
Preparation is very important, so make sure any cracks are racked out to around 2mm in depth and fill with a good quality filler, making sure it's prouder than the ceiling surface. This will allow for any shrinkage in the filler. When it's totally dry sand it back with sanding paper, using a sanding block (block of wood is ideal) until you have a smooth finish. Any cracking to coving/cornice joints should be filled with decorators caulk and wiped clean.
Pour some paint into a smaller pot for ease of use and start by cutting in around the edge of the ceiing (2" - 3") and coving/cornice if you have it, using a smooth and light action. At this stage don't worry about getting paint on the wall, in fact apply about 1" onto the wall from ceiling edge. Now is the time to start rolling, so dip your roller into the tray 2 or 3 times avoiding excessive paint. Apply the paint in slow straight lines with just light pressure - to much pressure and you will get paint splatter. Overlap each new stroke by 4" - 5" making sure you leave no blobs of paint from the rollers edge - if you do, go over lightly with roller, because once it dries it will look terrible. Work in areas of no more than 2 sq meters at any one time and keep your rolling consistant until you have covered the complete ceiling. When completely dry apply a second coat following the above proceedure. Your ceiling is finished.
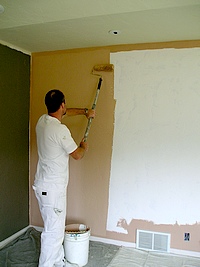
Walls;
The same proceedure regarding preparation is required and can't emphasise this enough, because this will determin the quality finish you can expect. At this stage if you don't feel comfortable cutting in around the window and door frames, apply a low tack masking tape for protection and mistakes. You will also need to mask around light switches, power sockets, skirtings and ceiling or coving/cornice edge. Using a 2" or 3" brush depending on your painting skills, cut in around around all masked areas leaving a band of 3" to 4" of paint using a light and smoth action. Time to start rolling again, so make sure your roller is thoroughly clean. Dip your roller in the tray 2 or 3 times removing any excess, starting from one corner working your way across the wall using a straight and light action. Overlap each new stroke by 4" - 5" making sure you leave no blobs of paint from the rollers edge - if you do, go over lightly with roller, because again once it dries it will look terrible. Work in areas of no more than 2 sq meters at any one time and keep your rolling consistant until you have covered all the walls. When completely dry apply a second coat following the above proceedure. Your walls are now finished. If you are applying a lighter shade of paint to the exisiting colour it would be worth while applying a 'mist' coat - a watered down coat of your new paint or use the white ceiling paint you may have left over. Remove all the masking tape carefully. To save washing your roller and brushes between coats, wrap in a small plastic bag or in cling film/gladwrap and this will prevent them from drying out.
Windows, doors & skirtings/trims;
Taking on these areas will require plenty of patience, because you will feel progress is slow for the area you have to cover. Apply filler to any damaged areas again leaving filler proud to allow for shrinkage, allow to dry and sand to smooth finish - at this stage all areas should be lightly sanded to give a 'key' for when new paint is applied. Thoroughly wash down all areas of grime and dus. Apply decorators caulk to any gaps on joints and wipe to a smooth finish. You will need to apply low (prevents paint from coming off when tape is removed) tack masking tape around door rames, window frames and skirtings/trims to prevent paint on freshly painted walls. Apply a water/acrylic based primer to any spot areas of bare timber. Apply a undercoat to all areas making sure there is no excessive paint left on the surface. When dry apply 2 coats of your top coat paint, making sure the first coat is complety dry before appying the second coat. Remove all masking tape. Apply the paint in a continuous stroke with just light pressure. Taking your time will give you a great finish and something you will be proud of, and save you plenty of money. Make sure you clean your brushes and roller thoroughly... they are a good investment. Always remember preparation is the key.
Please feel free to ask any questions you may have. Good luck.