Learn how to refinish your old worn real hardwood oak floor

Learn how to refinish your old worn real hardwood oak floor
Refinishing that oak floor will be one of the most rewarding home improvement projects homeowners like you and I could ever do. After all, let us be honest with ourselves for just a moment. One of the things we find most appealing about a real hardwood floor, all of those worn old oak floors of yester years, has a natural depth and warmth all the so-called, real wood laminated floor products of today can only wish they had. The best things about this kind of home remodeling project, regardless of weather or not you are a first time homeowner, or looking to retire and down size. You can easily learn how to refinish your old worn real hardwood oak floor and maximize your ROI, return on your investment.
Learn how to refinish your old worn real hardwood oak floor
Before we start refinishing our hardwood floor, we should answer these three simple questions.
1. Do we have a parquet or hardwood plank floor?
2. How thick are the floorboards?
3. How do we want the floor to look after we have refinished it?
Learn how to refinish your old worn real hardwood oak floor
Parquet and plank hardwood floors are both common in homes built in the 50’s, 60’s, and 70’s. They both make for a beautiful floor, to be sure, however they are constructed and installed differently. These differences make all the difference as to how we will go about the refinishing process, and what kind of the tools and materials we will need.
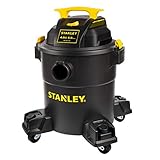
Heavy duty wet dry vacuum
Learn how to refinish your old worn real hardwood oak floor
For those lucky homeowners that have real oak parquet hardwood floors. The thing we need to remember, the wood is only about one quarter of an inch thick to start with. Refinishing parquet floors is really pretty easy as long as we do not want to change the color of the stain. The best we can do, without replacing the hardwood, is to simply put a fresh clear coat of polyurethane to bring back the shine.
Start by sanding them lightly with a Clark orbital floor sander with dust control, using a fine grit sandpaper to smooth the surface and give the new finish a ruff surface to adhere.
Then vacuum the floor, baseboards, windows, walls and heat vents. Wipe everything down with a tack cloth to remove all the dust you possibly can. The room and floor should be hospital operating room “clean”, any dust in the room will get into the wet polyurethane on the floor; dust will cause the finish to dry with bubbles in the finish. Bubbles pop and leave holes in the finish. I think you can see where this is going.
After applying the polyurethane, give the surface time to dry, in the event, your finish has bubbles in it after it dries, lightly sand them out and reapply the polyurethane and let it dry. Then put on a second coat. It is better to put three or four thin coats of poly on the floor than one or two heavy coats. I promise the finish will look a whole lot better after you finish applying four thin coats, opposed to one or two heavy coats and hold up a lot longer in the bargain.
Learn how to refinish your old worn real hardwood oak floor
Refinishing real hardwood plank flooring is a bit different from the parquet flooring, you see, where the parquet flooring is a thin material only one quarter to three eights of and inch thick. Real hardwood toung and groove flooring planks start their life at three quarters of an inch thick.
That obviously means we have more wood to work with in the beginning, with each refinishing we will remove about one eighth of and inch off the floor when we sand the floor.
Wood stains we use to color or tint the wood, soaks into the wood fibers about one eight of an inch below the surface of the wood we see and walk on.
Before we can effectively change the color or tint of the floor, we simply must sand the floor in order to remove all the old stained wood and other finishing material such as varnish, wax and polyurethane from the floor. Therefore, we can start with a clean canvas on which to create our own home improvement masterpiece.
Learn how to refinish your old worn real hardwood oak floor
Over time and all the wear and tear that goes along with it come other floor refinishing challenges, like the floorboards cupping, and crowning. These types of conditions cause the floor to become uneven and a bit uncomfortable to walk on with our sock feet.
As I am sure you have already guessed, sanding all the finish, cupping, and crowning, from a white oak plank floor is a big job, I am not going to lie to you about it. On the other hand, it is easier than you probably think; it just takes time, the right tools and materials.
Learn how to refinish your old worn real hardwood oak floor
Learn how to refinish your old worn real hardwood oak floor
What we will need to sand our red or white oak hardwood plank floor
Drum style hardwood floor sander with dust control.
Sheets, belts, or disk of sandpaper for the different types of floor and edge sanders we will need to get the job done.
Coarse 20, grit sandpaper cuts very aggressively and works much faster when removing layers of built up wax, other floor finishes and any uneven floor boards. Using 20, grit sandpaper will save you time and the expense of using many more sheets of the 36, grit sandpaper that has a tendency to clog up with old floor finishes quicker.
Medium 36, grit paper will quickly sand out any deep sanding marks along with any traces of the old floor finish left behind by the coarse 20, grit sandpaper.
It is important to understand, you do not absolutely have to use a coarse 20, grit paper to start with, especially when the floor is in good condition to start with.
The trade off however, you will use several more sheets of the 36, grit sandpaper, compared to what you would use when using both grits of sandpaper.
The chances of sanding the floor unevenly is a bit less likely to happen when using only the 36, grit. Therefore for the cautious do it yourselves that rather era on the side of caution, please start with the medium 36, grit sandpaper, if it wears out rather quickly go to the more aggressive coarse 20, grit.
Fine 80, grit sandpaper works well on hardwood floors as the final finish sanding, prior to the final clean up. Before we stain or apply, several coats of polyurethane that will make our old worn hardwood floor once again look beautiful and shiny just like a brand new wood floor.
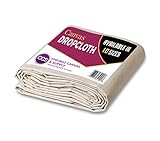
Drop cloth works well to cover windows, keeping wood dust from clinging to them
Learn how to refinish your old worn real hardwood oak floor
Dust control, while we are talking about sanding hardwood floors let us take a couple minutes to discuss dust control. As you know, sanding anything creates dust, sanding a wood floor is no different. Actually sanding a wood floor generates a whole lot of dust.
Drum style floor sanders sands a path about eight inches wide with each pass we make over the floor. That creates lots and lots of fine particle wood dust as you would imagine.
Think of it this way for just a moment; take a five pound bag of cornmeal or general purpose corn flower out of the pantry.
Ok, open the bag, and dump the whole bag of flour on the floor.
Oh, we are not done yet.
Next go out in the garage and get your electric leaf blower, oh yeah, we are really going to turn it on.
Now with a firm grip on the control handle, plug that puppy into the nearest electrical receptacle, and turn that baby on.
Now have your self a good time, blow that pile of flour or corn meal all over the room just like it was confetti and it is a New Years Eve celebration.
Are we having fun yet?
Learn how to refinish your old worn real hardwood oak floor
All right, it is time we took a realistic look at how to control all the dust that comes from sanding a wood floor. The five pound sack of corn meal and flour is really, about how much dust we will have to contend with when we sand an average sized hardwood floor and remove all of the old finish.
It is true the large floor sanders we rent or hire do come with a dust collection bag; however, the dust bag that comes with the sander, simply will not catch all the sawdust, and the more dust that is in the bag, the less effective it is in catching the dust. Which leaves a good amount of the hardwood dust finding its way into every nook and cranny of the room, windows, doors, and heating and air-conditioning vents.
Before we sand our hardwood floor, we should take the time to cover the windows and window treatments, cover the heating and air conditioning vents, and remove or cover our light fixtures to prevent them from collecting dust. Taking these important steps before we start sanding the floor will reduce the amount of clean up time we will spend before we can apply the finish to our hardwood floor.
Tack cloth picks up fine wood dust and makes clean up easy

Learn how to refinish your old worn real hardwood oak floor
Now let us get back to sanding the floor. The drum sander will do a great job sanding the center section of our hardwood floor. However, the drum sander cannot sand all the way against the wall and inside corners. The edges of the floor if you will, there is a special floor sander edger.
The floor edger sander uses the same grit sandpaper as the drum sander, and works great for getting right against where the floor meets the wall, but it will not sand the inside corners. It will get close, say all but the last couple of inches from sanding the whole corner.
To remove the old floor finish from that last couple of inches of the inside corner, use a sharp paint scraper like the ones painters use to remove paint from tight spaces, and scrape the finish off that bit of flooring. Generally, it only takes a couple minutes using a one or two inch wide paint scraper; remember to scrape with the grain of the wood, to avoid damaging the floor.
Learn how to refinish your old worn real hardwood oak floor
Clean up
Cleaning up is critical with any woodwork refinishing project, and refinishing our hardwood floor is no different. Any little bit of dust and debris will create an unsightly blemish in our floors final finish. So what do you say, we give the entire room, floor, walls, ceiling, windows and doors, heat vents and light fixtures, an honest to goodness break out the toothbrush, heavy duty wet dry vacuum and tack cloths type cleaning.
Why you ask, do we need to be so thorough with our cleaning efforts? Any dust in the room will quite simply settle on the wet coat of polyurethane. You see my friends; wood dust particles cannot resist the wet polyurethane. It is that whole opposites attract science class thing. Many of us still do not care to understand. The important thing we must understand here, dust settling in the wet coat of polyurethane will leave a bubble in the floor finish as it dries. A bubble in the finish simply means more work for us. Now I do not know about how you feel about extra sanding steps, but I for one would just like to get the floor finished and enjoy its natural beauty.
Hardwood floor finish applicator

Learn how to refinish your old worn real hardwood oak floor
Applying hardwood floor finish
Staining hardwoods is relatively easy, actually the most difficult part of the whole process, selecting the right color or shade wood stain. The trick is finding a stain color that looks good in the home improvement store, and looks just as good in our home. As you are aware, natural and Fluorescent lighting effects what the pigments in wood stains look like under different lighting conditions.
Stir wood stain, mix and stir the wood stain carefully. Do not, shake the can of wood stain to mix it, use instead a wooden paint stirrer and gently mix the stain. Let me warn you of something, shaking a can of wood stain will create thousands of little bubbles in the stain, and we have talked about bubbles and the problems they cause with a polyurethane finish, remember? Well thousands of tinny tiny bubbles in a wood stain leave a pokey dot look to the finish, is that what you want? I did not think so.
Batch the stain, when we find ourselves needing to use more than one can of stain, to avoid the potential problem of the color of the separate cans of stain being slightly different shades. Batch the cans of stain using a larger container; let us say a five-gallon bucket. Stir the cans of stain independently first, Second pour each of the cans of stain into the larger bucket and stir them together. I know it sounds like a lot of nit picky stuff but I think you will agree we want our wood floor to look great when we are finished.
Applying wood stain to a hardwood floor is a messy job for different reasons. Wood stain is very thin, like dirty water thin. Dirty water splashes rather easily so does stain, and it soaks into every porous material it comes into contact with, the walls, baseboards, fingers, and your favorite pair of tennis shoes as well.
For instance, the last time I had a wood staining project, the custom closet organizer I build for my sons’ room. Much to my surprise the vinyl glove I was wearing had a small hole in it that was leaking. What I believed to be sweat in my glove was not sweat at all; actually, it was the dark cherry Minwax wood stain I was using. My fingers had a dark cherry red tint to them for more than a week.
The fun and artistic job, applying the wood stain to a hardwood floor takes a bit of time to do correctly, but in my view, that is what makes it fun and rewarding.
No paint rollers please, I have tried that method; I absolutely do not want or need bubble problems paint rollers create.
Wipe the wood stain on the floor using a good lint free cloth, like the inexpensive microfiber cloths, or the pricier option of the lamb’s wool applicator, which in my opinion is the best option.
Learn how to refinish your old worn real hardwood oak floor
Take your time and apply the stain keeping with the grain of the wood, which is to say go the same way as the floorboards are running. Be careful not to leave puddles of stain on the floor, which will leave dark spots when the finish dries. Missing spots or a lighter coat of stain will leave light spots in the finish, which amounts to the same thing; the floor finish will look worn. Unless of course, that is the look you are going for, that being the case, by all means go for it.
Refinishing our own red or white oak hardwood floor is a big job, which is why the professionals charge so much money to refinish a floor. We can easily save as much as 60% of what the pros charge by refinishing our hardwood floors ourselves. Simply learn how to refinish your old worn real hardwood oak floor and do it yourself, save money and increase your home improvement ROI.
The author of this publication, Mike Teddleton owns the copyright to Learn how to refinish your old worn real hardwood oak floor . The rights to publish this article in print or online can only be granted by contacting me the author in writing. You may use the intro and link back to the article directing the reader back to my post here at HubPages where they may find the story in its entirety
Links to more useful Home Improvement ideas tips and secrets
- Install a programmable heat thermostat set it and forget it
Of course, you have heard that installing one of the new digital programmable thermostats will keep you and your family cool in summer and warm in winter. All the while, reducing your heating and cooling... - I want to look for a back-up power generator, how many watts do I need
For many of us, the idea of owning our own backup generator simply makes perfect since. Where we find ourselves a bit overwhelmed however, is making that all-important, and I might add seemingly easy choice.... - Homeowners basic household repair tool kit
I believe you will agree with me, the single biggest challenge we homeowners face today, learning how to keep up with all the home repairs and routine maintenance jobs crucial to keeping our homes systems... - Learn how to refinish your old worn real hardwood oak floor
Refinishing oak hardwood floors is a great DIY home improvement project we can do ourselves, save money, and increase our ROI...


