How to Paint a Wall Mural in your Child's Room


Paint your children's bedroom walls with their favorite heroes
Painting a wall mural for your child's bedroom is a wonderful idea and it really is not that difficult. A few months before my second son was born, we had just bought our new house which we had mostly painted and decorated ourselves and I wanted to do something really special for his new bedroom but was rather short of ideas. After looking around a bit, trying to find the perfect color scheme and theme for our nursery, I realised my heart was set on the idea of a storybook themed wall mural. I had always admired and envied handpainted wall murals I sometimes saw in celebrity and designer children's bedrooms but had always believed they were far too ambitious DIY projects and best left to professional decorators. This time however, after having completed a major DIY redecoration project of our new home to our complete satisfaction, I felt more confident and very ready and willing to tackle such a demanding task. I was five months pregnant at the time and I thought that I would have enough time to complete the job before the baby was born and that even if the result looked absolutely terrible, there would still be time to paint over the whole thing and go for something different. However, the results were absolutely amazing!
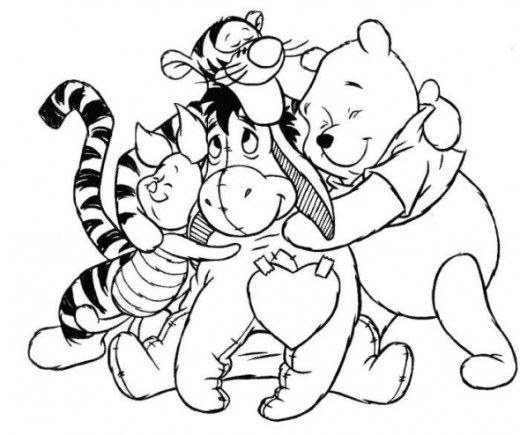
On this page I will show you step by step how I created my Winnie the Pooh wall mural in my son's bedroom and I can assure you that it will be one of the most enjoyable home decorating projects you have ever imagined, as well as an absolutely unique gift for your child to enjoy for many years to come.

You can see part of the finished wall, as well as the lilliputian room owner in his father's arms in the picture. If you like what you see and like the idea of creating a very personalized wall mural for your child on your own, here is how to do it.
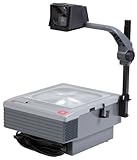
- An overhead projector
- Overhead projector transparency films
- A soft black pencil
- A variety of artist's paintbrushes, from small to wide
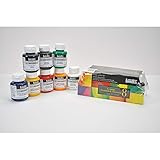
- A set of good quality acrylic craft paints
- A paint roller for walls
- natural sea sponges
- mixing bowls, jars and/or artist palettes
- Latex paint in colors of your choice for large wall areas
- dropcloths to protect the floor of the room you are working in
- a ladder or stepstool for higher wall areas
What do you need to paint a wall mural? - Tools and supplies you will need in order to paint your own wall mural
Here is a list of things you will need in order to paint your wall mural. Some tools and supplies you may have already, especially if you are a crafty or DIY person, other things you may have to buy or rent.
You can buy most of the things you need on Amazon
Most of the tools and supplies you need to paint a wall mural are readily available on Amazon. Check out those I personally use and recommend for this job


Paint your wall mural-Step by Step Guide
Choose your picture
First of all you have to choose the picture you are going to paint on your walls. You can either paint one or two walls of the room or all of them, in which case you will need as many related pictures. You can find these either online, or in picture books you already own. Winnie the Pooh was an old family favorite of ours so we had a large collection of Pooh books to choose from. What I did was choose two pictures of Winnie and his friends for the two larger walls of the room and decided to paint the two narrower walls, one of which had the door opening and the other one a large window, in a plain sky and grass combination, which would also be the background color for the two picture walls.
Once you have chosen your picture or pictures, print them or copy them on overhead transparency films.
Transfer your picture to the wall
Outline your picture with a soft black pencil
Before you transfer the picture to be painted, it is a good idea to inspect the walls of the room you are going to paint. If they are in good condition, smooth and painted in a neutral color, you don't have to do anything more. Otherwise, fill up any holes and cracks, lightly sand them and paint them with a good quality primer.
It is now time to transfer your chosen picture or pictures. Place the transparency with the picture on the overhead projector, turn it on and adjust it so that the picture projected on the wall is positioned and sized exactly as you want it. With a soft black pencil trace around the outlines of the picture. Cartoon characters are quite easy to outline but pay particular attention to their facial expressions as this is one of the most important elements for likeness. Trace all of the outlines in one go, without taking a break (it is not too time consuming), without switching off the projector and most importantly, without shifting it whatsoever.
Start painting!
Now that you have your picture(s) outlined on the wall(s), it is time to start painting.
Start with the large wall areas and paint these with your choice of latex paint and your roller. In my case, the background was green grass and light blue sky so I roughly divided all four walls of the room and painted the lower 1/3 in medium light green and the upper 2/3 in light blue. I then added some detail by painting in some tufts of grass in darker green with acrylic paint and a medium size paintbrush and using a sea sponge and a dab of white acrylic paint to sponge in a few clouds in the sky.
If you don't know how to do this, watch the video further down
Next, start working on the details of your picture. Take a small paintbrush and carefully outline each of the figures, trees and other objects, in black, dark brown or a slightly darker shade of the color you will fill it in with. Now, take a look at your printed colored picture and mix your acrylic paints so as to achieve the desired shade for each character/figure/object in your picture.
Store each mixed color in a small jar for touchups, as it will be nearly impossible to mix the exact color again in the future. Using a medium sized brush fill in all your figures with color. Use a piece of sea sponge to blend the colors, gently wiping some color off or blending in a touch of white for highlights or darkening it a bit for shadows. Once the background colors are dry, use a small paintbrush to carefully touch up details like eyes and facial lines, stripes etc.
Step back often from your mural as you work, to see how your picture is progressing. Don't forget to refer to your printed picture once in a while, in case you want to add more details as you progress.
photo credit: freedigitalpictures
How to sponge paint on walls
This is in my opinion the easiest and best looking technique to paint clouds, tree canopies, grass and add details and texture to your wall murals.
For fluffy looking clouds
Following the technique on the video, wet a natural sea sponge with water and squeeze it so it is damp but not soaking wet. Then lightly dip one side of the sponge in a dab of white paint and lightly touch it to the wall. Repeat this movement, slightly overlapping each touch of the sponge, so as to create the shape of a cloud. Don't try to get it perfect, as clouds never are. Work in light touches, so that the texture of the sponge is visible on the wall and the sky blue background shows through in places.
For trees and grass
Paint the trunks and branches of the trees in brown/dark brown. Dip a sea sponge in light green and sponge paint the tree canopy around the trunk and branches, letting some brown show through at places, like you did for the clouds. Before the color is totally dry, dip the sea sponge in a darker shade of green and touch it here and there on the lighter green, dabbing and blending the colors as you go, creating the effect of depth and clusters of leaves.
For large areas of grass or earth, first paint the wall in a lighter shade o your chosen color (eg. green, or light brown) with a roller or large paint brush. Then dip your sea sponge in a darker shade of green or brown and dab it on the background color, overlapping and blending the colors as you go.

Books to help you create unique wall designs - Top rated books on Amazon to help you create stunning wall murals out of any picture

What do you think about painting a wall mural in your home?
Have you ever painted a wall mural on your own?
Not a DIY person?
Buy what you need for stunning kids wall designs
Do you like the idea of a wall mural for your child but don't feel you want to tackle this task on your own? On Amazon you can find ready made wall murals and lovely wall stickers to give a unique look to your bedroom walls. Choose from your favorite cartoon characters or other popular designs. Click on the pictures to browse through Amazon's huge wall sticker collection


Or decorate with giant decals from Amazon

© 2013 Aquamarine18


