How To Make A Terrarium


Terrariums Made Easy
Making a terrarium is easy and fun and they can be oh, so beautiful. Here discover exactly how to make one; where to get the supplies; and how to display them and keep them growing for years to come.
I guarantee that you'll never look at a jar the same way again. Like the little boy with a hammer where everything looks like a nail, every jar will look like a terrarium to you. And, you will be right because terrariums can be make out of any size, color or shape of jar. They can have lids or they can be open.
Even if you think you don't have a green thumb, you'll be able to make and keep a terrarium growing for years.
Another big plus to having terrariums in your home is closed terrariums are pet proof. My indoor cats eat plants and dig in the pots so I can't have indoor plants. But I CAN have terrariums and I do. All of the ones you see here are in my home. Of course all of mine have lids so my cats can't get to the plants nor the dirt.
Terrariums are miniature Ecosystems
According to Wikipedia: "An ecosystem consists of all the organisms living in a particular area, as well as all the nonliving, physical components of the environment with which the organisms interact, such as air, soil, water, and sunlight."
Antique green jar terrarium

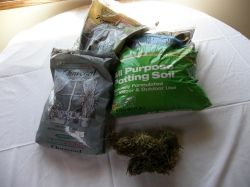
Supply List for Making a Terrarium
Easy to find items for terrariums
Here is a list of the items you'll need to make a terrarium. Many you'll probably already have in your home; others are easily purchased at a local nursery. (The activated charcoal pieces are found at pet stores as well).
You really only need 7 items:
1. Jar
2. Plants
3. Potting soil
4. Activated charcoal pieces
5. Sphagnum Moss (optional)
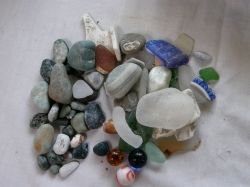
6. Small rocks, glass, marbles
7. Decorations (optional)

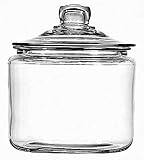
Jars are not all created equal
Jars make the terrarium
Any shape, size or color jar works, although, the more unique they are, the better in my opinion. They will add color but style to any room you put them in. If they are in unique jars, you'll be more likely to look at them and enjoy them.
You'll be proud to show them off and believe me, you'll be hooked on making terrariums -- for yourself or as gifts for family and friends.
Photo: elephant jars found at garage sales

STEP 1: Set up for success
Get your space together
The first thing you want to do is clear off a work area. Your kitchen table works fine. Spread out newspaper to cover the surface and lay out your materials you'll be using.
Have a garbage can standing by and of course a water bottle.
STEP 2: Start the layering process
Rocks, marbles and glass pieces
Now that you are all set up, you begin by putting a layer of small rocks, marbles and glass pieces in the bottom of the jar. You can use a very coarse sand instead but I find the rocks, marbles and glass pieces look prettier.
The amount needed varies per jar size, however, my rule of thumb is approximately 1 to 1-1/2" deep. I usually find what I need in my yard, however, you get buy small bags of tiny rocks, sometimes polished, at a nursery or dollar store.
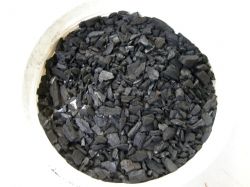
STEP 3: Add the charcoal layer
Charcoal pieces
Sprinkled a thin layer (about 1/8 - 1/4" ) on top of the small rocks. A terrarium with a lid makes it a closed environment. The activated charcoal pieces will filter the air and keep it fresh. If you can't find it at your nursery, check a pet store. It is the same charcoal used in aquarium filters.
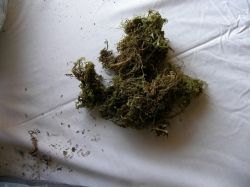
STEP 4: Add a layer of Sphagnum Moss
Sphagnum moss layer
Next spread a layer of moistenedsphagnum moss over the charcoal. Make it about a 1/2" to 1" layer. The moss will prevent the soil -- which you'll be putting on next -- from settling into the rocks below. Water will drain fine.
Some people skip this step but I prefer having this barrier between the soil and the charcoal/rocks.
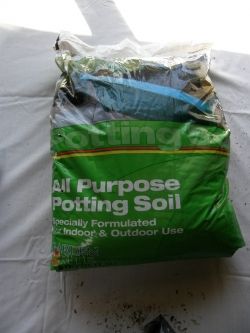
STEP 5: Add the potting soil
Potting soil to feed the plants
Next add potting soil which you can find at any nursery. Again, the amount depends on the size of the jar, but about 3 to 5 inches should work. You want enough to cover the plants roots with a little room to grow.
The total of the rocks, charcoal, sphagnum moss and potting soil should take up about 1/3 of the jar.
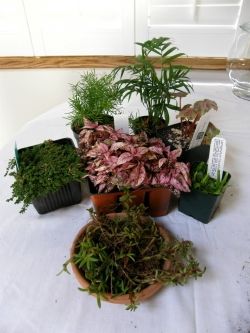
STEP 6: Add plants
Plants are key
Next, add your plants. Set your plants out on the table in different arrangements to see what works best. Keep in mind that the terrarium should be beautiful from all sides. A taller plant could be put in the center and shorter ones surrounding it. Or a taller one in the back and shorter ones in the front.
Keep in mind that you'll probably want to vary the color, size or shape of plants. Tall ones, short ones, ferns, large leaves, green ones and maybe even pink ones. Remember to leave room for a decoration or sculpture if so desired.
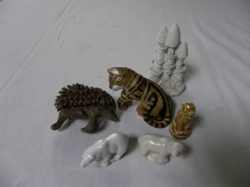
STEP 7: Add decorations
Decorations add a personal touch
Adding decorations, interesting rocks or sculptures can add an a special touch to the terrarium. They can be your focal point and can also be changed by season.
If you are making the terrarium as a gift, it can be personalized for that personal touch.
Some Of My Terrariums


How to care for your terrarium
Easy steps to keep your terrarium growing
The care and upkeep of a terrarium is easy. Just keep these things in mind:
SUN
Keep the terrarium in a well-lit room - bright, natural light. Do not put the terrarium in direct sun light.
WATER
Water sparingly. If the sides of the terrarium mists up, there is enough water. If there are drops rolling down from the mist, you are watering too much. If that is the case, simply open the lid and using a paper towel dry the inside of the glass jar. Better to underwater than water too much. A closed terrarium is a miniature world with it's own bio-system.
You may only have to water once a month or even every 6 months, depending on light, type of plants, size of jar. It's easier than it seems; just keep an eye on it and mark your calendar when you water. When it looks like a plant is drooping a little, mist it or put about a thimble-spoon amount of water on each plant.
PRUNING
If you see rotting leaves, pinch them off. It may be from over-watering.
PESTS / MOLD
IF you see any pests or mold, remove it immediately and clean around the plants and container. If it takes over the terrarium, you'll need to start all over. If you do start over, throw everything away, wash out the jar with soapy water and rinse well, then begin again.
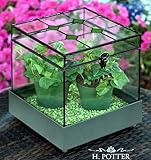
A Carnivious Terrarium

Beautiful Square Terrarium
Unique Jars make the terrarium special

Round jar tarrium

Triangle jar terrarium

Hanging Terrariums - Hand those plants!
What a great way to showcase plants. And, they take up little room. You can hang them instead of having to put them on tables.

Videos on how to make a terrarium
These are some of the best videos I've found on making terrariums.
A bell jar terrarium -- another way to go


Want to link to this lens? Here's how.
WANT TO LINK TO THIS PAGE?
Here's the HTML code to copy and paste:
make-a-terrarium
Copyright
This work is covered by copyright and can not be reprinted
in any matter (physical or digital) without prior written consent.
Copyright 2010 - 2018 Frankie Kangas All rights reserved.


