Shop made wood working edge jointer

Low cost and easily made
I have been in the market for a new edge jointer, after reading a bunch of reviews I realized that most bench top models are under powered and would not be a good investment and a flor standing model wold be over kill for what I do and are out of my price range anyway. I know i can make one myself for way less then a bench top model for way less" I am going to use a harbor freight 3 1/4" hand held power planer and plywood and 2x4's left over from other projects. the total cost of this project for me was just under $50; if i had to buy every thing for it it would still be less then $75, and that's about 1/3rd the retail cost of a similar commercial model that you would get at a "big box" store. I have also decided to share some of the things that I have made and am working on, all of them are meant to be easily made with low cost in mind.
My wood jointer hard at work
My Shop Made Edge Jointer
This first instalment will show my shop made edge jointer; it’s made from a hand held power planer some ¾” MDF, ¼” birch plywood, 2x4’s and some wood glue, screws and washers. I had been using my table saw with a jig for edge joining boards but I don’t have a real good table saw and my hands are not as steady as they used to be so the boards always had some wobble to them and I was afraid I might chop off a finger on smaller boards. Before I got my table saw I used my router table with a jig but it took 2-3 passes and it was time consuming. After I ruined my last table saw jig I had a bunch of boards that needed an edge joint I did not want to make a new jig for the table saw that was going to be inaccurate and dangerous and that was only going to be ruined after a few times of being used. I got to work on my edge jointer I look up some info on them on the internet and saw a few had made a stand for their hand held power planer, one had an alloy infeed and out feed table that was adjustable. Mine is not adjustable but works well and was made from what I had on hand.
How to use a edge jointer
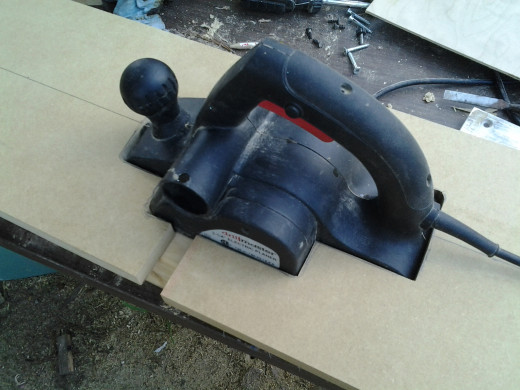
Wood planer with it's boots off
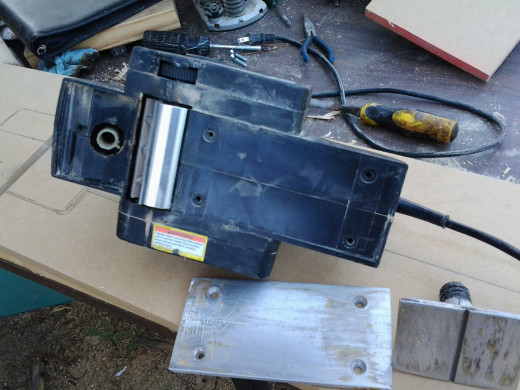
The first thing I did was remove the metal skid plates or "boots" from the planer they are ¼” thick
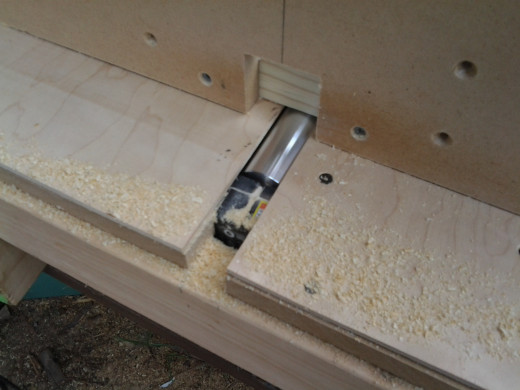
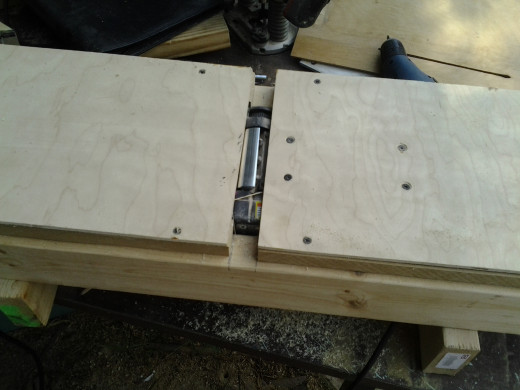
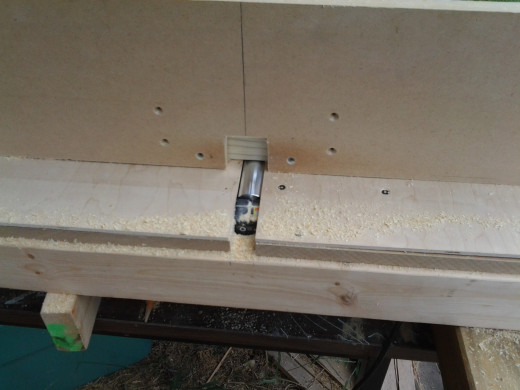
Infeed/outfeed table's
I had a piece of birch plywood the same thickness as the metal skid plates so I will use that in the same way you would use hard plastic or Lexan as a router plate to mount in a router in a table. I marked and drilled the screw holes on the out feed table and mounted the planer to that. the planer is not directly attached to the in feed table.
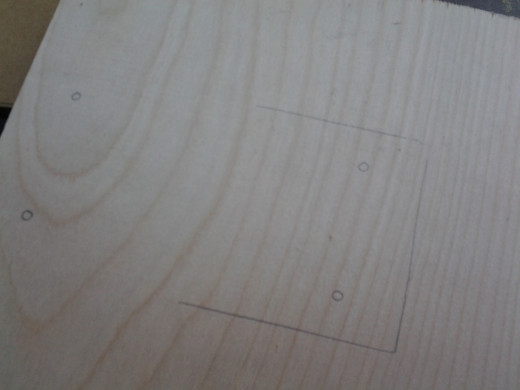
To help support the plywood I used ¾” MDF. I traced out the shape of the planer on the 3/4" MDF and cut it out with a jig saw.
How do you edge join boards
What tool do you use to join boards
Motor mounted in the table
The in feed and out feed tables are offset, that is the in feed table is lower that the out feed table I accomplished this by inserting washers in-between the top of the 2x4 frame and the ¾” MDF out feed table
The fence
the fence is made from a piece of 3/4" MDF and a 2x4 that was planed flat on the bottom on the edge jointer. to keep it flat on the tables of the jointer since they are off set I ran the board only halfway on the last pass.
Improvements I am going to make
After using this for a few weeks I have found a few things that I am going to improve upon, first I am going to make it sorter and narrower it does not need to be 50” long and 10” wide like mine, most of the boards I joint are less than 20” long and 2” wide and the cuter head is only 3 ¼” wide so the 10” width was pointless. I also did not make any means for dust collection so I only use it on my outside workbench as it makes a huge mess in my shop. Also the 2x4 frame/stand is not tall enough for the planers handle so I am going to improve the stand using ¾” thick hardwood plywood. I am also going to improve the fence and add a safety guard to the cutter head.
Major Update
After using this machine for some time i Made the "improvements" I narrowed the base and shortened the tables. narrowing the base made it hard to mount the fence and the machine was also prone to tipping over if it was not clamped down. I also shortened the bed from 50" down to 30" it was far more work to get the boards nice and flat with the shorter tables. also with the narrower frame the dust just shot out all over the place instead of being contained under the machine. the birch plywood I used for the face of the tables dose not stay slick for very long and has to be waxed often. with what i have learned I am going to rebuild the edge jointer, i am going to make it 48" long X 12" wide this is kind of a big foot print for my small shop but it will make the machine safer and easier to use. I am going to use 2x6" instead of 2X4" for the bed support and 3/4" plywood for the frame and that should help make the machine strong and sturdy. I also plan to use Thermally Fused Laminate for the in feed out feed tables and for the face of the fence, it has a good smooth surface that should not need to be waxed. I will update this tutorial as soon as i am done.
Simple, easily modified design
In conclusion I have found that this could be made using many different types of material, first you could use hardwood or plywood for the frame/stand and the infeed/outfeed tables. Plexiglass, MDF or hardwood of the right thickness could be used for the tops of the infeed/outfeed tables. It is also possible to modify the infeed table to make it adjustable you would use the same method as used in a router lift just reversed to raise/lower the table. This is a very simple design that can be easily modified and improved and many different types of materials could be substituted based on what you have on hand.


 Outlet")

