- HubPages»
- Gender and Relationships»
- Weddings & Wedding Planning»
- Invitations for Weddings
How to Write Your Own Wedding Invitations

Introduction
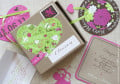
Writing your own wedding invitation is an easy task that you can make look professional. Stationary stores sell wedding invitation kits complete with the invitations, envelopes, response cards and directions for your word processor. Here is how to write your own wedding invitations.
Things You'll Need:
- wedding invitation kit
- addresses of guests
- stamps
- calligraphy pen
- direction information
- computer with a word processor
- printer with colored ink
- address labels
- gift registry cards
Step 1
The first part of a wedding invitation is who is announcing the occasion. If it is the bride and groom planning and paying for the wedding then the first two lines could read:
Jessica Renee and Sean Henry
Cordially Invite You To Attend Their Wedding
Traditionally, the parents of the bride pay for the wedding. If this is the case then the wedding invitation could read:
Mr. and Mrs. Simon Jones
request the honor of your presence
at the marriage of their daughter
Step 2
The next step if one is doing a traditional wedding invitation with the bride's parents making the request, is to state the bride's first and middle name and the groom's first, middle and last name. If the groom has a special title such as doctor or military rank, that can be stated as well. See example below.
Miss Stacy Kelly
to
Captain Joseph Michael Banks
Step 3
Next, state when the wedding will take place. It should be spelled out like the example below.
Saturday, the fourteenth of September
Two Thousand and Two
at six o'clock in the evening
Step 4
Next, state where the wedding will take place and whether or not the reception is at another venue.
Gone With the Wind Mansion
1908 Ivy Lane
Park City, Any State
Reception immediately following at the Grand Ballroom
Step 5
Print the invitation from your printer according to the directions in the wedding invitation kit. Then type a half sheet of paper with directions to the wedding, wedding reception as well as hotel information for any out of town guests to include in the envelope.
Step 6
Next address the envelopes. If you know how to write in calligraphy then, take your time and handwrite the invitations. If you can not but know someone that does, ask them as a wedding present to you to write your wedding invitations in calligraphy. If not, you can print address labels for your guests addresses as well as yours for the return address for the response card envelopes.
Step 7
Last mail the invitations six weeks before the wedding date. This will give guest time to respond before the RSVP date which should be about three weeks before so you can have the necessary guest count for the reception.
Additional Information
- Make sure to use print that is legible for people read.
- Make sure you have enough color ink before printing all of your wedding invitations.
- Be sure to have correct addresses for your guests.
- Proof read before printing all of your wedding invitations. Print one and read over before printing the rest of them. This way you can make sure that the print is ledgible and the color shows up.
- Have gift registry cards to place in the envelope so your guests will know where you are registered.
- Before buying stamps, take a complete invitation in the envelope to the post office to weigh. It will cost more than a regular first class stamp per wedding invitation. Plus the post office has special wedding stamps you can purchase.