Henna/ Bridal Mendhi 101


To the uninitiated henna is a flowering plant called Lawsonia Inermis. The leaves of the plant when bruised start emitting a red brown pigment that stains the palms. Naturally over a period of time people then decided to begin drying out the leaves and grinding it into a fine powder. A number of natural ingredients can be added to the powdered leaves to create a darker hue to the natural dye. Tea, coffee, lemon juice and natural oils like tea tree or eucalyptus all can be combined to bring out the best color that henna has to offer.
Commercial henna may be available readily in shops in pre-formulated products, but if we are talking the real deal the best would be to get natural, organic, raw unbranded henna. You will often hear the words henna and mendhi used interchangeably but rest assured that either phrase boils down to the same thing, the beautiful decorative designs that you want staining your palms and feet.
Powdered Henna

If you are going to make your own mixture here are some of the products and steps that you will need to make a lovely beautiful design.
BASIC HENNA RECIPE
You will need
- Fresh, organic powdered henna.
- A cup of strong black coffee or tea
- Essential oils- Olive Oil and Eucalyptus oil
- Cellophane wrapping to make a henna cone
Step One- Choose fresh, natural henna along with good strong essential oils.

Have your coffee and lemon juice on standby

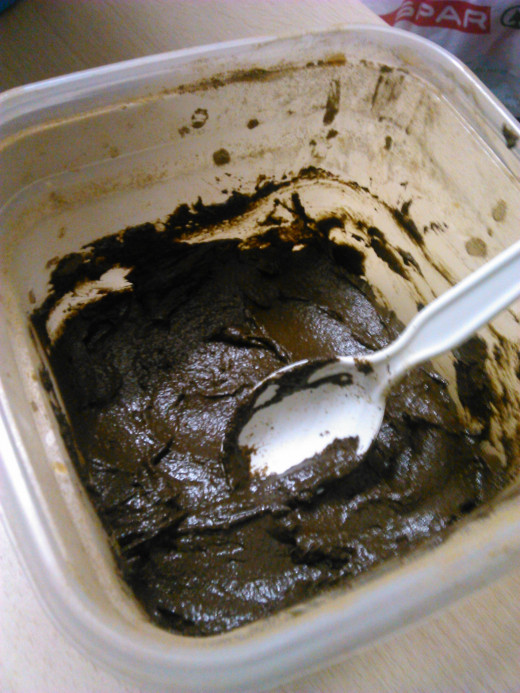
Gradually drop by drop introduce the liquid into the henna paste. You should at first have a paste that becomes as clumpy as mashed potatoes that gradually loosens as put in a few drops at a time of essential oils. It should not be neither runny nor too thick, but be the consistency of a very thick cake or brownie batter.

When you are done making your henna mixture, you can easily make a henna cone out of cellophane. Take a look at the following video that will give you a little more information on the intricacies and details on how to do this.
How to make a henna cone at home
Henna filled into a home-made cellophane cone.

Now that you know a little more about what henna is, how to make it and how to prepare it let’s take a look at the different styles of henna body art there is out there. Decide on a beautiful henna pattern and let the fun begin!
Yes it is easy to think that henna is just another endless loop of twirls and whirls composed and put together on a body surface, but that is exactly where you would be mistaken. For those in the know, deep symbolism and diversity may be found in different styles and patterns.
Moroccan and Arabic Henna


This type of henna is characterized chiefly by geometric design shapes and repetition. The use of flowers and more sinuous design elements is sparing and judicious. The overall patterns rely more on creating design intensive focal points and providing gaps and spaces in the design to create some level of visual relief.
Indian Henna


Indian henna design has a number of elements. Most distinct is the full coverage of surface area when it comes to the design work. There is little relief by way of spacing and the design motifs that stand out most are flowers, spiral shapes, paisley designs and grids. Caricature scenes may also be painted in with little images of the bride or groom along with their names embedded deep in the intricate patterns. The guests at the wedding often have fun looking for the names of the bride and groom within the pattern.
Rewind just a little bit, before we get to the wedding day itself, perhaps the most critical part of a henna design for the artist and for the bride-to-be is the question- will my mendhi/henna be dark? The answer to this one is rather complex and may be answered through a number of different questions and reflections.
Was the paste kept on long enough?
At the mixing stage, was there enough lemon juice, essential oils and black tea/coffee added into the mixing bowl?
Aftercare
There are many different methods, complete with rigmarole of what you are supposed to do from a traditional point of view to get a darker henna stain but here are some sure-fire tips to assist you on achieving the desired result.
- Scrape off the paste once it has dried- do not wash it off.
- Oil the design to lock in heat- Olive oil would be best, but you can still use other oils such as mustard oil, sweet almond oil or sesame oil.
- Use a heat inducing herbal ointment on the design to aid body heat in developing the color.
- Keep the paste moist for as long as possible following application so that it keeps on staining. This can be done by using a mixture of sugar and lemon juice to keep it soft and pliable.
- Put on a pair of socks where possible to retain body heat
- Drink hot drinks like tea, coffee or soup to keep your body temperature up
- Avoid water intensive tasks like washing dishes for at least 48 hours after application of henna
If your henna stain is a light orange at first don’t lose heart, know that henna stains are at their darkest between 24-48 hours after application with the right care. There are new and alternative henna and mendhi types that are coming up frequently but if you go with cones and ingredients that have been carefully selected, fresh and well preserved you shouldn’t go wrong.
Note: Especially if you are buying new henna to make your own mix or simply getting some pre-ordered cones, here are a few simple ways in which you can ascertain whether it is indeed fresh. These tips will help you ensure that you get the best mendhi.
Color: Henna powder or even one that has already been premixed in a cone needs to look a healthy shade of green. Be wary of henna that while in powder or paste format looks brownish black in appearance. This usually means that it has been oxidized and over-exposed to sunlight. Speaking of which…
Refrigerate: Once your henna has been mixed and the necessary ingredients have been added in, you need to stick it in the refrigerator as soon as possible. If you intend to store the henna for use a few weeks after the fact, rather move your henna or mendhi cone to the freezer instead. If kept diligently frozen between usages, your henna should last at least six months before it starts losing potency.
Smell: If you have fresh henna or mendhi in hand you will know it by smell. There is an earthy, almost ‘green’ aroma about it that is unmistakable. If your henna smells a bit musty and lack-lustre better to get rid of it than fooling yourself into thinking that it is going to work and stain well.
Take a look at this stunning video of henna design filmed in time-lapse, complete with drying, darkening and decoration.
Timelapse Video of Henna
The next level: Other expressions of henna
So you’ve done a beautiful henna design, but is there anything that you could do to make it stand out a bit from the crowd? Of course there is!
Gilding and Glitter henna
This can be done either before or after applying on henna paste. A lot of people choose to do theirs with the henna paste on to provide greater contrast between the darkness of the henna and the sparkle of the glitter and the magnificence of the rhinestones. Another level of henna inspired decoration is body painting for brides that is inspired by bridal henna design.
For examples of gilding, glitter henna and bridal henna inspired body paint, check out the pictures below:
Back with glitter henna

Henna Hands with Glitter


