How To Put In U-Tip Fusion Hair Extensions

Materials Needed
1: Pre-bonded Fusion U-Tip extensions (100 1gram pieces should be enough for entire head)
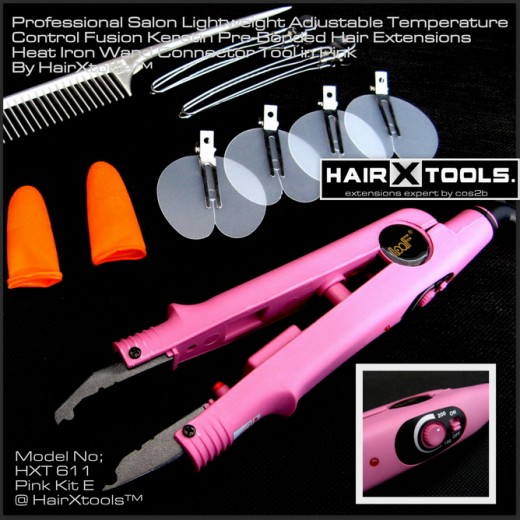
2: Fusion heat wand (much like a flat iron, but only one side gets hot)
3: Fusion hair shield or spacer
4: Hair clips
5: rat tail comb
6: finger shields (optional)
Steps
1: Part the hair so that on each side of the head there is at least 1 inch of hair left out. This ensures that when the hair is in a ponytail, no extensions are shown. DO NOT FUSE this part, leave it out by clipping in place or using a hair tie. (If hair is thin, you may need to leave out more hair)
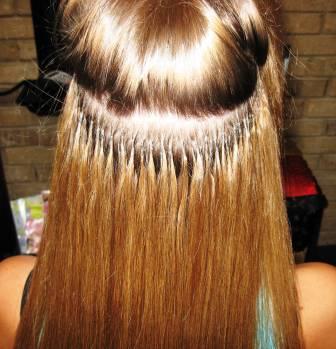
2: Starting at the back of the head, horizontally part a thin row of hair across the head. The hair should be about the thickness of the extension. (Too much hair and bonds will break, too little hair and breakage occurs)
3: Starting on the right, make a small part vertically through the row of hair. Parts should be neat, small boxes. (This ensures there is no snagging in hair) Clip extra hair out of the way.
4: Grab small box of hair. Using the slit in the heat shield, pull hair through small opening in shield. Make sure shield is on the scalp.Slit in shield should be pointing upwards.
5: Clip shield in place. Pull down on hair piece to ensure that extension will not be sticking out. (Heat shield protects scalp while creating space so the extension is not bonded directly to scalp. This causes breakage.)
6: Plug in extension heat wand.
7: Grab a bonded extension. (Can cut bond to preferred length. Some people don't like a lot of keratin on hair)
8: Place U of keratin bond under small box of hair as close to shield as possible. Extension should be cupping the hair.
9: While still holding extension in place, grab heat wand and place heated side under extension bond. Close heat wand for about 3 seconds or until glue starts to melt.
10: Take heat wand off and, using your pointer finger and thumb, Roll the bond around the natural hair. Ensure that the bond is sealed. Moisture should not be able to penetrate between extension and natural hair. Bond should start just below shield, not too low, not too high.
11: Repeat steps 3 through 10 until entire row is complete.
12: Depending on preference and thickness of natural hair, every other row should contain extensions or every other small box of hair. If hair is thick enough, it is possible to bond every row of hair until you reach the top of the head.
13: Stop the extensions about 1 inch below the top of the head. This is so that the hair left out at the top can cover the extensions.
14: Part hair like usual. If extensions need to be installed on the sides of head, repeat steps 3 through 10 for sides. Make sure to leave top of hair and any bangs out so these wont be bonded.
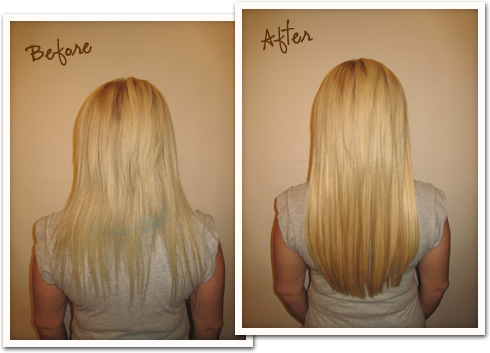
15: Style as usual.