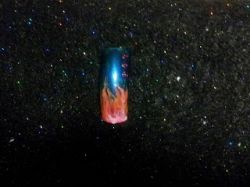
Nail Art Design: Blue Background with Pinkand Orange Flames

How To Make Your Own Flames
In order to make your own flames, follow the directions and have fun! It isn't hard. Just make your own color scheme and use the type of gems you would like to have on our nails. Follow each step for the perfect flame nail art design. If you have questions and suggestions, please, feel free to leave them for me. Thank you.
(P.S. The picture on the right is of a display nail I did with this nail art design. Those are colors I chose. Sorry that the picture is kind of small; however, once I am equipped to take better photos of the displays nails, I will post it again.)
IF YOU DECIDE TO ROCK YOUR NAILS WITH THIS NAIL ART DESIGN SEND ME A LINK TO A PICTURE! I WOULD LOVE TO SEE IT! :)
Step 1: Prepping the Nail
You Need: 180 Grit File, Antibacterial Soap, Sea Breeze (Optional)
I this step, you will prep your nail. You can do a specific manicure (with or without water) or you can just skip to a polish change. You will remove any previous polish with polish remover. Wash the hands and dry them thoroughly. Rough up (also known as taking off the shine from) the nails with a 180 grit file. Do not file too much. Wash hands again or use Sea Breeze to cleanse the nail in preparation for your nail art design.
(If you have a nail the still "shines" or is oily from touching after the hands have been washed, the nails will be subject to chipping or the polish will peel off. To ensure this does not happen, follow proper hand washing procedures and do not touch the nail plate after it has been completely dried. Sea Breeze is suggest due to removing oil from the nail plate. For extra "umph", use Bond-Aid or 90% alcohol to dehydrate the nail plate better.)
Step 2: Base Coat
A base coat is applied to the nail plate for specific reasons before you perform your artistic duties with your nail art design. The first reason is to prevent the nail from staining due to polish colors. Another reason is to help give the nail plate strength. (Too much strength can have the adverse effect. The nail plate needs a bit of flexibility to with stand bumping and bending during daily activities.) The other reason is to fill in natural ridges that occur in the nail plate. Apply a thin layer of base coat to the nail and allow it to dry as you paint on the next coat. Start with the same finger to allow time in between the painting process. (In Missouri, State Board requires that the Manicurist begins with the small finger and workers their way to the thumb on both hands.)
(You can buff off ridges; however, it is highly suggested to not buff too much as it will take layers off of the natural nail. In order to lessen ridges in the nail, use cuticle oil. Cuticle oil will replenish the moisture that the nail plate is lacking. Ridges are due to dehydration in the nail plate and cuticle. This will take some time to fix, but it can be done. Also, keep in mind that some medications can also cause this issue. There are cosmetic fixes if this seems to be the case.)
Step 3: Polish
You Need: Orange Wood Sticks, Polish (Background Color)
You will be applying two layers of the background (main) polish color. The nail art design will be applied to this background, so it is important to pick a dark color if the flames will be bright and bright background polish if the flames are going to be dark. You need to create contrast so that the nail art design stands out.
Apply the first coat of background polish; in my nail art design I chose to use a metallic blue. (Darker and sheer colors typically will need a third coat to ensure a well balanced layer of bold color. If the sheer color is light, use a solid light color to ensure a balanced color. For example, if you have a sheer glittery pearl white, then paint on a layer of white first, then do the two layers of the sheer background color that you would like to use. Make since?)
Use the orange wood sticks to scrape off any polish that you may get onto the skin. Keep the polish from touching the cuticle. If the polish painted onto the cuticle, the oil from the skin will cause the product to lift from the nail plate or chip in that area.
Start with the same finger each time to ensure that it has a few minutes to aid in drying time. If you do not allow the polish to dry to some extent, the polish will be wet again once the next layer is applied. (Again, State Board wants a manicurist to start with the little finger and end with the thumb on both hands.)
Step 4: Flame Prepping
You Need: 3 Colors of Polish, Dropper (Or Dotting Tool)
For this step, you will need to make sure that your main background color polish is at least 90% dry. This nail art design for flames is important to have the nail almost completely dry due to polish re-wetting after another layer is applied. You will need to take a dropper and add a thick stripe of color horizontally across the nail on the free edge of each color. The colors need to touch.
Once you have the thick stripes onto the nail, use the dotter (aka dropper) to swirl the paint upwards into flame patterns. Be creative and ensure that all three colors are seen in the flame design. If you go down to far with the tool and scrape the background to where you are able to see the natural nail in the design, then all you have to do is gently push some of the flame polish over the 'hole'.
Step 5: Gems
You Need: Top Coat, Gems, Tweezers or Dotting Tool
This is where you will add your gems. In order to get the gems to stick to your nail, paint on a thin layer of Top Coat where you would like your gems to be. Use tweezers for the gems, or you are able to dap the dotter tool into a tiny, minute dip of Top Coat to get the gem to stick to the dotter in order to get it to the nail plate. Allow this to dry for a minute or two. Just long enough that the Top Coat is not too runny for the next step.
Step 6: Top Coat
You Need: Top Coat, Orange Wood Sticks
You will need to make sure you allow the flames to dry before you use the Top Coat. If you apply the Top Coat on the nail art design before the flames are dry, then you will smudge the flames and the nail art flame design will be ruined. It takes approximately 30 minutes for nails to dry; however, 10 minutes will be adequate enough for the Top Coat. Ensure that you do not ruin the flame nail art design by rubbing the Top Coat brush too hard onto the nail art design.
After applying the Top Coat to the flame nail art design, allow the nails to completely dry before using your hands. Just as my educator has taught me, "Nails are jewels; not tools."
Give me your opinion!
What do you think?
© 2014 B K Dahlia