Absolute Beginners Guide to Home Recording - Part 2 - Setting up

Before you set up
So you've bought everything you need to start up a basic home recording studio. Hopefully you've already read some tutorials and/or gained some experience in recording at this point. If you haven't, you'll learn some important info in this article that will help you get setup and get started. If you haven't read Part 1 of this article series I would recommend doing so, as this follows on from the first article. http://bandic22.hubpages.com/hub/Beginners-Guide-to-Home-Recording-Equipment

Computer/Audio interface
Firstly, you need to ensure that the computer/laptop that you intend to use as the host for your DAW (Digital Audio Workstation), has the correct port for the audio interface of your choice. If you want to use a Firewire interface, you need a Firewire port on your computer. And the same applies to a USB or Thunderbolt (can be backwards compatible with firewire if you have an appropriate adapter) If your desktop PC lacks the appropriate port, then you can get a PCI-express card that will add the needed ports. Beware. Unless your laptop has a rare Express Card slot (allowing a firewire port expansion), you won't be able to connect a firewire interface to a laptop at all.
If you're using a windows PC, you'll undoubtedly need (ASIO) Audio Stream Input/Output drivers to work with your audio interface. The standard WDM drivers that come with windows are not sufficient to work with a professional audio interface as the latency is much too high. A Mac PC is more likely to use CoreAudio drivers, which represent the standard for audio on the Mac. Drivers like ASIO and CoreAudio communicate with your DAW and the VST plugin format, giving low latency communication and streaming between your DAW and interface.
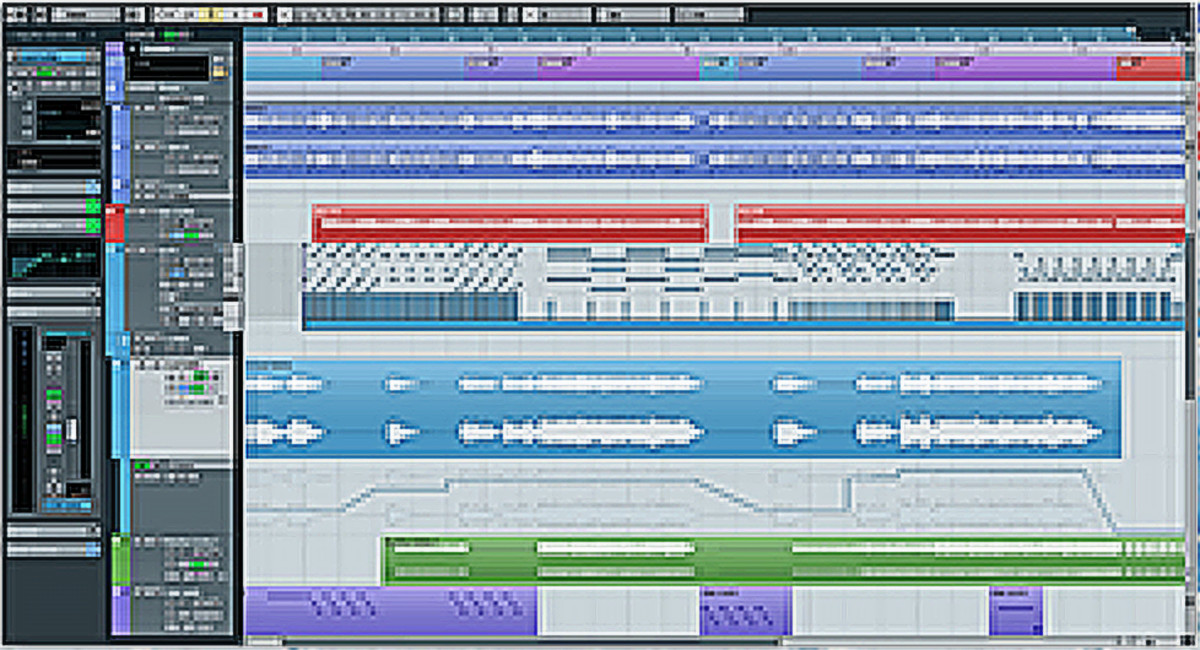
DAW (Digital Audio Workstation)
Once you have your PC setup, audio interface plugged in and the appropriate drivers installed, you need to install your DAW and configure and optimize it to your preferences.
Any DAW will be shipped with a number of stock plugins. You'll want to ensure that the stock plugins have everything that you need to begin with. If you're a beginner, it's highly likely that the stock plugins will initially cater to your every need, until you have a developed understanding of types of audio processing you wish to use and the quality of plugins.
You'll need to learn about your chosen DAW. Using the software is usually as simple or as complicated as you'd like it to be. For those just getting started, its not difficult to get going. Generally, you'll need to be able to do the following things (many tutorials exist online):
- Setup a project (choose bitrate, sample rate, file format, project name, bars and beats format, etc)
- Select your audio device and desired driver from the options/preferences menu.
- Create a number of empty audio/MIDI tracks on which to record, and route the appropriate audio interface input to the track on which you want to record.
- Apply a few plugins to your tracks. You should learn about the different types of audio signal processing to know what plugins you will be needing in your project. (time-based processing, dynamic processing and equalization.)
- Make basic edits to your audio files. Split, cut and glue segments of audio together to create your final product.
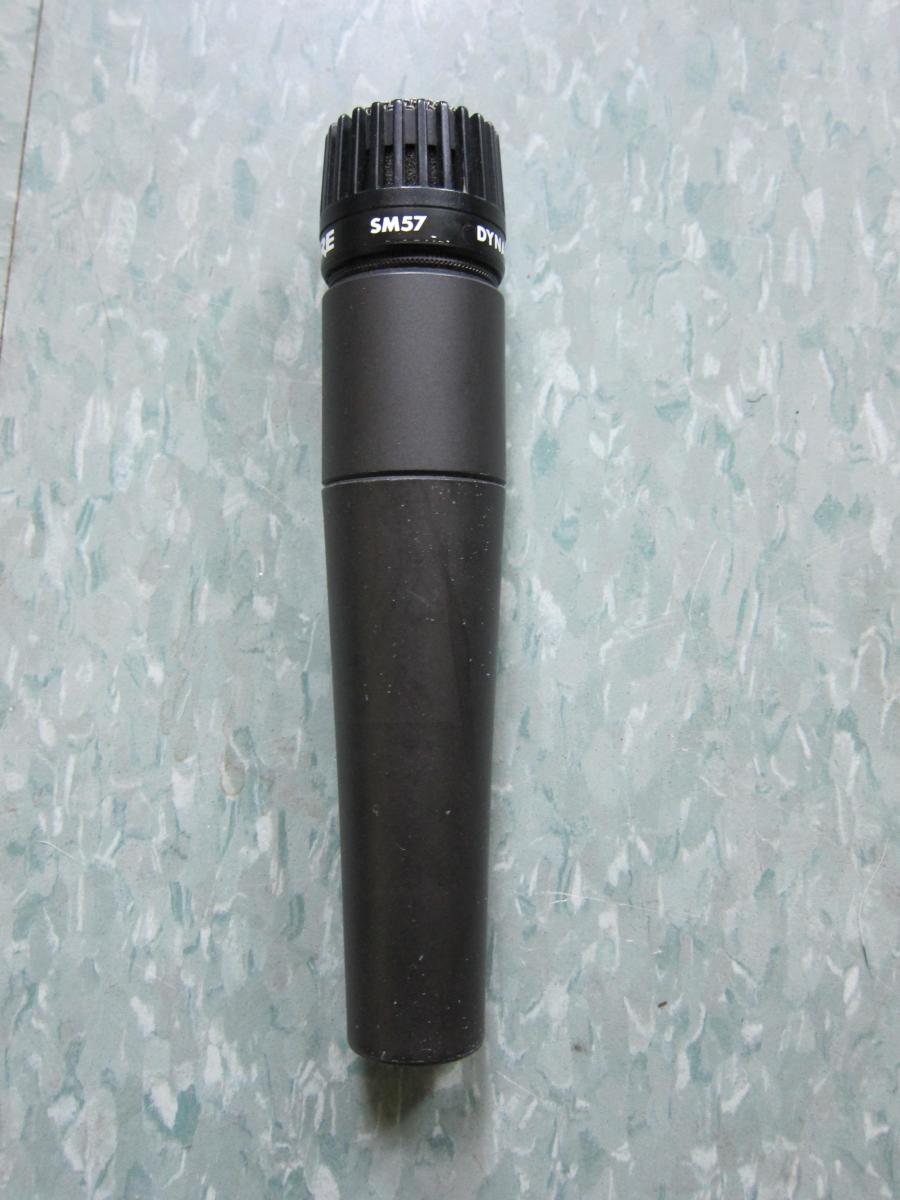
Microphones
All professional microphones make use of an unbalanced XLR cable. These cables are resistant to electrostatic and electromagnetic noise which would otherwise add additional static and noises into a microphones' signal path.
If you're recording in your home studio, you'll definitely need a microphone stand for any application of a microphone. Be sure to loosen, adjust and tighten one part of the stand at a time, consistently, to avoid damaging your stand.
If you're going to be recording vocals, specifically with a large diaphragm condenser microphone, you might want to invest in a shock-mount which helps your microphone stay still and resist low rumbles which travel through the ground, up your stand, and prevent your microphone from remaining completely still, and thus adding unwanted low-frequency noise into the recording.
Ensure that you have the needed microphone clip to hold your microphone, and the correct screw at the top of the stand to allow you to screw on the clip that you desire.
You also need to take note of any polar pattern or pad settings that your microphone might feature. As I mentioned in Part 1 of this article series, it's important to know from what directions the microphone accepts and rejects noise. The polar patterns you choose to work with will be dependent on the nature of your recordings, as well as your studio space. Once you know what each pattern does, you will want to select a polar pattern on your microphone (if it has this feature, which many do). It might also have a pad setting, which allows you to decrease the sound pickup level at the signal source if for example, the signal source is much too loud.

Monitor speakers and monitoring
Monitor speakers make use of normal line-level cables (like instrument cables) which are either balanced or unbalanced. The monitor outputs of your audio interface will accept either balanced or unbalanced.
Monitor speakers enable you to hear accurate sound in open air with natural room acoustics. The point of monitors are to provide an output signal which has a relatively flat signal response (doesn't emphasize or de-emphasize any frequencies).
Due to the fact that room acoustics cause coloration to the signal, listening to a mix through monitor speakers can be completely different in one room than in another. In one room your mix might find fantastic, and in another it might be completely off balance, with a low-frequency boominess that destroys the track, for example.
Therefore, the positioning of studio monitors within your home studio space is extremely important. The easiest way to make a difference to the sound of your monitors is to make sure that your room is as symmetrical as possible to make sure both speakers are equally affected by reflections and coloration, preventing you from creating mixes that are off balance. It's also important to make sure that you as the listener, are positioned directly in the middle of the stereo field, meaning that you should be exactly in the middle of the 2 speakers.
Another important part of monitoring is to configure your audio interface's DSP mixer to route each input from the interface, to the output you would like (headphones/monitors etc). You're usually able to adjust relative volumes between the inputs, their spacial positioning (pan), and mute or solo tracks. If you have multiple outputs on your audio interface, you can create a different mix for each output, consisting of tracks directly from your DAW project, being monitored with all their effects in real time.
![By Matt Vanacoro (DSC03043) [CC BY 2.0 (http://creativecommons.org/licenses/by/2.0)], via Wikimedia Commons](https://usercontent2.hubstatic.com/12163819_f520.jpg "By Matt Vanacoro (DSC03043) [CC BY 2.0 (http://creativecommons.org/licenses/by/2.0)], via Wikimedia Commons")
MIDI controllers
A MIDI (Musical Instrument Digital Interface) keyboard controller's main use is to sequence MIDI data into a software sequencer, and playback selected audio samples/synthesized sounds that correspond to the musical note played on the keyboard. Due to the fact that MIDI controllers are only triggers for something else, they are not affected by acoustics and so their position within a room does not matter (assuming you've considered the implications of it's position on other acoustically sensitive pieces of equipment such as monitors.)
You'll need to use a MIDI cable or a USB cable to connect a MIDI controller to a PC. They are usually plug and play (windows has it's own pre-installed drivers) and conform to the General MIDI spec which is a standardized MIDI specification that all computers can understand. Additional drivers might be required to make use of all the features of a MIDI controller, especially if it has uncommon features and MIDI parameters.
You may want to customize the and program the triggers, knobs and sliders on your controller to affect the parameters that you desire. (For example: pan, level, filter frequency or any other parameter within a plugin in your DAW)
It's important to note that there are other types of MIDI controllers other than keyboards. For example, drums and wind controllers (flute, recorder, sax etc).
Keep on keeping on
I hope that this article and the previous one should have given you a good insight into the basics of home recording, from the equipment used and all their uses, to the setup and optimization of all the equipment you need, with a variety of tips in between. I will write more articles on specific topics from now on, as I believe that all the basics have been covered. If you're interested in reading more, follow me and you will be notified of any new hubs I write. Thanks for reading!
 Review")


")


