- HubPages»
- Technology»
- Communications»
- Smartphones»
- Android Phones
Android OpenGL ES Tutorial, Part 1: Rendering a colored triangle to the screen

")
What is OpenGL ES?
If you are familiar with OpenGL, then the ES variety is simply a stripped down version of OpenGL 1.3 with a few developer friendly features added. If you have never used OpenGL before, then just think of OpenGL ES as your triangle rendering ally in your quest to develop awesome games and applications.
By reading this tutorial, I am assuming that:
- You are familiar with Java (syntax, object-orientated paradigm, etc.). If you have no programming experience and would like to learn, there are plenty of resources freely available on the internet as well as books that you purchase in analog and digital formats.
- You are somewhat familiar with Android. If you are not, that is fine too; this tutorial is very thorough.
- You have an IDE (preferably Eclipse) installed and configured for Android development. If you do not, read my guide here.
- OpenGL ES 1.0 is supported by Android devices 1.6 and above, so I am assuming you have an Android device with a firmware 1.6 or higher. Emulators render with OpenGL very slowly, so I recommend testing OpenGL ES based app and games only on actual devices.
- You have an interest in developing graphically demanding applications. Most platforms provide an effective means of drawing and displaying GUI elements, so if that is all you plan on developing, you are better off sticking those native drawing and layout methods (unless you really want to get your feet wet with some graphics programming).
If you are interested in downloading the source code for this project, refer to the next section; otherwise, continue on to "Getting Started".

Source Code
The source code for this tutorial can be downloaded here. You will receive a zip file. Extract the contents of this zip file to your workspace. In Eclipse:
- File > Import > General > Existing Projects into Workspace
- Select root directory: browse for the "opengl-es-tutorial" folder and click it.
- Your screen should look like the one on the right -->


Getting Started
Okay, let's create an OpenGL ES Android app! Assuming you have Eclipse installed and configured properly for Android development:
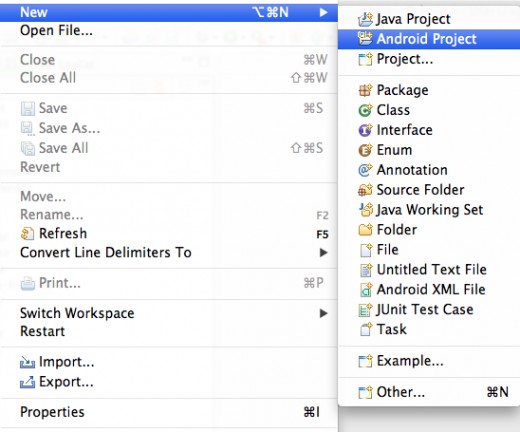
- File > New > Android Project
- Follow the screenshots provided on the right -->
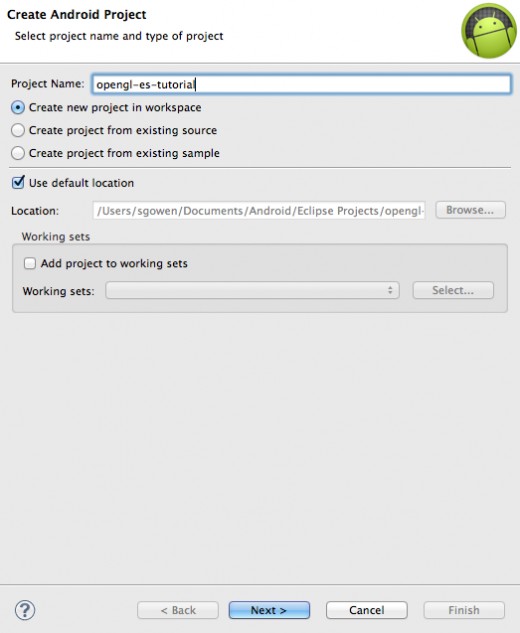
- Name your project "openglestutorial"
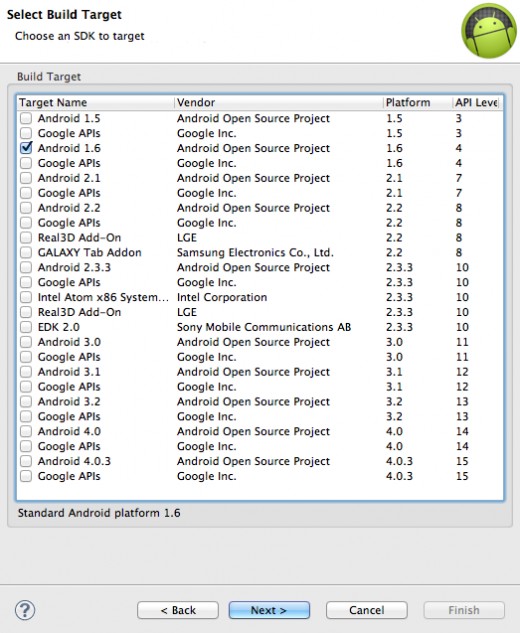
- Set "Android 1.6" as your Build Target
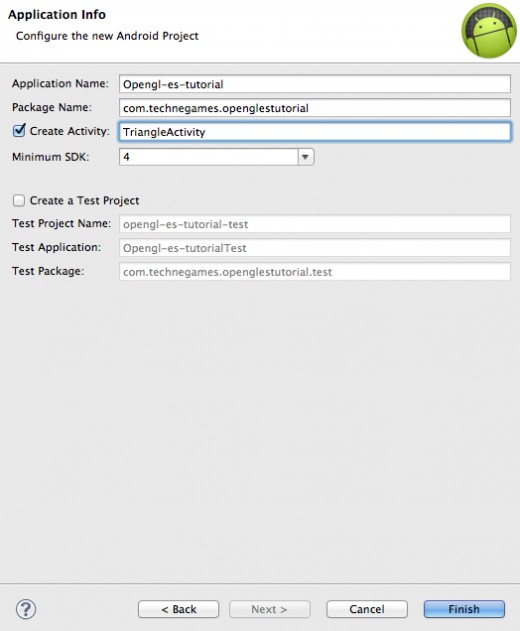
- Set the Application Name as "Opengl-es-tutorial"
- Set the package name to your website starting with the domain name and followed by the project name. For example, I used: "com.technegames.openglestutorial"
- Make sure "Create Activity:" is checked; name it "TriangleActivity"
- The Minimum SDK should be set to 4, since OpenGL ES is not supported below that.
AndroidManifest.xml
<?xml version="1.0" encoding="utf-8"?>
<manifest xmlns:android="http://schemas.android.com/apk/res/android"
    package="com.technegames.openglestutorial"
    android:versionCode="1"
    android:versionName="1.0" >

    <uses-sdk android:minSdkVersion="4" android:targetSdkVersion="4" />

    <application android:icon="@drawable/ic_launcher"
        android:label="@string/app_name"
        android:launchMode="singleTask"
        android:theme="@android:style/Theme.NoTitleBar.Fullscreen" >

        <activity android:name="com.technegames.openglestutorial.TriangleActivity"
            android:label="@string/app_name" >

            <intent-filter>
                <action android:name="android.intent.action.MAIN" />
                <category android:name="android.intent.category.LAUNCHER" />
            </intent-filter>

        </activity>

    </application>

</manifest>
About the AndroidManifest
Most of this will be set up for you by Eclipse by default.
I added one important line:
android:theme="@android:style/Theme.NoTitleBar.Fullscreen"
Adding this line will cause any activities in your application to launch in fullscreen mode.
TriangleActivity.java
package com.technegames.openglestutorial;

import java.nio.ByteBuffer;
import java.nio.ByteOrder;
import java.nio.FloatBuffer;

import javax.microedition.khronos.egl.EGLConfig;
import javax.microedition.khronos.opengles.GL10;

import android.app.Activity;
import android.opengl.GLSurfaceView;
import android.os.Bundle;
import android.util.Log;

public class TriangleActivity extends Activity implements android.opengl.GLSurfaceView.Renderer
{
	private static final String TAG = TriangleActivity.class.getSimpleName();

	private static final int Coordinates_In_A_Vertex = 2;
	private static final int Vertices_In_A_Triangle = 3;
	private static final int Bits_In_A_Byte = 8;
	private static final int Bits_In_A_Float = Float.SIZE;
	private static final int Bytes_In_A_Float = Bits_In_A_Float / Bits_In_A_Byte;

	private GLSurfaceView glSurfaceView;
	private FloatBuffer vertices;
	private int width;
	private int height;

	@Override
	public void onCreate(Bundle savedInstanceState)
	{
		super.onCreate(savedInstanceState);

		glSurfaceView = new GLSurfaceView(this);
		glSurfaceView.setRenderer(this);
		setContentView(glSurfaceView);
	}

	@Override
	public void onResume()
	{
		super.onResume();
		glSurfaceView.onResume();
	}

	@Override
	public void onPause()
	{
		glSurfaceView.onPause();
		super.onPause();
	}

	@Override
	public void onDrawFrame(GL10 gl)
	{
		gl.glClear(GL10.GL_COLOR_BUFFER_BIT);
		gl.glColor4f(0.64313725490196f, 0.77647058823529f, 0.22352941176471f, 1);
		gl.glVertexPointer(2, GL10.GL_FLOAT, 0, vertices);
		gl.glDrawArrays(GL10.GL_TRIANGLES, 0, 3);
	}

	@Override
	public void onSurfaceChanged(GL10 gl, int width, int height)
	{
		Log.d(TAG, "Surface changed! width = " + String.valueOf(width) + ", height = " + String.valueOf(height));
	}

	@Override
	public void onSurfaceCreated(GL10 gl, EGLConfig config)
	{
		Log.d(TAG, "Surface Created!");

		width = glSurfaceView.getWidth();
		height = glSurfaceView.getHeight();

		gl.glViewport(0, 0, width, height);
		gl.glMatrixMode(GL10.GL_PROJECTION);
		gl.glLoadIdentity();
		gl.glOrthof(0, 1, 0, 1, 1, -1);
		gl.glClearColor(1, 1, 1, 1);

		ByteBuffer byteBuffer = ByteBuffer.allocateDirect(Coordinates_In_A_Vertex * Vertices_In_A_Triangle * Bytes_In_A_Float);
		byteBuffer.order(ByteOrder.nativeOrder());

		vertices = byteBuffer.asFloatBuffer();

		vertices.put(new float[]
				{
					0.0f, 0.0f,
					0.5f, 1.0f,
					1.0f, 0.0f
				}
		);

		vertices.flip();

		gl.glEnableClientState(GL10.GL_VERTEX_ARRAY);
	}
}
TriangleActivity members
We have 10 class-level fields in total.
- TAG is used when writing logs
- Coordinates_In_A_Vertex stores the number of coordinates for a vertex. On a 2D plane, there are only x and y coordinates, so this number is 2.
- Vertices_In_A_Triangle should be pretty self explanatory.
- There are 8 bits in a byte, and there are 32 bits in a Float data type (we know this because Float.SIZE returns 32).
- OpenGL ES requires that we allocate memory in terms of bytes, so we store 4 in the Bytes_In_A_Float variable (More on this below).
- glSurfaceView is responsible for displaying all of the OpenGL rendering
- vertices is a FloatBuffer that stores all of the coordinates of our triangle
- we use width and height to store the dimensions of our GLSurfaceView
TriangleActivity onCreate, onResume, and onPause
You may have noticed that our TriangleActivity implements android.opengl.GLSurfaceView.Renderer. When creating a GLSurfaceView, we can use the activity class itself to supply the renderer via the setRenderer() function.
In onCreate(), we simply instatiate our glSurfaceView, set its renderer, and finally set the content view to the glSurfaceView.
In onResume and onPause, we call the respective glSurfaceView methods. Note that we only resume our glSurfaceView after we call the super implementation of onResume. The opposite is true for onPause. The reason behind this is because our glSurfaceView cannot be alive and rendering unless the activity is in the foreground.
onSurfaceCreated, onSurfaceChanged, and onDrawFrame
In this section, I will explain each line of OpenGL ES code. If this your first time learning OpenGL ES, read and reread this section until everything makes sense.
- In onSurfaceChanged, we simply log the dimensions of the glSurfaceView whenever it changes.
- In onSurfaceCreated, we perform the bulk of the initialization work. After setting width and height, we have to initialize our rendering system:
- glViewport() sets the portion of the screen that we render to.
- glMatrixMode(GL_PROJECTION) tells OpenGL ES that we are drawing in a 2-dimensional environment.
- glLoadIdentity() resets the matrix to its original state.
- glOrthof() defines our own coordinate system. I set the values so that our triangle would be drawn onto a coordinate system that is 1 unit wide and 1 unit tall.
- glClearColor(r, g, b, a) specifies what color the screen will be cleared with when
glClear is called.
- As for the triangle, we must use a ByteBuffer to supply all of the float coordinates. Each of our coordinate pairs are stored as Floats, since this is what OpenGL ES expects.
- There are 2 Floats in a vertex, 3 vertices in a triangle, and 4 bytes in a Float. This means we have to allocate 24 bytes to our ByteBuffer.
- After we allocate our bytes, we transform this ByteBuffer to a FloatBuffer and store it in our vertices variable. After this, we place all of our coordinates in our vertices.
- Once our coordinates are loaded, we call flip() so that our vertices can be read from the beginning by OpenGL ES.
- Finally, we enable the client state to GL_VERTEX_ARRAY so that OpenGL ES knows we are going to be drawing vertices.
- onDrawFrame is where your triangle is actually drawn to the screen! Before drawing our triangle, we clear our screen with the color white via the glClear method. We call the glColor4f method so that our triangle will be drawn with the "Android green" color.
- The glVertexPointer method is used to describe our vertices to OpenGL ES. Our Vertices have 2 coordinates stored as Floats.
- In the glDrawArrays method, we tell OpenGL ES that we are drawing a triangle (GL10.GL_TRIANGLES), and we are drawing 3 vertices (1 triangle).
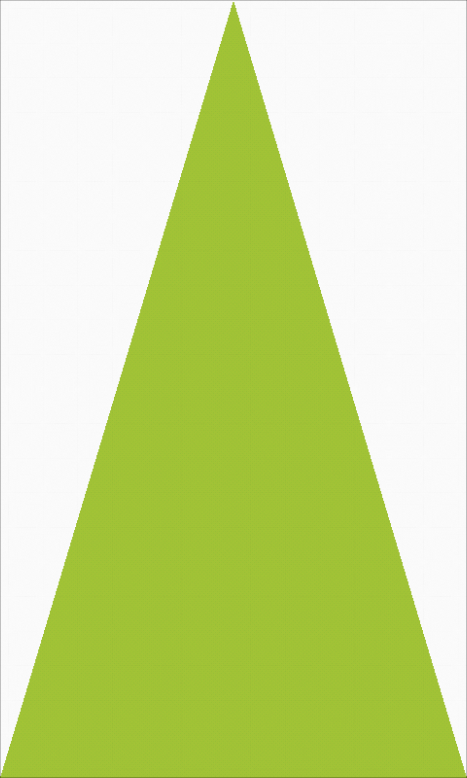
All Done!
Congratulations! If you have done everything correctly, your device screen should look like the one on the right -->
I plan on writing more tutorials, so comment below and let me know how I did and what I should write about in my future articles.


