- HubPages»
- Technology»
- Computers & Software»
- Computer Software»
- Office Software Suites»
- Microsoft Office
How to Create a Text Box in Microsoft Word 2007

Creating a text box in Microsoft Word 2007 can be simple once you get used to it. There are a lot of options to format and align your text box so that it fits the overall design of your document. In this article, we will cover how to insert, align and format your text box so that it integrates seamlessly into your document, making your finished document look polished and professional.
In this article, the written instructions are on top of the corresponding screenshots.
Inserting a Text Box into Your Document
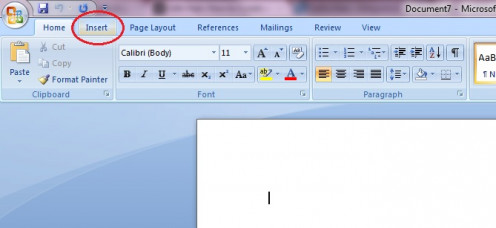
- From the homepage, click on the Insert tab.
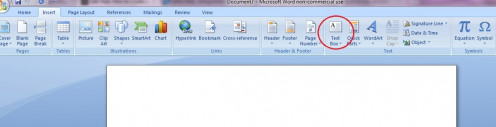
- From the Insert tab, under the header Text, click the button labeled Text Box.
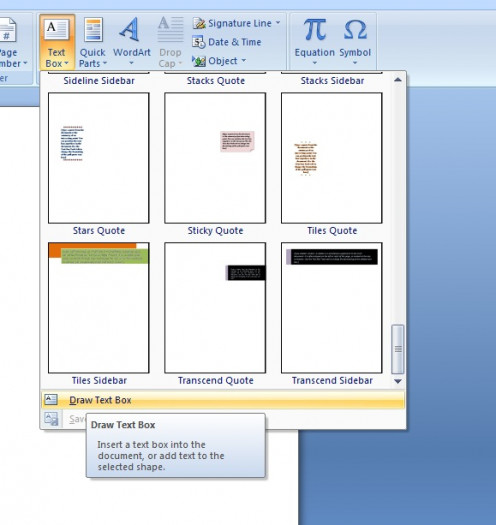
- After clicking the Text Box button, you'll have a variety of different styles of text boxes to choose from. Scroll down to see more options and click on the style you would like to insert.

Drawing Your Text Box
If you don't see any text box styles that you like, you can draw your own text box by clicking the button labeled Draw Text Box. You can easily change the look of your text box no matter which style you choose, which we will cover how to do in the section, "Formatting Your Text Box."
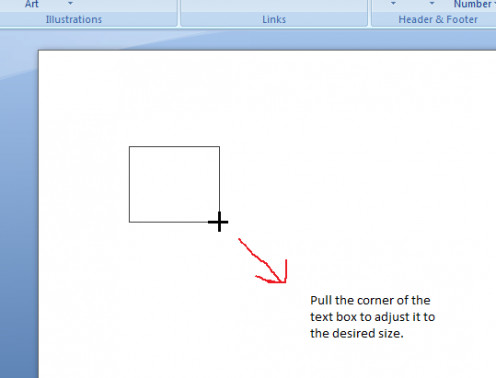
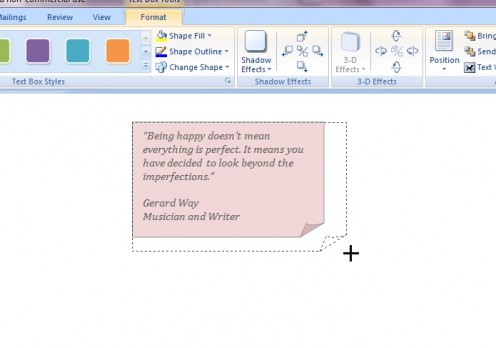
- Use the cross mouse to drag the bottom corner of your text box to adjust it to your desired size. You can always go back and adjust the size whenever you need.
- Now that you've inserted your text box, go ahead and write whatever you wish in your text box by clicking on the inside of your the text box until the blinking cursor appears. Note that your text box will automatically adjust in size as you type.

Formatting Your Text Box
There are many options to choose from when formatting your text box. Let's cover those options now.
Changing the font in your text box: You can adjust the font type, size and color in your text box just like you would in your regular Word document.
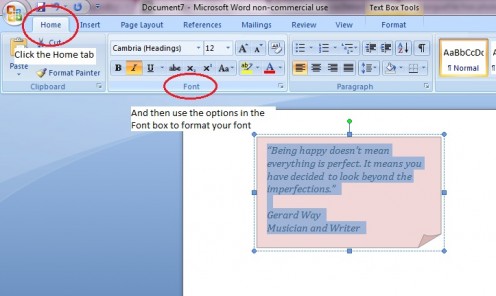
- Click in the text box so the blinking cursor is highlighting the text you wish to format.
- Click the Home tab and then use the options under the heading Font to adjust your font.
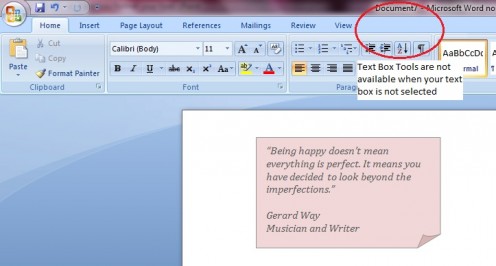
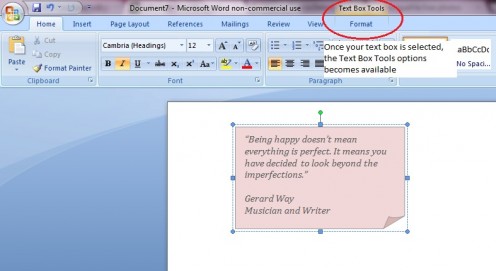
- Whenever you want to return to the Text Box Tools, click on your text box and then click on the Format tab that will appear under Text Box Tools after you click on your text box. If your text box is not selected, the Text Box Tools tab will not be available.
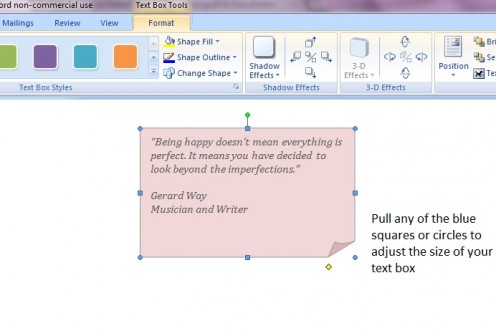
Changing the size of your text box: You can always adjust the size of your text box by pulling the little circles or squares that surround your text box when it is selected.
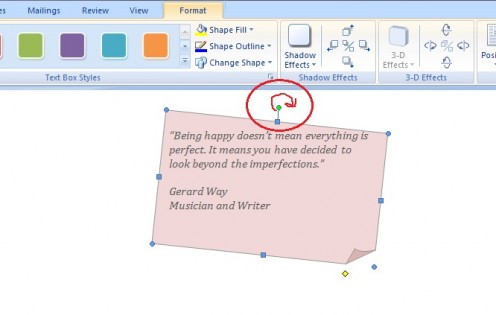
Rotating your text box: By clicking and holding the green circle on top of the text box, you can rotate your text box so it's angled.
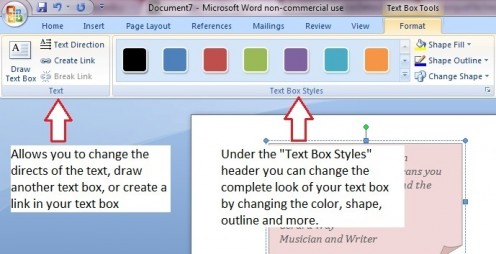
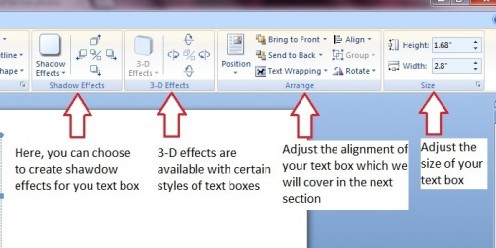
Changing the shape, color and effects of your text box: When you click on the Format tab under the Text Box Tools label, you can see all of your options to format your text box. These options include changing the style, shape, color and outline of your text box, creating shadow and 3-D effects, and adjusting the alignment of your text box.
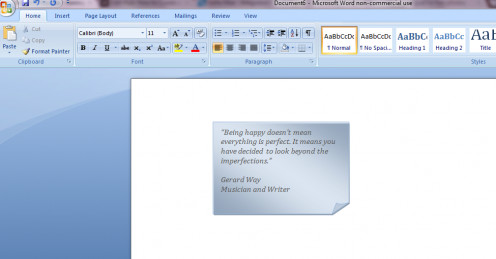
In my example, I scrolled through the styles to change the look of my text box. As you run your mouse over the options, Word will automatically preview what your text box will look like with that style. Play around with it until you find one that you like.
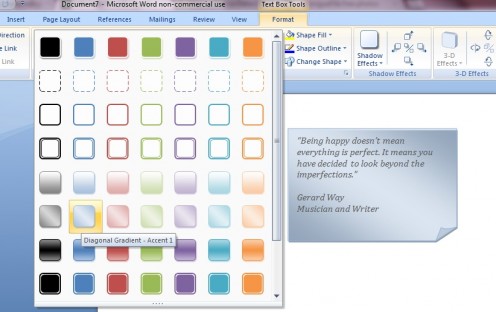
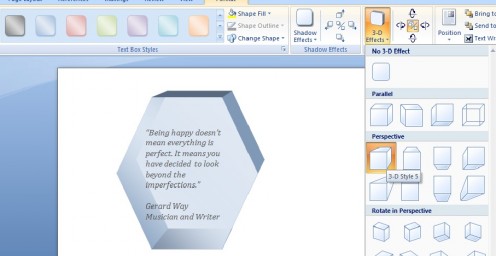
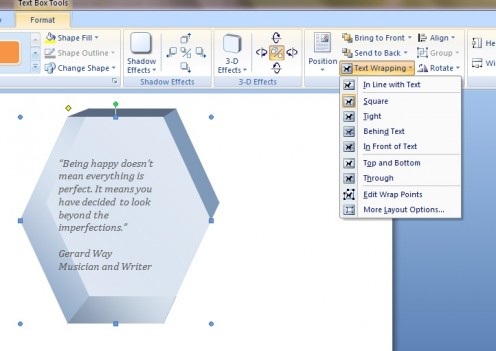
In my example, I chose the "Diagonal Gradient - Accent 1" and changed the shape to a Hexagon. Because the 3-D option was available with this shape, I chose "3-D style 5" to make it look like the quote is carved on glass.
By clicking on the arrows next to the 3-D Effects button, you can rotate your shape. There are endless amounts of variations you can use to format your text box.
Adjusting the Alignment of Your Text Box
If you choose a pre-formatted text box, you should be able to drag the text box anywhere in your document. However, if you draw your text box, you will need to adjust some setting under the Arrange heading in order to move the text box easily.
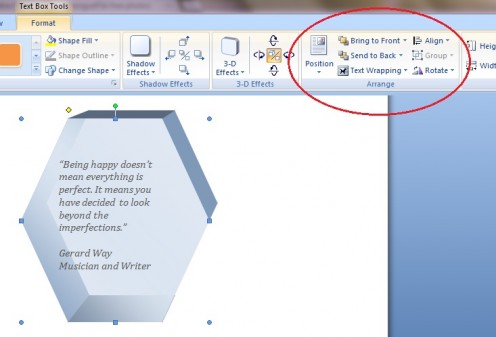
- If you click on the Position button, you can choose where you would like your text box to line up in your document. Word provides you with illustrations so that you can easily visualize where you text box will be in your document.
- If you roll your mouse over the options, Word will automatically preview that selection for you, so you can see what your text box will look like if you choose that layout option.

- If you click the button Text Wrapping, you have more options for arranging your text box. If you want to be able to freely drag your text box around your document, choose any of the options, Square, Tight, Behind Text, or In Front of Text.
- If the option In Line with Text is selected, then your text box will automatically be adjusted to be in line with the text and you won't be able to drag your text box anywhere in your document.
- The Tight option will bring the surrounding text all the way up close to and follow the shape of your text box.
- The option Square will line your text up squarely around your text box.
I hope this helps you be on your way to creating more beautiful Word 2007 documents. If you have any questions, comments, or would like me to cover anything more thoroughly, please leave your comments below. Thanks for reading!
Was this article helpful?
Related

How to Proofread a Document on Microsoft Word
")
How to Use Word Processing Software (NVQ Diploma in Business and Administration & IT)

Working With Microsoft Office PowerPoint 2003 to Create a Presentation

How to Create Free Recipe Cards With a Template

How to Use the Microsoft Office Word 2007 Page Layout Ribbon Tab


