How to Take a Screenshot on Mac

This is a short guide explaining How to Take a Screenshot on Mac. Read through and share your queries in the comments.
There are several uses of taking a screenshot on a mac or PC. You can use the screenshot for saving some important transaction information, sharing some in-progress design work etc. I personally use it everyday when I write tutorials or guides for my technology blog.

On PC, the process of taking a screenshot is slightly lengthy and messy. You have to press print screen then paste the screenshot in paint, crop it and then save it. But if you want to take a screenshot on macbook (pro/air whichever) the process is quite easy and intuitive. You just need to know the right shortcuts!
There are Two Ways in Which you Can Take a Screenshot on a Mac Laptop -
A. Using Shortcuts
B. Using Grab application in Mac Os X
A. How to Take a Screenshot on a Mac Keyboard Using Shortcuts
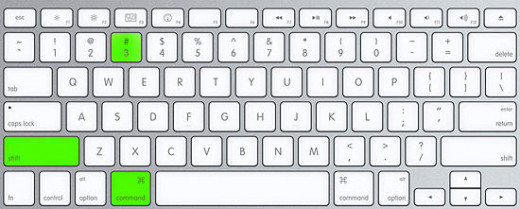
1. Press Command-Shift-3. The screen shot of your entire desktop will be captured andwill be saved as a PNGfile. You will get a camera sound confirming that a screenshot was taken successfully.
2.Press Command-Control-Shift-3to copy the entire screen to clipboard and paste it in your favorite image editor.
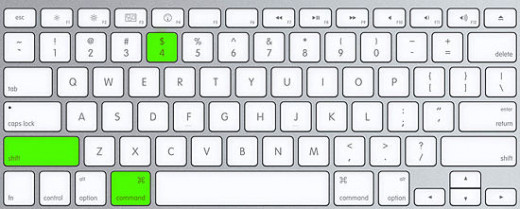
3. Now If you want to capture just a portion of the screen, just press Command-Shift-4 anddrag to select the area you want to capture with the cross-hair cursor on your screen. As soon the mouse button is released, the screen shot will be automatically saved as a PNG file on your desktop.
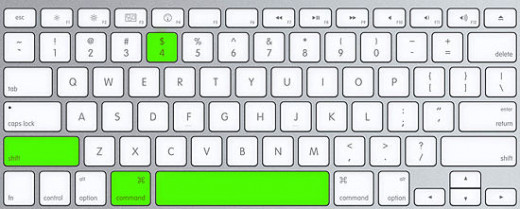
4. Press Command-Shift-4, and hit the Spacebar and catch an application window. The cursor will change to a camera, move it around the screen. your window will be highlighted. Now just click the mouse button and the screen shot will be saved as a PNG file on your desktop.
B. How to Take a Screenshot on a Mac Using Tools
If you want more custom ways of taking a screenshot you may use the Grab app that comes with the OS X. It is located at /Applications/Utilities folder. Go to the preferences of the app and make the changes you need for your custom sreenshot. For example, you may want to include the 'Menu' in the screenshot.

In the Grab application you will see a 'Capture' option in the upper left corner of the screen.
There are various modes of Capture and you need to select one.
1. Selection mode - This mode of capture will allow you to drag over the portion of the screen you want to capture
2. Window mode - This mode allows you to capture an entire window. As soon as you select the Window mode, a dialog box will appear and you see an option “Choose window”. Click this option and then click the window you want to capture.
3. Screen mode - This mode allows you to capture screen by clicking it. To include the cursor or not is totally upto you. You may select the cursor in preferences and it'll be included in the screenshot.
4. Timed Screen mode - First you have to prepare your screen for capture. When you are done, click the "Start Timer" button and you will have ten seconds before the screen is captured. This time can be used to open some menus and submenus on the screen which you want to include in your screen shot. After ten seconds the entire screen will be captured.
How to Take a Screenshot on a Mac Running Windows 7
There are two ways of doing this too.
1. You can invoke the on screen keyboard by going Start → Control Panel → Ease of Access → Ease of Access Center → Start On Screen Keyboard. Just do a print screen and you've got yourself a screenshot!
2. Another, simpler way is to press the shortcut 'Shift+Fn+F11'.
I hope you found my guide on how to take a screenshot on mac useful and easy to understand. If you still have queries post them as comments below.


