- HubPages»
- Technology»
- Computers & Software»
- Computer Software»
- Digital Photography & Video
Photoshop Tutorial: Rain Creation
Creating Rain Effect
Here is a trick to add rain effect in image. I tried my best to explain everything. I hope everyone will like it.
I used Photoshop CS3 in this tutorial.
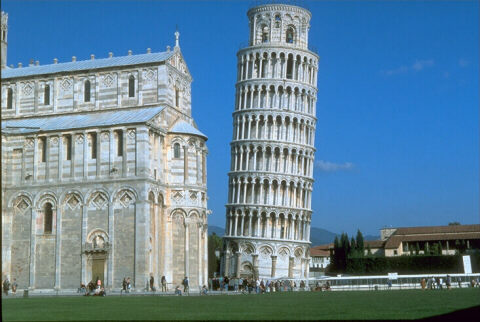
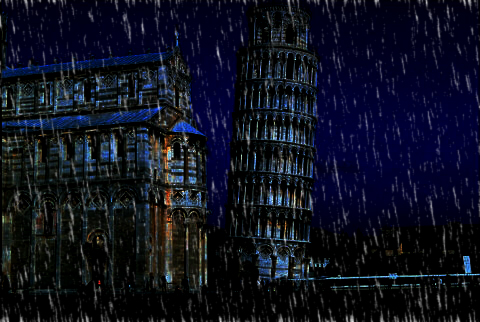
In this tutorial I'll explain step by step to turn
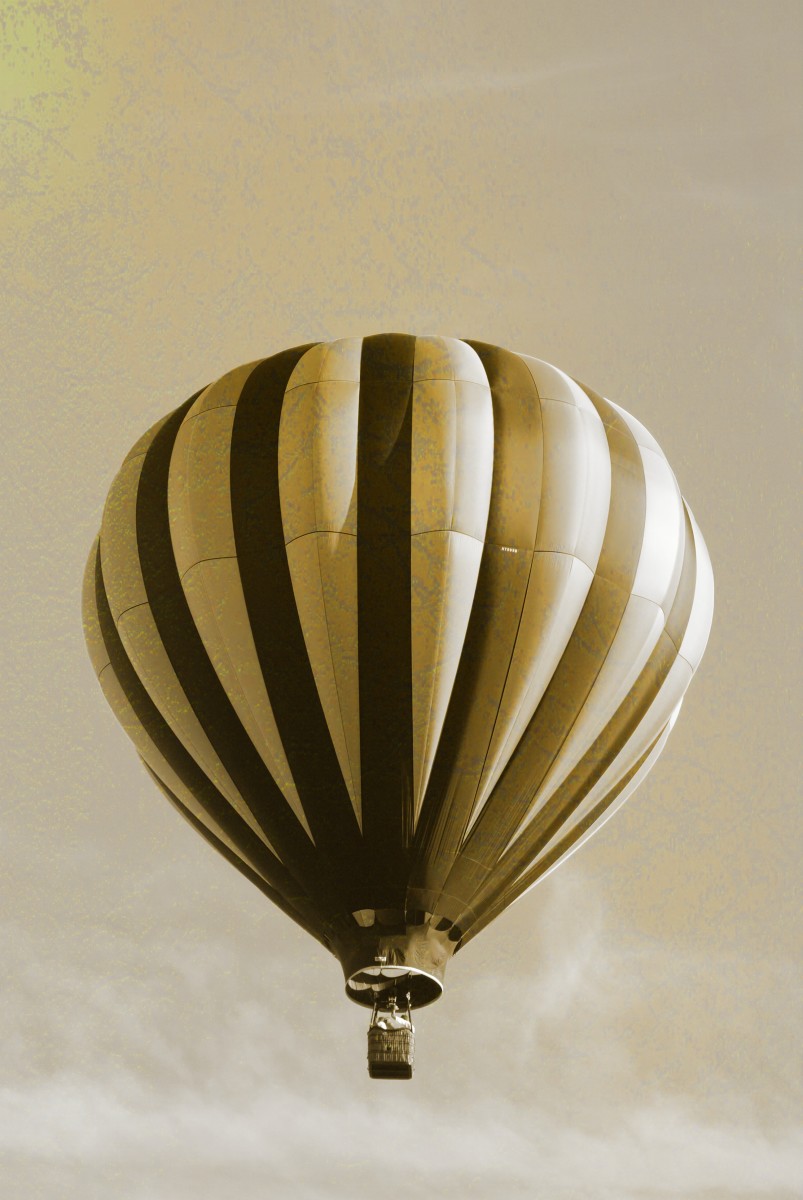
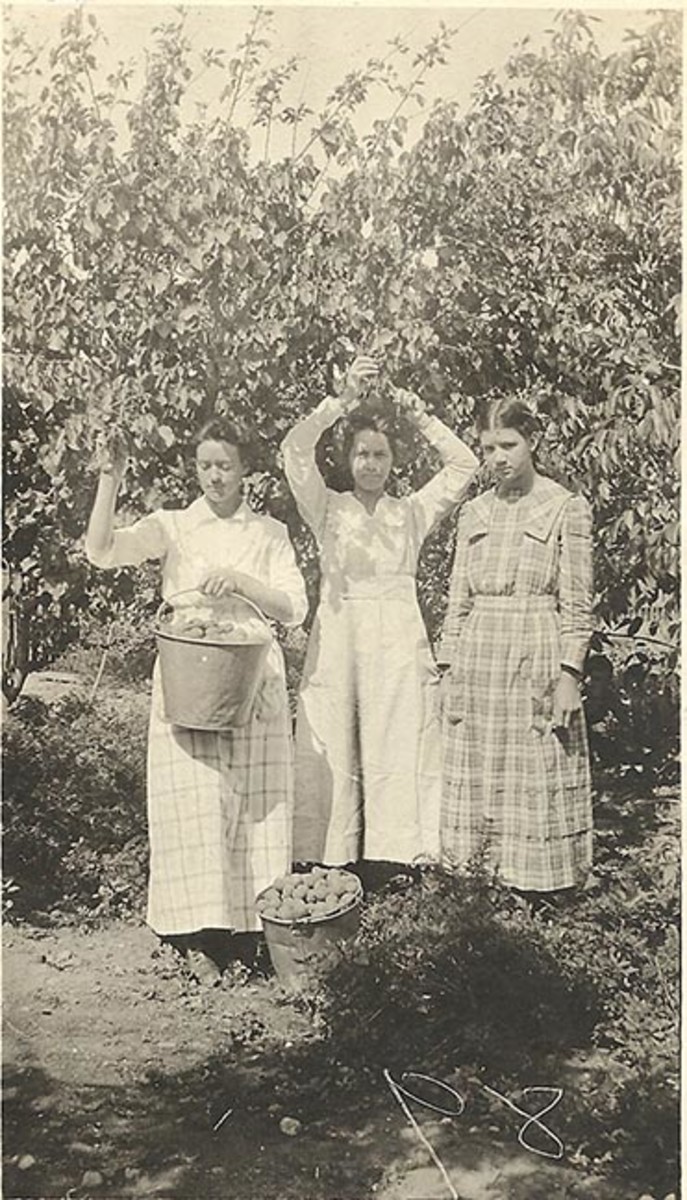
this image
Into this.
So you can do it very easily.
First Step: Opening the Image
First open the image you want to give effect with photoshop. You can use any kind of picture you like.
- Run the Photoshop application.
- Go to File>Open or press the Ctrl+O buttons.
- Select your image and click open.
Second Step: Preparing the image
Go to Layer menu then click Duplicate Layer. The keyboard shortcut is "Ctrl+J" to duplicate the layer.
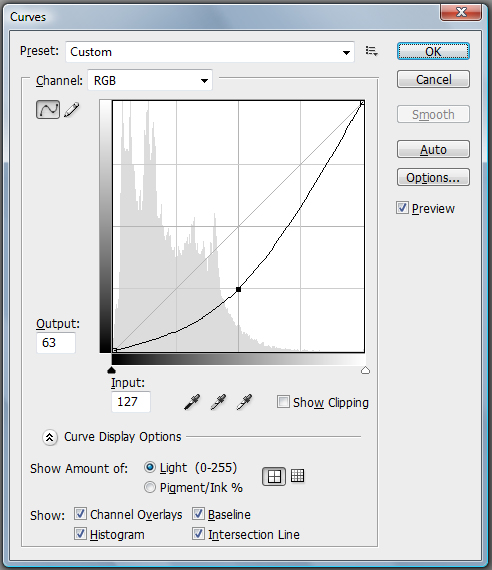
Now select the Duplicate Layer then go to Image>Adjustment>Curves or press Ctrl+M.
Adjust the setting to give the image “dark rainy day” appearance.
Third Step: Creating Rain
Now the image is ready lets add some rain.
- First add a new layer. Go to Layer>New>Layer (Shift+Ctrl+N) name it "rain" then click ok.
- Fill the "rain" layer with white. Press Ctrl+Backspace.
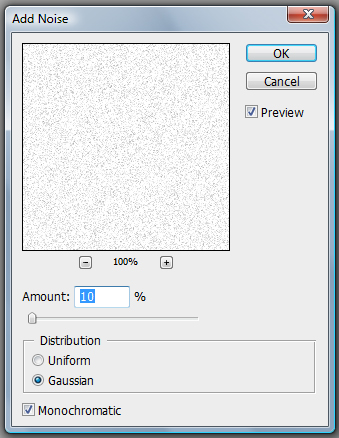
- Now go to Filter>Noise>Add Noise and adjust the setting like below.
Amount= 10, Distribution= Gaussian
or as you like.
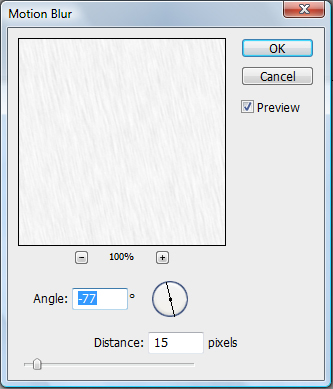
Head for the Filter>Blur>Motion Blur and change the settings as given below.
Angle= -77 Distance= 15 pixels
or as you like.
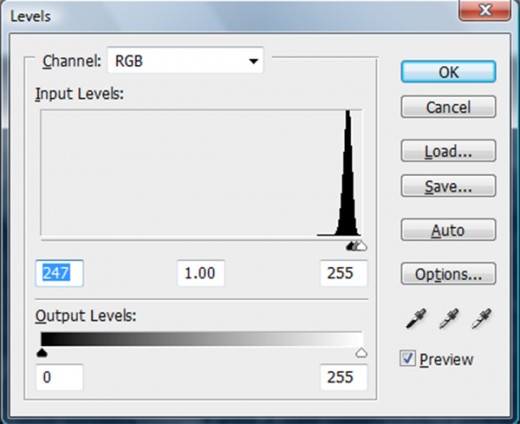
- Now you have to adjust the levels of the image. Go to Image>Adjustments>Levels. My preferred settings are given in the image. You can change it as you like best.
Final Step
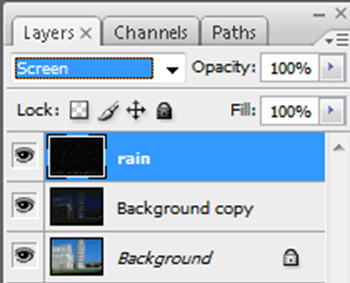
Now go to your layers pallet and select "rain" layer and then change the mode to “Screen” and Voila!
You have a rainy image!

