How To Make These Easy Christmas Dog Toys From Repurposed Materials


Recycle Materials From Around Your Home


Recycle What You Have To Make A Dog Toy
I am pretty sure anyone can rummage through their home and find plenty of materials to re-purpose into a very similar dog toy like the ones shown in the photos. Use your imagination and some old socks to make this project. It is very easy and lots of fun. It is safe to say a couple of dog toys could be handmade in just about one hour once you get all the materials together.
Materials List
- Old socks
- a small toy ball that is pet friendly
- some heavy thread
- pom-pom balls, white sweatshirt material, or similar re-purposed material for the eyes
- a cord for the neck, rope, twine or ribbon can also be used
Tools List
- scissors
- a large sewing needle and a threader if you need one
- a thimble if you like
Putting The Dog Toy Together


Assembling The Project
Now that all the materials needed have been gathered you can get started. This is a perfect craft project to do with children too. The ease of this re-purposed craft project makes it a good one for children to learn about recycling, sewing, using their imagination and saving money. So round up the kids too!
Step One
Using two socks, place one sock inside the other to give the dog toy a plush feel. The thicker the socks the better. Crew socks work fine because they are just the right length. But it does not really make a difference so use what is available. Stuff one inside the other and smooth it out so it looks like one thick sock.
Step Two
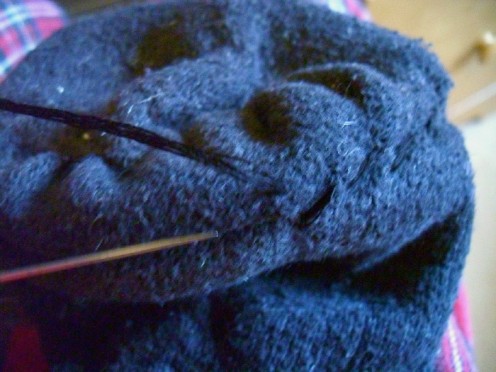
Using one hand inside the sock formation and the other hand on the outside, shape the sock like a puppet. Use your thumb on the inside and your fingers to form the mouth and head. See how the photo takes on a puppet shape. Carefully remove your hand from the socks when you have it formed the way you want it.
Step Three
Using heavy thread, cut a length to double thread the large needle and tie a knot in the end of the thread on the needle. This will be used to sew the puppet like mouth into shape.
The thread can be a contrasting color if you want or have it. The idea is to shape the head of the dog toy by sewing a mouth, eyes and nose into shape. This forms the basis for the entire toy. Make sure to have fun with your imagination as you work.
Adding the Finishing Touches to Your Dog Toy
Adding The Character Features
Step One
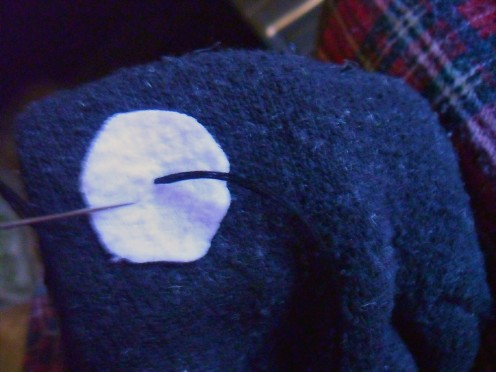
Sew the upper and lower part of the mouth together using heavy thread and a simple closing stitch. For those who have some sewing skill this could be enhanced with a fancy cross stitch too. Basically you want to tack the mouth shut and anything else is up to you. You could add a tongue in pink, red or orange as you close the mouth, as another option to creativity and individuality.
Note*
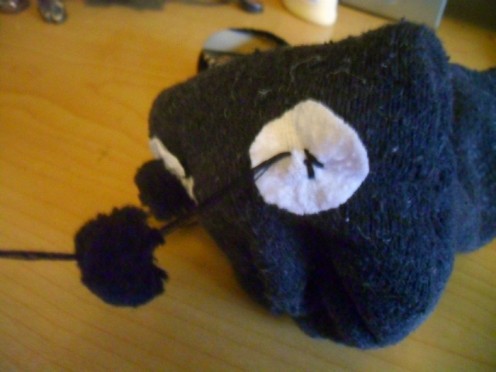
This is where you can bring the character of the dog toy to life. Just a few stitches here and there can raise a nose, make the eyes and give the mouth of the toy expression. In the photo examples I found black pom-poms to make eyes. On the first toy I sewed the pom-poms directly to the sock where I wanted the eyes to be.They turned out just fine but....
On the second dog toy I wanted the pom-poms to stand out better so I cut two 1" circles from an old white sweatshirt. The circles were then attached behind the pom-poms for more contrast. So use your imagination as you work.
Step Two
Sew the material you found to make the eyes in place. Place the eyes where you want and tack them down good using the needle and thread you have.
Step Three
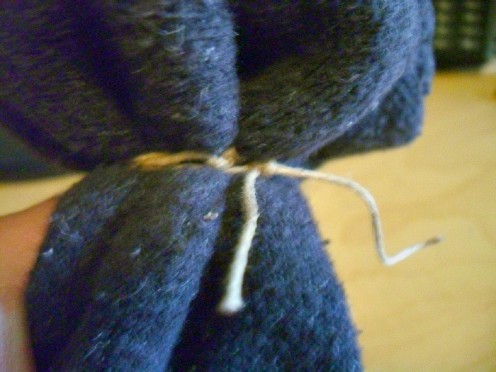
When the mouth is closed and the eyes are on you are almost finished. The last step is to tie off the head with some kind of cord, twine, rope or ribbon. Wrap the neck cord around the throat of the dog toy and pull it very tight. Tie several good square knots in the neck cord to secure the head in place.
You can use a contrasting color here too. A piece of bright yarn would do the trick. The important thing is to get the necktie very tight and knot it several times.
Sew a Few Tack Stiiched Details


Details Lend Character to These Christmas Dog Toys
The finishing touches can form a nose or wrinkle in the face with just a few tack stitches. Using your fingers to shape up the details you can then tack it down to taste. Just stitch it in a couple times and tie the thread off to finish. Look how the nose ridge is formed up on the dog toys in the photos. This was done by pinching the material together the way I wanted it and then tacking it in with the needle and thread.
Note*
It may be good if you help small children out with the stitching. Encourage them to try their hand with the needle and thread if they are old enough, but be around to help if they need it.
Making a Base with the Ball
This is the last step.
By adding a small ball to the opening in the socks a base to stand the dog toy is made. Small dog treats could also be added first and then the ball could be placed inside the opening. This makes the dog toy become a busy toy. It can keep small puppies entertained for hours. I know my Foster Child would like treats and toys in his new dog toy!


