Make Your Own Dog Collar


Too many times I have found myself in need of a collar for my dog. Tyeing a string around a dogs neck is not a good idea. Too many times the know turns out to be a "sliding" not that slowly tightens around the dogs neck until it begins to stangle them.
I found the perfect solution right in my closet!
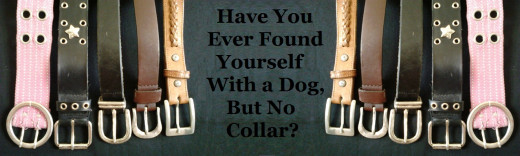
Everyone has a belt or two that just won't fit around their waste anymore or one that isn't worn often if ever. These belts can be easily transformed into a dog collar. With a measurement and a few snips here and there you will have a perfectly funtionining collar for your dog.
You'll be pleasantly surprised with the variety of colors and designs available on belts. If your looking for a fancy collar with lots of "bling" children's belts are a good place to look. If you don't have one at home the local second hand store always have several on display for a great price. Far less than the standard ten to twenty dollars you'll pay at the pet store.
There's a few things you'll need to make this project easier and the collar functional:
- An old belt
- Pair of scissors
- Super glue, glue gun or needle-n-thread
- A hole puncher


Step-by-Step Instructions
- Select the collar that will work best for your dog. Small dogs will do best with a thinner belt while large dogs need a larger (in width) belt.
- Have an assistant hold the dog so it won't pull and wiggle while you put the belt around your dogs neck and pull until it is loosely hanging.
- Mark that spot.
- Cut the belt in an arrown fashion so it will easily enter the bucket when you have to put it on your dog later.
- The end that you have cut may be a "fraying" type of material. Using the glue gun, super glue or needle-n-thread, secure the end, so it won't fray with use. Of it isn't the fraying type then leave it as it is.
- Again, have your assistant hold your dog still while you put the collar on and check if there are holes in the belt where you will need the collar to buckle at. Often the holes don't go up that far. Using your hole punch, punch several holes at the point where the buckel will be at. Several holes are convenient, so when your putting the collar on each time your not frantically trying to spear one hole, several holes are easier to spear on a wiggly dog than one!
Homemade belt/collars like these are not intended to hold large, strong or aggressive dogs, by no means. A large leather belt would need to be used for such dogs, but I believe your best bet would be to purchase a heavy duty dog collar if your looking for high restraining abilities.
Now that your collar is complete put it on your dog and make sure you can fit two fingers under the collar comfortably. This is a standard sizing method for any collar. If its too loose, punch a few more holes further down the strap. Make sure its not so loose that your dog can put his/her paw through it when playing or walking or get it into their mouth.
Don't forget to treat your doggy model to a bisquet for so patiently modeling the collar for you!
When you see a cute belt at the second hand store with lots of "bling" pick it up, it could be your next homemade dog collar!!


