"6 Tips for Beginning Photographers"

The Beauty of Using Available Light

Beginning Photographers - Quickly Improve Your Photography
I was just like you--a beginner in need of solid photography education. Let's begin making images viewers will truly appreciate and admire!
Following, is a brief copywriter31 photography bio, written, not to bore, but to lend credibility.
As corporate photographer throughout my 14 year tenure at the E.I. DuPont company, I studied photography at Brooks Institute in Santa Barbara, CA, and attended many workshops and seminars all addressing the finer points of capturing excellent images.
Tip #1 Know Your Camera
Many times, great picture-taking opportunities occur quickly and at the spur of the moment.
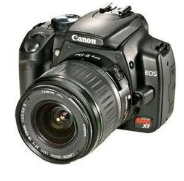
You will not have time to fiddle with your camera in attempts to get the right settings. If you own a digital SLR (Single Lens Reflex) with 2 or 3 interchangeable lenses, then you've a lot of homework ahead. These cameras offer huge numbers of features and you should know them.
I own a Canon EOS Rebel T3i, and I use an 18-55 zoom lens for most of my shooting. I have locked my settings where my subject is in focus, and the background blurred. The technical aspects of this setting include f stop and shutter speed... (Don't worry--That information will be as technical as this hub gets.)
Most beginners own a 'point and shoot' digital camera. Fine and good--ensure your P&S contains at least the ability to shoot an image with 14 megapixels, and ALWAYS use the highest megapixel setting for every picture. You may just capture an image you want to enlarge for wall hanging. Shooting with the maximum megapixels gives you that option.
If your budget allows, buy the largest available SD (Secure Digital) card for your camera. 64 gigabytes is enough memory to hold most any photographer shooting many high-megapixel images. After transferring your picture to a computer, erase the SD card for re-use.
Hot Idea! Make Personalized Greeting Cards

Tip #2 Lighting
ALWAYS shoot without flash unless your camera either doesn't give you that option, or it's not made for low light situations.
Available light lends itself to the creation of beautiful, natural pictures, and preserves depth of field and dimensionality.
Move your subject to an area containing natural sunlight or if indoors, find a soft lighting area. Invest in a tripod for extremely low light situations--this will eliminate blur caused by involuntary hand to camera movement.
The best times for outdoor lighting are sunup and sundown. These times provide beautiful, warm lighting, especially good for portrait photography. Always be alert for that special lighting only mother nature provides and your images will reflect her beauty.
Unless absolutely necessary, never, never, never use flash!
Amazing results from available light. Shot in my living room.


Hot Tip!
Can't afford Photoshop? Check out a program from Serif titled Photoplus X5. This program does most everything Photoshop does and the learning curve is low. The program sells for around $60, and is well worth the price: In fact, considering all the work this software program provides, EVERY beginning photographer should buy it.
Tip #3 Up,Up, Up--Close, Close, Close
Always go for the tight shot.
Either move yourself closer to your subject or make use of your zoom. As a general rule, portrait photography calls for vertical positioning of your camera, thereby capturing the entire body; scenic photography calls for a horizontal camera angle, also known as landscape mode.
This tip is not necessary if you are using all 14 megapixels for the shot ONLY if you plan to use an image manipulation software program like Photoshop or Serif. The large megapixel image can be cropped and enlarged within Photoshop with no loss of picture quality.
The close-up captures all the character of your subject and makes for an appealing image.
The Original Photograph Before Editing

Cropped and Color-Corrected in Photoshop

Tip #4 Candid Camera
In the 1960s, Allen Funt produced a great TV program titled "Candid Camera." The program caught people being themselves--totally oblivious to the hidden cameras capturing their funny moments.
When you attend family gatherings, parties with your friends, etc., blend in with the crowd and anticipate special moments when people will react to the intense human interaction and shoot candidly.
Capture your subjects in mid-laugh, for example, or maybe shoot while your subject is telling a story while his/her arms and body are animated. You are attempting to capture that person's true personality, and you will never achieve that goal if you 'stage' a scene.
Use this method often for amazing results.

Tip #5 Body Language for Kids
To get great results when shooting kids, you must position your body to be on their level.
Get used to lying on the floor, bending or stooping so the camera is keyed on their eye level. Imagine the lack of impact the picture on the right would have delivered if I simply stood straight and pointed the camera downward. The wonderful expressions I was able to capture would have been totally lost.
BTW, I used available light for this picture and though I did arrange them, this image did show interesting body language with nice smiles. I shot at random, capturing 7 images never alerting the boys when I was going to pull the trigger.
Remember: For memorable kid photography, the floor is your strongest ally.

Tip #6 Look Beyond Your Subject
Large objects seemingly growing from a subject's head ruin the image. Always check your background to avoid this error, and move yourself or the subject away from that blossoming light pole, or a tree planted squarely inside his/her head.
There may be times when you must press the shutter button quickly with no regard or time to avoid ill-positioned background objects. Go ahead and take the shot and remove it in Photoshop, or another similar program.


