- HubPages»
- Arts and Design»
- Graphic Art & Design»
- Design Software
17 Quick Photoshop Tips and Tricks for Beginners

Photoshop Tips and Tricks
Being the groundbreaking revolution in the realm of raster graphics editing, Photoshop is a name we all are acquainted with. Regularly, millions of designers and photographers from around the world use Adobe Photoshop to transform their vague ideas into stunning images. For those who want to make the task of everyday edits possible with ease, this tool is like a magic wand. Though beginners may find the tool a bit complex at start due to having infinite functions, it is not a rocket science to have mastery in. If you are seeking ways to master Photoshop, then no need to worry anymore as we’ve summed up some easy and useful Photoshop tips and tricks to assist you. Walk through the tutorial to learn more.
1. Save Files Instantly
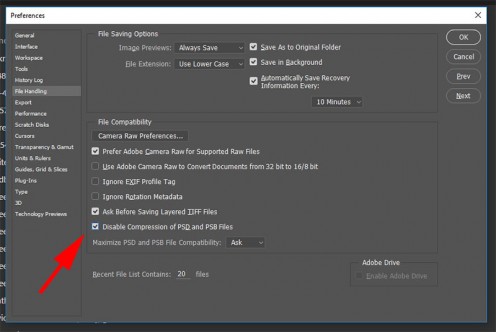
Photoshop demands your patience when comes to saving files as it takes time to compress files. If you don’t have enough time and is not interested to put your patience at test, then you can turn compression off to make the files save faster. To do so, all you need to do is just navigate to Preferences > File Handling and then check the box next to Disable Compression of PSD and PSB Files.
Bonus tip: Disabling compression will make your files take more space on disk. So before disabling it, just think a bit of it.
2. Rotate the Canvas Without Touching the Photo
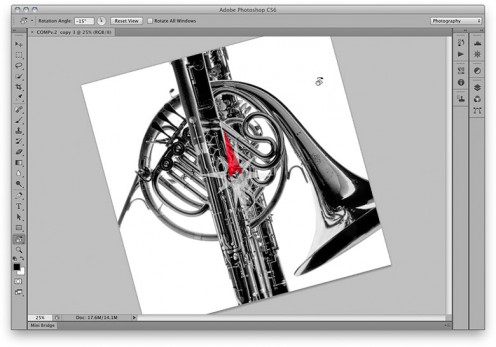
Wanna edit any image by following a different approach? This Photoshop tip will help you. Using this trick you can edit any of your images from different angle even without rotating. To make the trick a success, you need to click on Rotate View Tool, which can be found in the Hand Tool option. Next, click and drag the photo you want to edit for rotating the canvas. Once done, hit the “Display Reset” button resting in the Option Bar.
3. Edit Multiple Text Layers Simultaneously
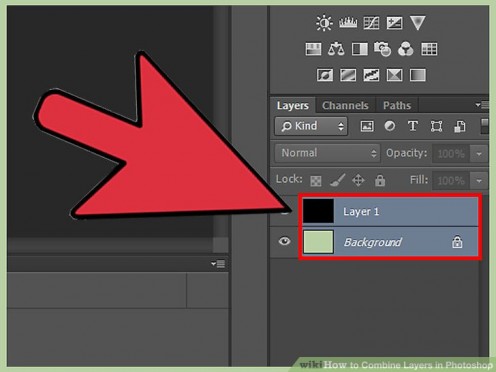
Editing multiple text layers for same changes is not a hassle anymore. You can, now, edit multiple text layers at once. For this: simply, hard press Ctrl (or Cmd on Mac) and select the text layer you want to change from the Layers window all together.
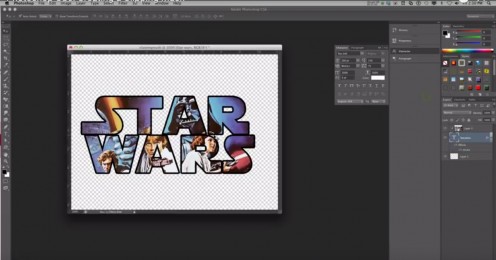
4. Learn to Clip An Image to a Text
A stunning professional-looking design isn’t complete without text-image compilation effect. To do so, here’s the other Photoshop tip. Just drag and drop/import a background image layer over a text layer, and head towards the Layers Panel, next press the Alt along with clicking on the line between these two layers. Following this will make the process of clipping the selected image to the text a success in a matter of seconds.
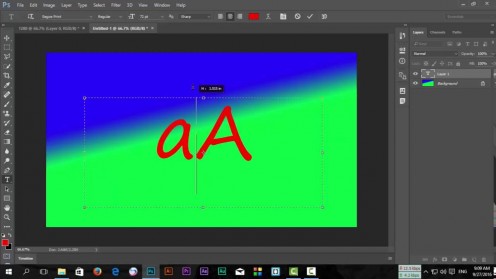
5. Add Backgrounds as You Fond
Tired of watching the default dull grey background? If yes, why not to replace it with something that dazzles you. Simply, choose the background layer you want and head towards the Paint Bucket tool in the toolbar. Now, shift + left click over the background area for filling it with the colour that you like most.
6. Interactive Zooming
The Interactive zooming feature is meant to target the exact spot where your mouse cursor currently is. By using this feature you can easily navigate through an image. How to do it? Simply, take the cursor on that spot and hold Cmd/Ctrl + Space and drag left to zoom in. in order to zoom out, drag right.
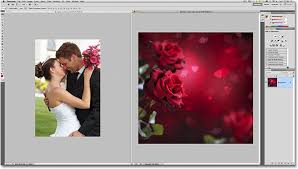
7. Drag Selections between Multiple Tabs
Dragging an object between different tabs is the basic trick every Photoshop user must know. All you need to do is use the Move tool to select the object layer from the first image and drag it to the other tab. Once you see the object in the second tab, lift your finger off the mouse.
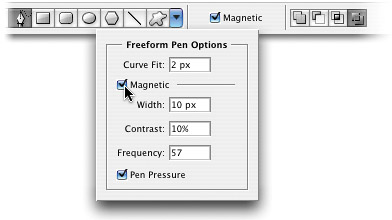
8. Use Magnetic Pen Tool
Experts at Photoshop know how useful The Freeform Pen tool offered by Photoshop is for them. This tool is a type of hybrid Lasso and Pen Tool which creates an outline following your mouse cursor. Once you are finished making selections, the tool automatically adds anchor points, curves, and lines for that path.
Making it more interesting and easy-to-use, Photoshop allows you to turn this tool into a Magnetic Pen. All you need to do is head to the toolbar and check the “Magnetic” option to get accurate paths drawn around an object.
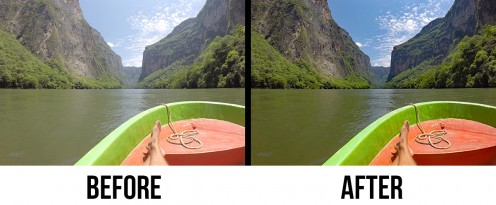
9. Dehaze Landscape Pictures
This feature has been added to the latest Photoshop versions. Dehazing an image clears out the fog and haze from landscape images. To get the effect done, open Filters > Camera Raw Filter > Effects and click on the Dehaze slider.
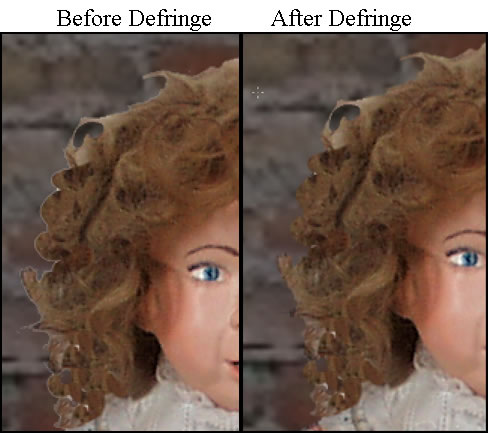
10. Defringe Cut-out Objects
This Photoshop trick is one of the most desired features for not only the experts but the beginners too. Before going further on how to use this trick, it’s better to know what we mean by fringes in the first place. Fringes are the colored outline of pixels around an image when you cut and paste it to another layer. This outline (also called edge halo) interrupts the flawlessness of the image, giving it a poorly-edited effect. So, it’s better to get rid of it if you want to master the Photoshop art.
How to do it? Let’s check out. Select your desired object and delete its background. Next, head to Layer > Matting > Defringe and enter a value in pixels.
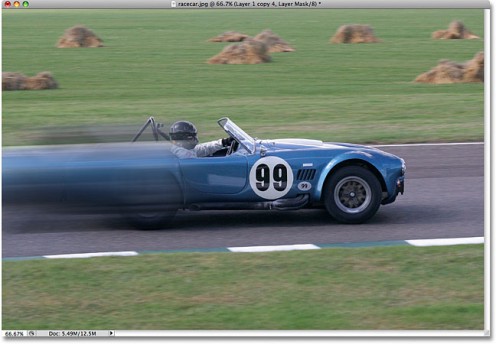
11. Create Realistic Motion Blur Effect
The motion effect is another effect you won’t find in the older versions of Photoshop. By using this feature you can add motion to still images. So, in order to give your BMW picture a swift, motion effect, do as follows:
• Select a layer and create its duplicate layer
• Now, select the top layer and head to Filters > Blur > Motion Blur. Choose a strength and angle of your preference
• In case your image is bright, reduce its opacity
• Now, head to the toolbar and select Eraser Tool, set its flow to nearly 35% and begin erasing the blurred image layer from front to back
12. Export Individual Layers Instantaneously
Photoshop offers multiple options when it comes to exporting layers. However, there’s a catch; these all options work only after you save the file. Don’t worry though! In case you want to export an individual layer without saving it, simply do as described: right-click on the Layers window and choose Quick Export from the context menu.
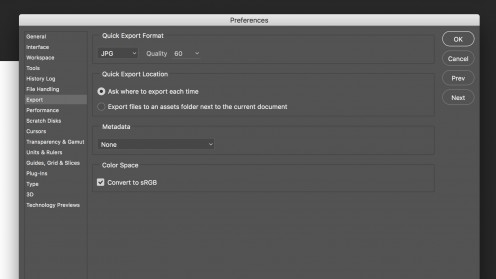
Note: Your edited layer is exported as PNG by default. If you want to modify the Quick Export Preferences, go to Preference > Export.
13. Make Any Image a Brush
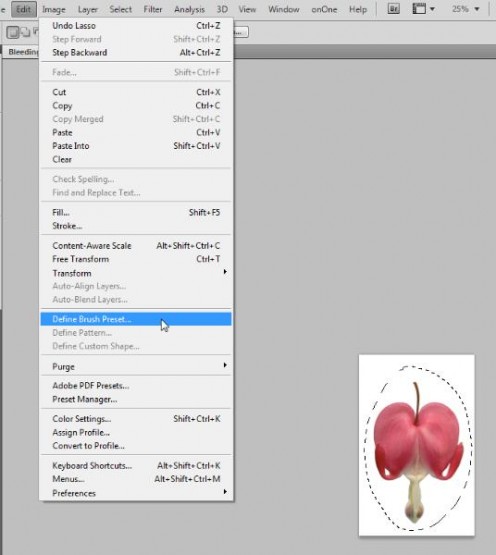
Photoshop offers many brushes of fancy designs and patterns, but as you start depending on the software, you will find that these conventional brushes are not enough. The good news is you can make your own custom brush using your favourite image, logo, vector and more. To do so, select the image, go to Edit menu and select Define Brush Preset. Now, give your brush a name and click Ok.
14. Get More Undos
This is one of most chosen Photoshop tips and tricks. You may know that CTRL +Z only helps you undo the last action you performed in the application, but to get more undos you need to find a way. That’s where Alt helps. Simply hold down Alt + Ctrl/Cmd while pressing down Z as per your need.

15. Use Essential Keyboard Shortcuts
There are plenty of Shortcuts that can prove helpful while using Photoshop
- Cmd/Ctrl+Shift+Alt+E – It helps in merging a copy of all Layers
- Cmd/Ctrl+J - It duplicates a selection or layer
- Cmd/Ctrl+T – This helps in transforming a layer
- Cmd/Ctrl+E – Merge various highlighted layers using this shortcut
- Cmd/Ctrl+] – It helps in bringing layers forward
- Cmd/Ctrl+[ - This shortcut helps in sending layer back
- Cmd/Ctrl+Shift+[ - Using this shortcut one can send layer to bottom of stack
- Cmd/Ctrl+Shift+] – It helps in bringing layer to bottom of stack
- Cmd/Ctrl+L – Bring up levels box using this keyboard shortcut
- Cmd/Ctrl+T - This opens Free Transform tool
- Cmd/Ctrl+M – It helps in opening curves
- Cmd/Ctrl+B – Edit Color Balance with the help of this shortcut
- Cmd/Ctrl+Opt+G – It creates clipping mask
- Cmd/Ctrl+0 - It helps in fitting on screen
16. Paste in Exact Place
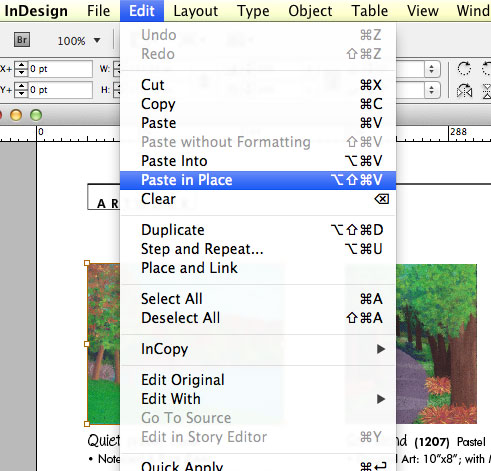
When an object is pasted into a new layer, it automatically drops in the centre. Happening this might irritate you as it may take some of your time to fit the object at your desired place. Using this Photoshop tip you can save yourself from this hassle. All you need to do is, just make use of the Shift key while pasting the object for retaining its original position.
17. Quickly Walk Through the Images
Moving swiftly around your images caters your workflow with enhanced speed. By making use of this Photoshop trick, you can easily check all the open images faster than ever before. For zooming in and out, simply press Cmd/Ctrl along with (+) plus or (-) Minus as per your need. Besides, if you want to make use of the Hand tool then this can be done holding the Spacebar key as well as by dragging around the photo.
For a beginner, the aforementioned tips and tricks are quite enough to edit any image and get started with this amazing photo-editing tool. After having mastery in all these tips and tricks, you can think of digging deep in more complex and comprehensive images for crafting professional images.
In a Nutshell!
This post covers all the tips and tricks one needs to master Photoshop. If still you're not able to make the design you want, using the tool, then why not to get the impression of your brand or something you need from an expert designer. Choosing the best one is a difficult task, bank on http://www.softcruxsolutions.com for extraordinary, efficient and reliable IT solutions the way you fancy.