A Guide to Jewellery Making Tools
There is a wide variety of tools available to use when making handmade jewellery. For some types of tool there are also many sub-types and these can be general purpose or intended for more specialised use. This large variety can seem overwhelming and confusing to someone new to jewellery making or make it hard to see where to start. When first starting out making jewellery it can be tempting to buy many tools at the start just because they are available. However this is likely to lead to unnecessary spending and owning tools that do not end up being used. This may be because they do not fit the techniques you choose to work with or because you have a preferred general purpose or even non jewellery making tool. One example of this is using nail clippers as cutters. This inexpensive item is an accurate and easy method to cut thinner diameter wires and nylon threads. Knowing the types of tools that are available and which are most suitable for your purpose can make a difference to not only the quality of the finished jewellery but also the time required and ease of creating it.
Different jewellery making techniques will often require different types of tools. Some tools may have several applications or can be used in different ways whereas others do have a very specific use. In some cases it can be possible to utilise tools and other times used in other crafts or even around the house in jewellery making. For example mini sets of pliers can be found in some DIY shops at very reasonable prices.
It is worth buying the best quality tools you can afford as these are likely to have a longer lifespan, be more comfortable to use and more efficient. They are also more likely to be made and finished to a high standard, meaning that there will be no rough edges or mistakes in their formation. In some cases it can be important to only use the correct tool for a job. Cutting memory wire is one common example of this. Special memory wire cutters are stronger and so better suited to the job of cutting this tough material without being damaged.
Pliers
Pliers have many uses within jewellery making including shaping, bending, gripping and strengthening wire. They can also be used to open and close jump rings, head pins and other components. Pliers are available in many variations, some of which have a variety of uses and some which have been designed for a more specific purpose. Pliers that have a serrated jaw are best avoided as they will scratch or damage the surface of wire and components. In some cases this can create a rough and even sharp finish which may not be easily visible. Only once the jewellery is worn will be rough surface become apparent and then it may be very difficult or impossible to fix.
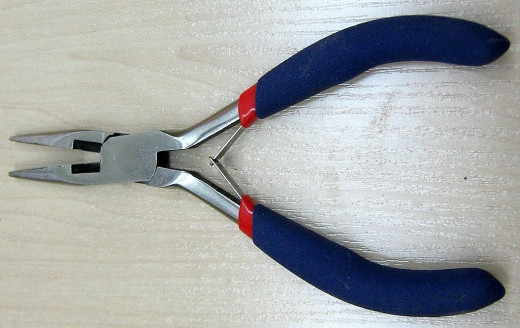
Chain nosed pliers – These have a flat smooth jaw and are used for gripping, holding, bending or shaping wire.
Round nosed pliers – Round nosed pliers can be used to shape wire and create loops, curves and when making your own eyepins, clasps and ear wires. Round nose pliers can also be used to hold and grip wire.
Flat nosed pliers – These are similar to chain nosed pliers but are larger. They are useful for straightening wire and for working with thicker gauges of wire.
Half round pliers – These pliers are useful for shaping wire and creating ear wires.
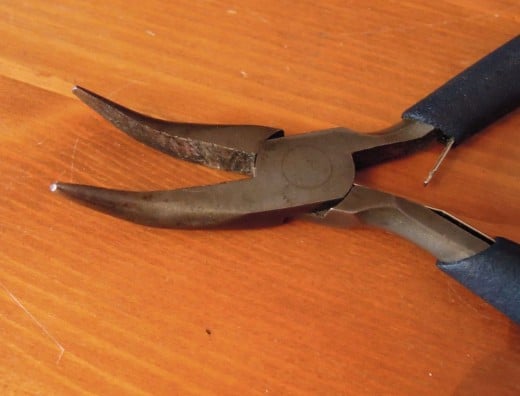
Bent nosed pliers – This style of pliers can be easier for working with a large amount of jump rings such as when creating chain maille designs. They need to have a smooth jaw so not to damage or mark the wire.
Nylon/acrylic jawed pliers – These are used for working with any delicate or coated wires. The plastic coating helps to prevent the surface of any wire being scratched or marked and can be replaced as needed. This type of plier can be used to shape, straighten, bend, gripe or hold wire. Check the jaws regularly for any damage to the surface that could cause any harm to your wire while working.
Crimping pliers – Crimping pliers are used to close metal crimps (also known as crimping beads).
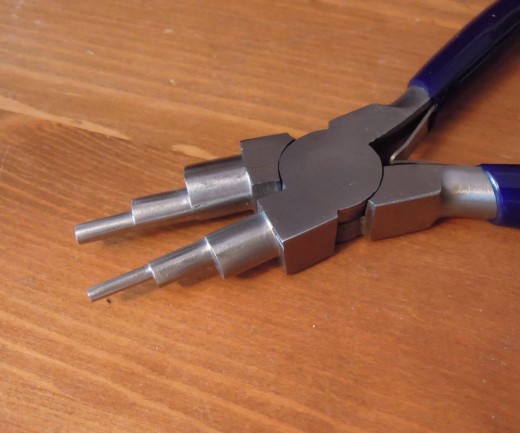
Three step pliers – These pliers have a one normal side to their jaw and the other has a stepped end of several sizes. This can be used when many identical loops or shaping’s need to be made. Three step pliers can also be used when making jump rings.
Wire Cutters
There are two main types of wire cutter that are used in jewellery making. These are known as side cutters and end cutters. They cover pretty much all wire cutting needs but when working with memory wire they are unlikely to be strong enough, or if they do cut may be damaged in the process.
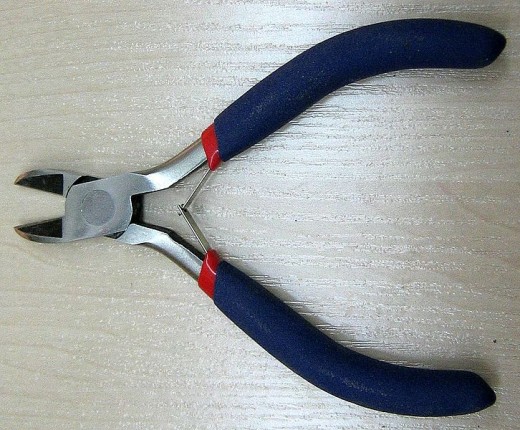
Side cutters – Side cutters are used for precision cutting and when you need to cut close to another component and leave a neat flush end.
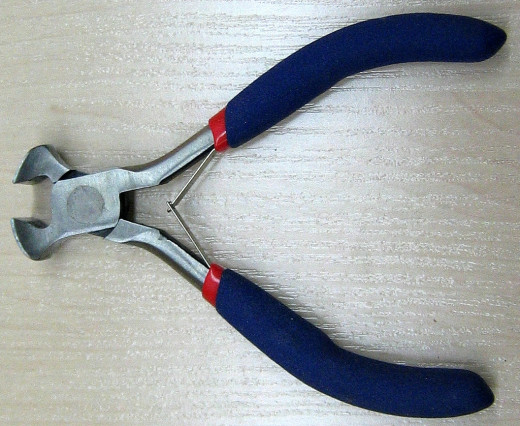
End cutters – End cutters are stronger than side cutters and can be used to cut much thicker gauges of wire. Some varieties can create a sloped end to the wire but this can be rectified by filing or if the wire is not too thick using side cutters to trim this edge off.
Memory wire cutters – Sometimes called memory wire shears, these are very strong and can be used to cut memory wire and thicker gauges of any other wires.
Other Tools
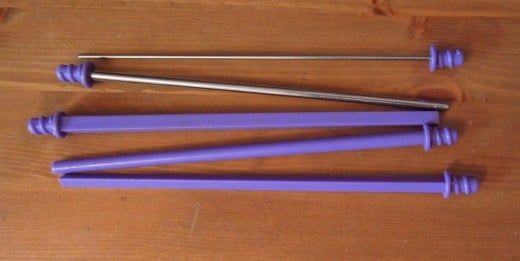
Mandrels – Mandrels are used to form shapes in wire and to create jump rings, ear wires and fasteners. Jewellery making mandrels can be bought in a variety of sizes and shapes. A mandrel tool featuring one stepped piece can also be bought. These are great for space saving and if you want to create many sized wire items. They also save the need to sort through a collect of individual mandrels to find the size you need.
Many household items such as pens and wooden spoon handles can be used as mandrels very effectively. Another option is to buy lengths of dowel from hobby, model or DIY shops and use those. The diameter can be written on these in marker pen for future reference.
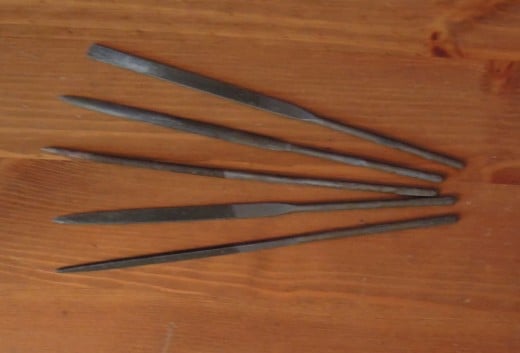
Files – Sets of mini files are available to buy in many craft or hobby shops. These can be used to file down the sharp edges on wire after it has been cut or to shape or smooth beads and other work such as those made from wood.
Bead reamer – This tool is used to increase the size of or smooth the inside of a beads hole. This should be done slowly and careful, especially with glass beads and others than are prone to breakage. A good technique is to start with a small tip and gradually increase the size until the hole is the size you need.
Scissors – Small, sharp pointed scissors can be useful for making clean cuts in thread and also enabling you to cut precisely and close to your work with less risk of damaging it.
Bead stoppers – These are small spring like items that grip onto thread and stop beads from dropping of the end. Bulldog clips make a good substitute and also allow you to attach the thread to another surface. This can be useful when working with long lengths of thread or with threads that are very fine.
Lighter – A standard household lighter can be used to burn away the ends of many thread types or to seal the ends of nylon cords or ribbon to stop them from fraying. Do not hold the lighter close to the item as this can cause it to burn and be marked. Gentle heat will be enough to achieve the desired results.
Nail cutters – This inexpensive item can be used to cut smaller gauges of wire effectively and are good at getting into spaces and easy to use safety. The larger types work better, are easier to hold and last longer. Over time the wire will mark the cutting surface and the cutters will need to be replaced.
Clear nail varnish – Clear or coloured nail varnish can be used to seal the ends of threads such as hemp and waxed cord. This technique can help to stop the cord fraying, either during the time you are working with them or when the finished item is being worn. This technique can be particularly useful when you need to thread a lot of beads onto fibre based cords such as in macramé. These cords tend to start to fray if the ends are pushed through more than a few beads but the nail varnish creates a solid sealed end (like that of a shoe lace) that prevents this and also makes the threading process easier.
Wig-Jig – This tool is very useful if you do a lot of wire work as it makes creating shapes in wire easier and ensures that they will always be the same. The jig consists of a plastic board covered in regularly spaces holes. Metal pegs can be placed in these holes in any form you wish and then the wire is wrapped around them. A wig-jig can make creating consistent wire shapes, clasps, ear wire and connectors easier and faster. There are several types of jig each with a different hole layout and spacing to allow for different design types. A spiral maker attachment can also be purchased to create wire spirals with ease and consistency.
Hammer and anvil – These can be used to add texture of flatten wire. Flattening wire can be used to add an addition design element to a piece of jewellery and also strengthens it. The hammer should have a flat end that is free from damage or other imperfections as these may transfer on to your wire. Small clock makers’ hammers can also be bought for working on small or delicate pieces.
© 2013 Claire

