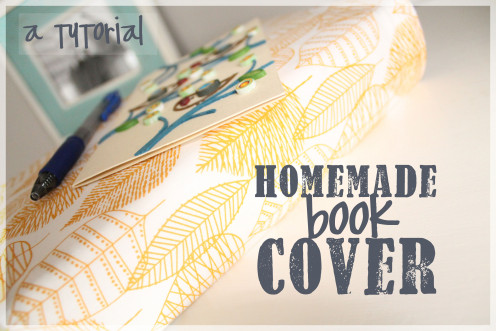
A Tutorial: How to make a Homemade Book Cover

Homemade Book Cover
What is your favorite leisure reading material?
Creating.
Are you looking to spruce up your journal? Do you want to add a little life to your boring textbook cover? How about adding some color to the outside of your Bible?
Maybe it's just me, but making something beautiful is challenging and highly satisfying. Even the completely unnecessary fun changes are rewarding. I didn't need a new cover for my new study Bible, but there is something a bit fun and whimsy about a pretty cover. This was a simple project that I was able to complete in less than an hour.
Do you have a favorite book that could use some sprucing up? I hope you find this tutorial useful.
Choosing fabric.
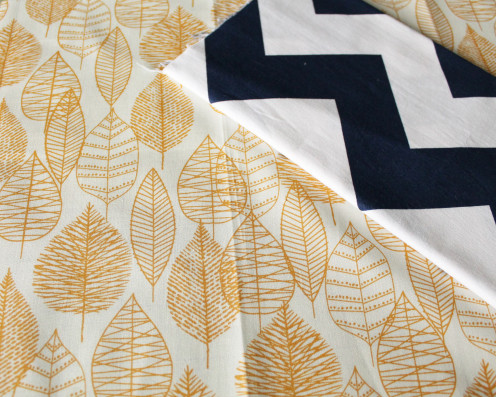
Step #1: Choosing fabric.
Perusing fabrics has become a favorite way of winding down for me in the evenings. I am not quite sure when this started to happen, but I find all the different colors and patterns fascinating. I have finally built a small lovely stash. I am learning about color combinations and learning about what I like and do not like together. Sometimes I surprise myself.
Today I chose Bark and Branch Line Leaf in Gold by Eloise Renouf for the outside of my book cover. The flaps inside the cover are Riley Blake's Medium Chevron in Navy.
Feel free to be creative with your cover. Quilt a cover. Applique a bird silhouette. Pin a fabric flower on top.
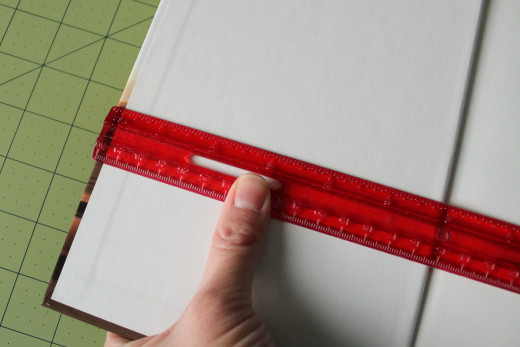
Tracing around your book.
Click thumbnail to view full-size


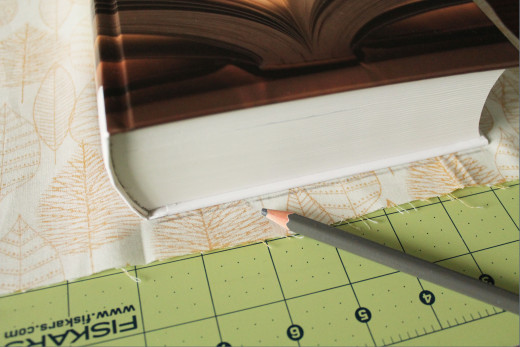
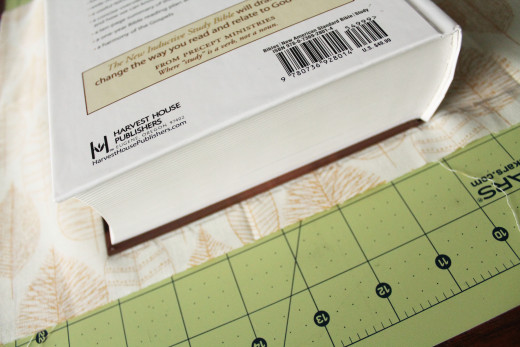
Step #2: Tracing around your book.
This project is adaptable for almost any book you have. Find a piece of fabric that is at least a half of an inch larger than the outside of your book. Using a fabric pencil, you need to trace around your book.
When tracing around your book, close your book and lay it flat on its side. Trace around one side. Next, set your book up on the binding while you continue tracing. Finally, lay your book flat on the opposite side and finish tracing around your book. Check out the pictures if I confused you.
You cannot just open up your book, lay it flat, and trace around it. Your cover will end up being too small when you close your book.
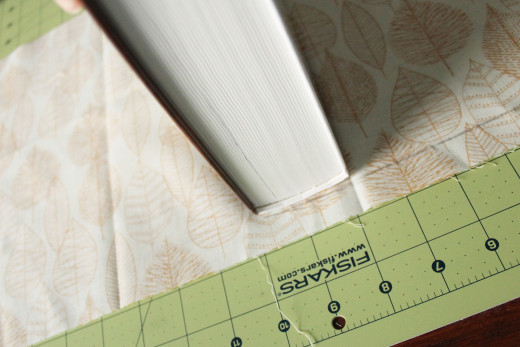
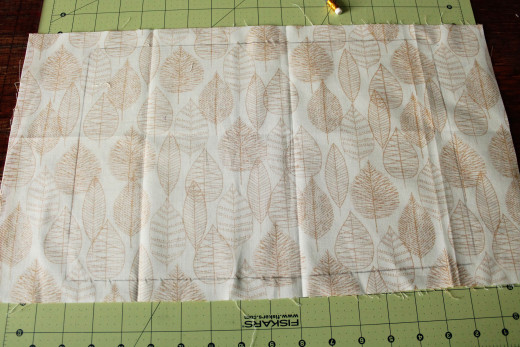
Trimming your fabric.
Click thumbnail to view full-size


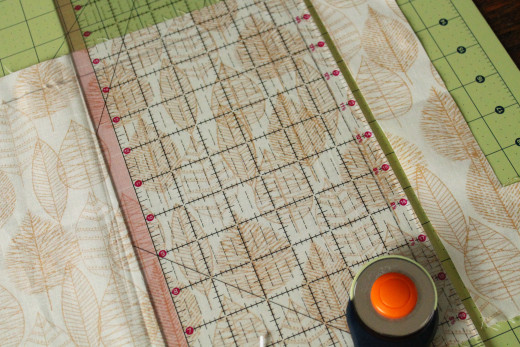
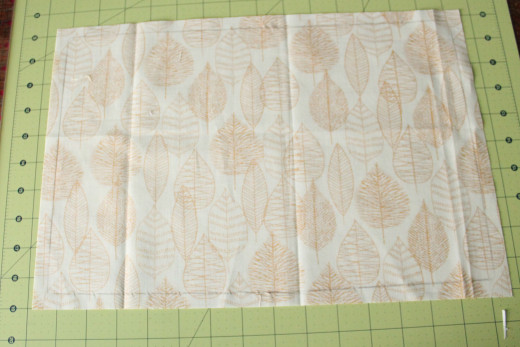
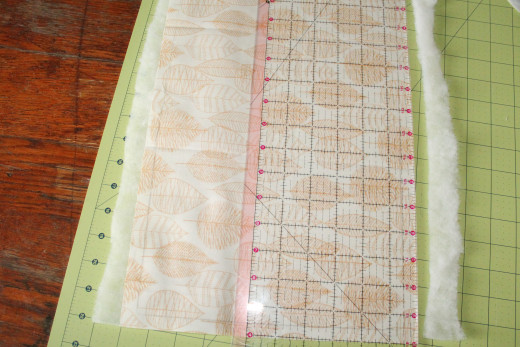
Step #3: Trimming your fabric.
Using your pencil line as a guide, trim around your fabric leaving a half of an inch seam allowance. In other words, trim your fabric down until it is a half of an inch larger than your traced book lines. I use a Fiskars rotary cutter and ruler to ensure a good accurate cut.
Once you have your fabric trimmed, now is a good time to cut a piece of batting the same size. The batting is not necessary if you don't have any on hand, or if you prefer not to have a little extra cushion. The book I am covering is a hard back, and I would like a little cushion and stability.
Instead of remeasuring your book to cut your batting, I recommend just laying your trimmed fabric on top of the batting. Use your fabric as a template and carefully cut around it while it sits on top of your batting.
Cutting the sleeves of the cover.
Click thumbnail to view full-size


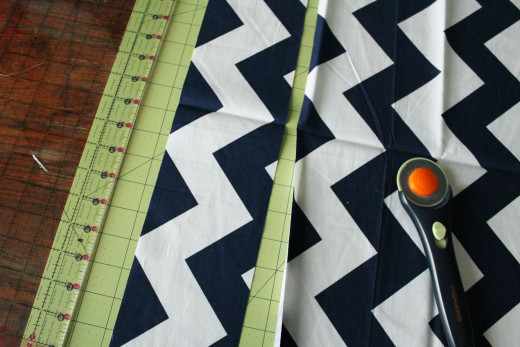
Step #4: Cutting the sleeves of the book cover.
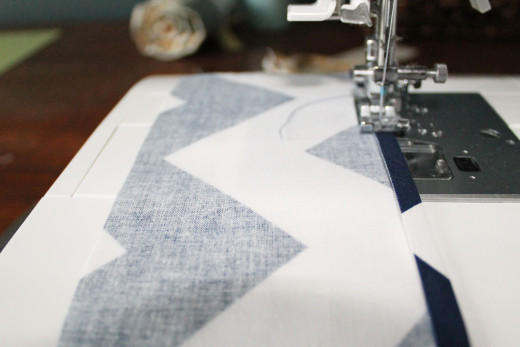
Next up is cutting and hemming the sleeves of the book cover. These are the flaps that go on the inside of the front and the back of the book to hold the cover in place.
First, measure the width of your book cover. Divide that number in two and add a quarter of an inch for a finished edge. For example, my book cover is six inches wide. I cut two pieces of fabric that were 3 1/4 inches wide and approximately 10 inches tall (the height of my book plus 1/2 inch). Cut the flap the same height as the outside cover that you just trimmed.
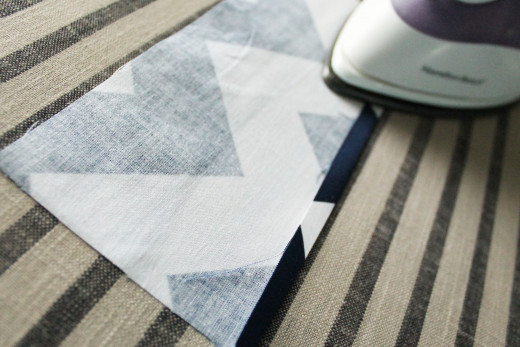
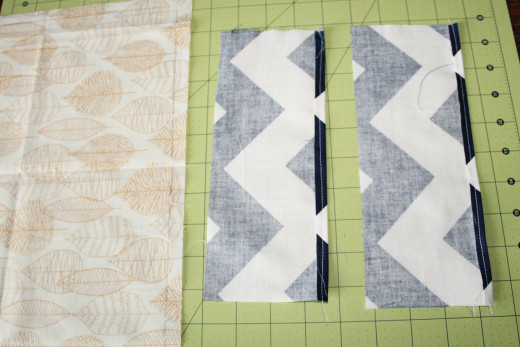
Cut two pieces of fabric the same size for the front and back of the book. Once you have cut the fabric, take one of the pieces and fold over the long edge about a quarter of an inch. Iron that crease and sew a simple stitch to secure the fold. Do the same for the other flap.
You should be left with two pieces of fabric for the sleeves of the book cover. Each piece should have one long finished edge.
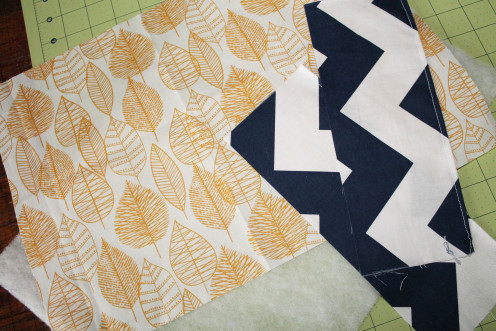
So this is what we have now:
- one large piece of fabric for the cover of your book.
- two smaller pieces of fabric for the sleeves.
- one piece of batting to accompany the larger piece of fabric.
Assembling your book cover.
Click thumbnail to view full-size


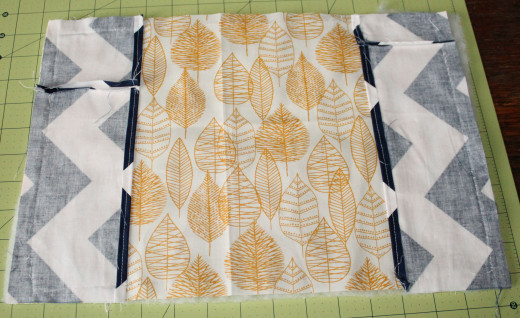
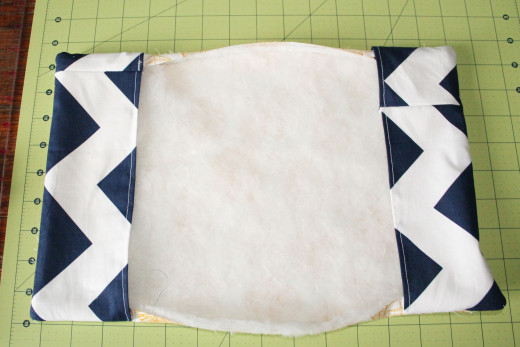
Step #5: Assembling your book cover.
Time for the fun part! Stack all your fabric together on the table. Put your batting down first. Place your large piece of fabric for the outside of the cover next. Lay this FACING UP. Next lay each sleeve FACE DOWN. (Check out the corresponding picture to double check if you'd like.)
If you don't layer your fabric correctly, you will end up like me and sew everything incorrectly. Then you get practice ripping out seams. Oh well. Tis life as I learn how to sew.
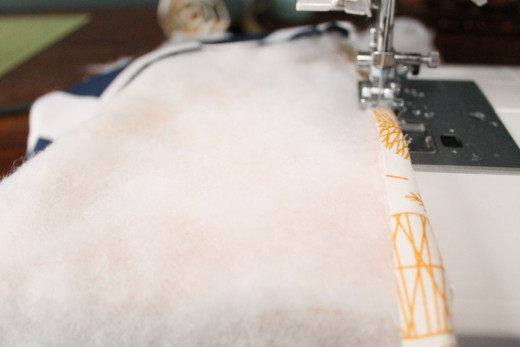
Pin around your fabric sandwich.
Sew around the entire perimeter using a quarter of an inch seam allowance. If you remember, at the beginning of this tutorial, I instructed you to cut a half inch around the perimeter of your book outline. I recommend sewing a quarter of an inch seam allowance at this point because of some of the variables. The batting takes up some room, and depending on how thick your book cover is, you may have some trouble knowing the exact seam allowance to sew.
Personally, I like to leave a little room for error. If you slip your book cover on, and it fits too loosely, sew around the perimeter one more time and it will fit a bit more snug.
Does that make sense?
Once you are finished sewing, flip your book cover right side out.
Finishing the raw edges.
Click thumbnail to view full-size


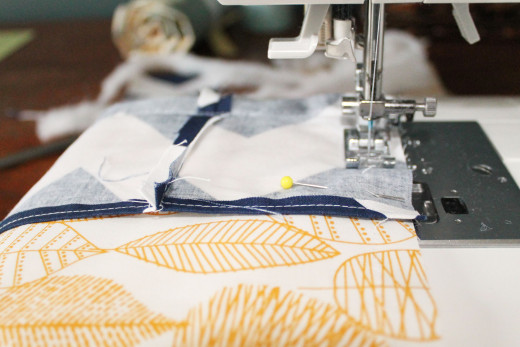
Step #6: Finishing the raw edges.
You turned your book cover right side out, and now you will notice the top and bottom edges of your book cover are still unfinished. Those edges have a natural inclination to turn inward. Using the crease already forming, iron down those edges and sew a quick stitch to secure the crease.
I started sewing right where my sleeve ended and stopped sewing where the second sleeve began. I secured my stitch at both ends. I did the same on the bottom of the book cover.
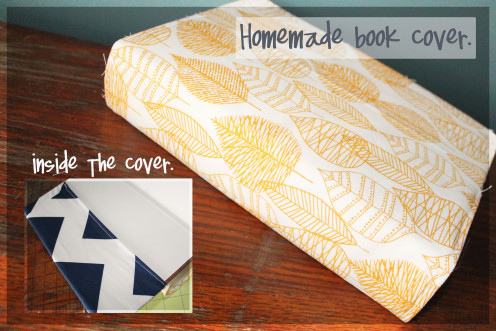
Time to put your lovely book cover on your book!
Handmade Book Cover


")


