- HubPages»
- Arts and Design»
- Photography»
- Photography Instruction & How-Tos
Beginner's Guide to Creating a Time-Lapse

Here is a Time-Lapse I have taken
Let's begin your journey to create your first Time-Lapse
Find a spot that you want to make a time-lapse. It can be any from clouds moving across your favorite landscape, waterfalls, oceans, rivers, lakes or a creek.
You will need a tripod for these, and you will need a shutter release to take the photos. Any shutter release will work. Here is a link to the one I own. https://www.amazon.com/Progo-Shutter-Release-Replacement-PowerShot/dp/B00A83H2XC/ref=sr_1_6?ie=UTF8&qid=1526619526&sr=8-6&keywords=canon+shutter+remote
If you have a different camera, search "Shutter Release Remote" for your type of camera. After you plug the remote, make sure you are in manual mode, and your camera is in continuous shooting. Then you can adjust the shutter, aperture, and iso to your preference. Make sure you turn off stability and auto-focus off. What I do is to use the auto-focus to get in focus, then I turn it off. Once you have done all of that, you're ready to take photos. Now to use the remote, push the button down and slide up to lock it in place. Let your camera take around 150-300 pictures. You can hold the remote if you want (I just slowly set let it hang down and just read up on some photography news). Once you have got the number of photos that you desire. Load them into a program you use to edit. I use Adobe Lightroom for my edits.
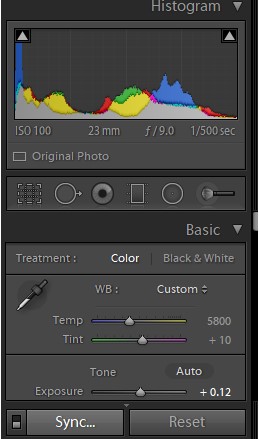
If you have Lightroom, You can edit the first photo and sync the rest of the pictures with it to make it all match.
To sync all the photos. Just click Ctrl+A on the first photo and then click sync. Here is a picture of the sync button
This window will then pop up.
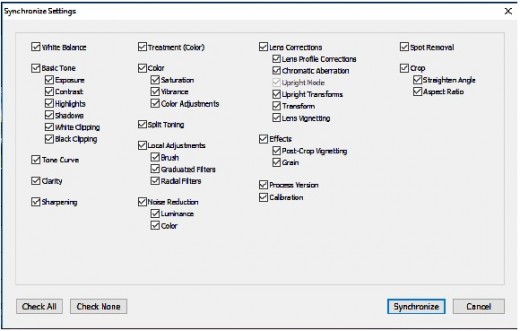
Click "Check All" then "Synchronize".
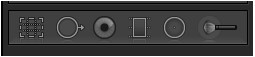
To make it a time-lapse you will need to crop it. To do that simply just click on the first icon below the histogram.
It looks like a square with a grid inside it.
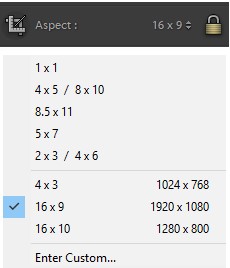
Once you click that icon. Click on Aspect, and change it to 16x9 1920 x 1080
After you have changed the Aspect, You will need to sync all the photos again. Just do ctrl+A and press Sync
and click on "Check All" back and then Synchronize
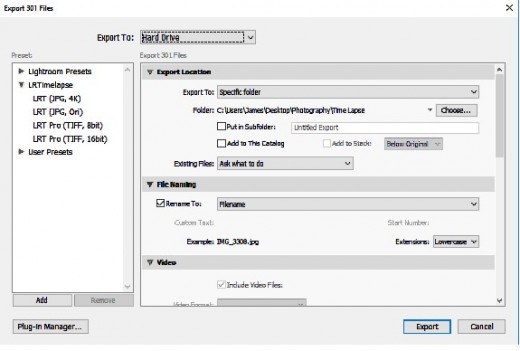
Once you have finished that, You can Export them by pressing ctrl+Shift+E, and you will get this pop-up
Just choose your folder you want it to export.
Import into the program LRTimeLapse. Here is a link to the program I use. https://lrtimelapse.com/download/
It's free! I got the LRTimelapse 5.0.6 the newest version.
You will also need Adobe DNG converter. Here is a link. https://supportdownloads.adobe.com/thankyou.jsp?ftpID=6321&fileID=6357
This is to make sure the LRTimeLapse will be able to read the files from your type of camera.
To import your photos. Just look for the folder you have them in, in the bottom left box on the screen.
Then once you click on it will appear in the main box on the right.
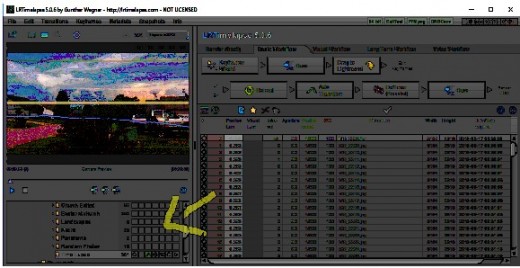
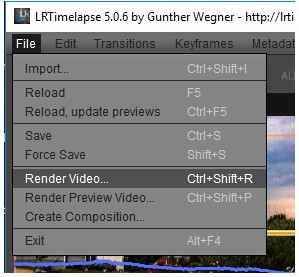
Then once you click on it. They will appear in the main box on the right. After they finish importing. Go to file and click on "Render Video"
Once you click that you will get a screen
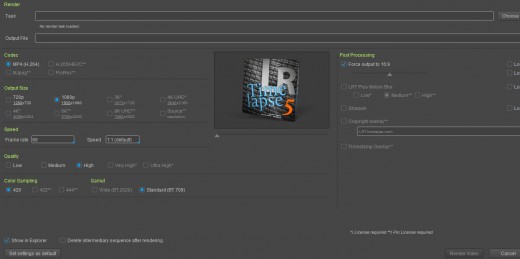
At the top under "Render Task" Choose the location, you want the file to go after it's finished.
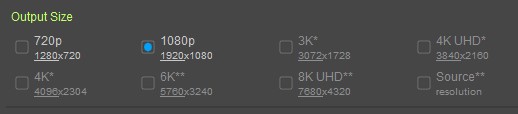
You can also put the time-lapse into 720p or 1080p under "Output Size" shown here
Then you can change the Frame rate and the speed you want for the time-lapse to be under "Speed" shown here.

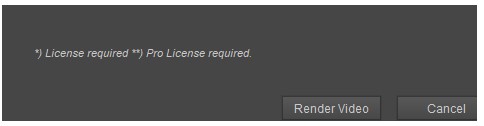
I've found that 1:1 (default) is perfect, and changing my frame rate to 30 made it a smoother time-lapse. You can change the speed and frame rate to your own preference. After that, you just click on "Render Video" in the bottom right-hand corner shown here
After the video is finished rendering. A screen will pop up with the file, so you can view it, and share it with the world!
I hope you've enjoyed this guide and found it helpful. Please leave me a comment below, telling me what you thought about this guide.


")


