Better Food Photography Tips for the Non-Professional Photographer

What is the Best Way to Take Food Pictures?
What is the best way to take food pictures that look like the ones in magazines? If hiring a professional is out of the question, you can still create superior food images with a little work, some advanced planning, and some common household items. Although quality equipment makes the shooting process easier and may improve your pictures, it also costs money. There are several substitutes for pro lighting equipment that work quite well.
Items you will Need
Camera:
Ideal: SLR camera w/ Image Stabilization lens.
Alternative: Anything you are comfortable with. 1st choice, any digital point and shoot.
And: A tripod, even a mini one.
Reflectors:
Ideal: Photo quality collapsible reflectors with stands (or an assistant to hold them.)
Improvise: White foam board, aluminum foil, mirrors, reflective gold wrapping paper. (At least a white foam board.)
And: Stiff cardboard pieces to wrap foil, etc. around.
*Note: If available, go to an art store for your foam boards, they usually have a selection. Buy a smaller poster size, about 20x30, and a larger 40x60 piece.
Main/Key Light:
Ideal: Natural light, large soft box or hot lamp with reflector and umbrella.
Improvise: An adjustable desk lamp, an outdoor work light, or common desk lamps.
Preparation
This is the step where you will set up the ‘stage’ for your shot. This may be as simple as placing the prepared food on the desired plate in front of nice window lighting. Or it could involve creating an entire mood that transports the onlooker to another place and time. The point is, set everything up just the way you want it before making a single image.
Depending on the food being photographed, preparation may include cooking/baking backups if something spoils, or preparing an ice bath for desserts, etc.
Evolution of my cupcake shot


 The angle gives the impression of 3 dimensions, but it's not the best.")

A Note on Food Preparation and Selection
Many pro photographers want their dishes undercooked. A lot of foods photograph better this way, including pastas, vegetables, and poultry. Overcooking saps vibrant colors from vegetables in particular. Use contrasting cooking methods as well as contrasting shapes and textures.
For example, grill chicken with boiled corn or steamed veggies. Or, grilled corn in the cob with bright vegetables sauteed in olive oil, this time roasting or broiling the chicken.
In addition, have a brush and cooking oil or melted butter on hand to make meats glisten. For pastries or desserts topped with frosting or whipped cream, you can keep the temperature low by sitting them in an ice bath. For extended periods of time, lightly cover and store in a freezer or refrigerator. If possible, lower the temperature in your shooting space as well.

 and placing the foam board behind and to the left of the frame, the picture comes alive.")
Lighting
Lighting can be tricky and for the amateur may seem time-consuming and difficult. This is why I use natural light and reflectors whenever possible. Unfortunately, this limits when I can shoot and what I can control, so reliable light sources are necessary.
Without professional equipment, you will need to choose a lamp to use as your main key light; the main lighting source. Photo retailers sell inexpensive hot light and reflector sets, but any lamp will suffice.
If your lamp isn’t giving off enough light, you can buy stronger bulbs. Keep in mind, these higher wattage bulbs can get hot quickly. Turn them off when not in use, and keep them a safe distance from perishable foods. It is also a good idea to use only metal shaded lamps when you choose a 150 watt or 200 watt bulb.
No matter what you use, a bare bulb shone directly on your subject will create harsh shadows and unmanageable highlights. This can be moderated by adjusting the distance of the light from the subject; you can also diffuse the light through a sheet, translucent white cloth or even wax paper or artist's vellum. Using soft white light bulbs is also helpful.
A very basic lighting setup involves placing the key light (or arranging the food in front of the key light) at the desired angle, and using a reflector on the opposite side to fill in the shadows. This is an easy setup to play with and can be adjusted with little effort. Small squares or rectangles of foil-wrapped cardboard will create textural highlights that bring the food to life. Start with one, experiment, and use more if you need to. It is common to see a professional food shoot using half a dozen mirrors or aluminum reflectors for this purpose.
***By small rectangles or squares I mean about half the size of a sheet of paper. This is functional for most dish-sized food photo shoots.
****When I say ‘arranging the food in front of the key light’ I don’t mean directly in front. A good rule is to start with the key light 45 degrees to the left of the food.


More on Preparation and Composition
Preparing for and composing the shot is a dynamic process. It is not unusual to try a dozen different arrangements, angles and compositions before you find one that works. This experimentation can be mitigated using sketches, rearranging the set before the shoot, and using stand-in items to test the lighting (anything of similar size and texture will do.)
When thinking about the shot, be sure to make a list of what you will do.
For example:
1.) Small depth of field leaving only part of food in focus.
2.) Focus on main food item in foreground and allow other items on table into out-of-focus background.
Get the idea? Make this list as a general guideline, and watch the wheels start turning.
On a final note, do not bring the food out until the set is 100 percent ready to go. Once the food is prepared, clean the plates, garnish, baste if necessary, and start shooting!
Don’t be afraid to try unusual ideas. Experiment with your lighting setup, your ‘stage set’ and your props. Try different angles, adjust and try again. Just be sure to follow a general roadmap or all of the preparation may go to waste.
More Food Photography Examples
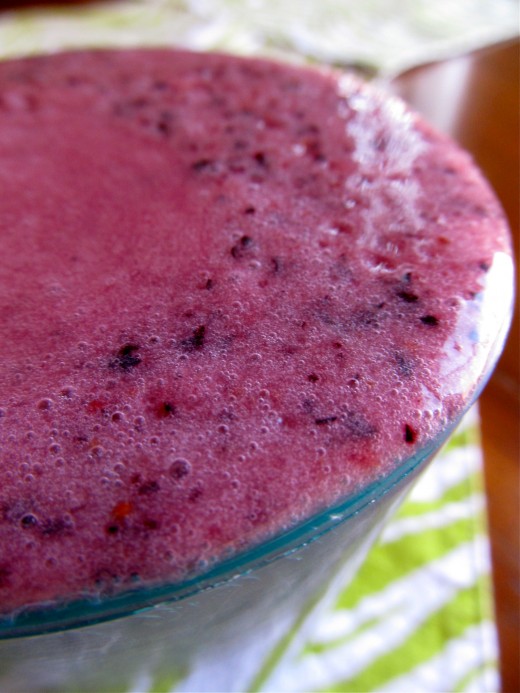
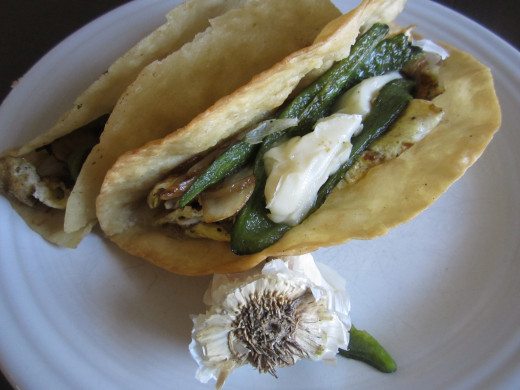
All of the following photographs were made with a digital point and shoot and adjustable window light (i.e. blinds!) A small white reflecting card was the only additional equipment.


For more references about food photography:
- Q&A: Food Photography Tips, Tricks and Techniques for Great Food Photos
Food Photography is hard because it requires skills with close-ups, lighting, focus, depth of field and the subtle use of shadows. This hub goes into all the details of food photography in depth. Grab a seat and settle in... - Food Photography by tedfarm
Some excellent tips on getting started making great photographs
- 7 Beginner Photography Tips To Make Your Photos Look Great
- Moving on from Rejection
Often rejection will cause us to give up on the project we are working on because we lose our confidence. Should we allow this to happen or not? - Camille Seaman Talks About Photo Workshops In Xinjiang, China
Camille Seaman will lead two photography workshops for Tours Abroad in Xinjiang, China, in 2012. In this hub she talks about her previous experiences in China and her plans for these two workshops. Inspirational, make time for this one!
Read this important hub about photo usage rights. Details how to find reusable photos in Google Images.
- Finding Free Images and Royalty Free Stock Photographs
Free images and Royalty Free Stock Photograph resources and the best methods for obtaining high quality free images for use with your blogs, including public domain images, and more.
Photo Centric Travel Hubs:
- Hawaii Kayaking- Kailua Bay offers a Travel Adventure for All Ages
A trip to Kailua Hawaii on the Windward side. This may be one of the best destinations in the world for all ages. - Watson Lake and the Granite Dells in Prescott, Arizona
Watson Lake in Prescott Arizona is a scenic reservoir surrounding by giant natural sculptures called the Granite Dells. If you live in or plan on visiting Arizona, this is a must see destination. - Deep in the Arizona Desert Just off the Highway
Pull off of the highway in the empty desert and drive down a dirt and gravel road to nowhere. You just might find a hidden treasure, an ancient monument, or some shotgun shells. - Arizona's Grand Canyon-The Bright Angel Trail with Kids
Hiking the Grand Canyon with kids. Absolutely! Follow our adventure on The Bright Angel Trail, a great place for first time canyon hikers. - Oahu Hawaii - A Perfect Day on the Windward Side
If you've been to O'ahu, Hawaii but missed out on the Windward side, you are missing out on a paradise of ancient proportions. Catch a slice of the beauty in this journey to the turquoise blue waters and lush green mountains hidden away from the bust - Arizona Desert Views-Strange and Beautiful Plants and Cacti in the Desert
There is more to the desert than scrub, rocks and dirt; but even these can be interesting in the right light. Take a journey with me and get a fresh look at everyday desert plant life.