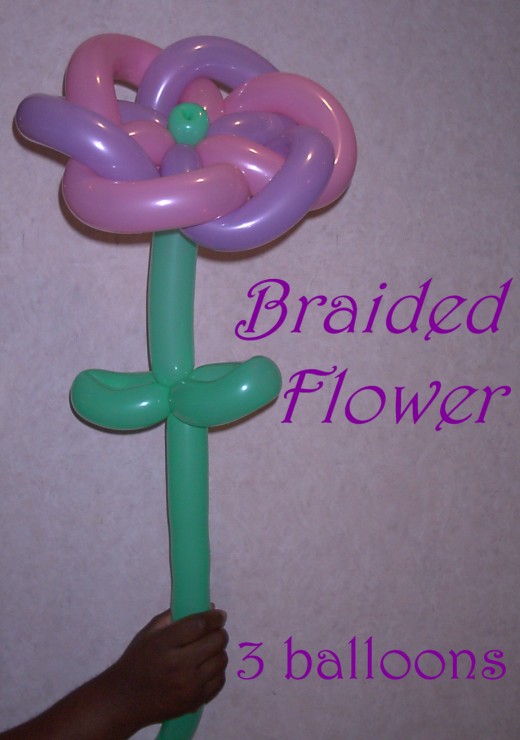
How to make a Balloon Braided Flower with Pedals

Dr. Andrew (doctor of balloonology) has been making balloons since 1981. He has made balloons for church, parties, restaurants, corporate functions, wedding receptions, and baby showers. . . all kinds of events.
Dr. Andrew knows how to entertain everyone, not only children but also adults of all ages and places in life. He especially loves convincing big burly men that they could use a Harley made out of balloons, or convicing teens that think they are too cool for balloons that it would be cool to get one.
Question for Balloon Entertainers
Do you avoid doing complicated balloons because it slows you down?

The Braided Flower.
I call this the braided flower even though it is not braided. It is more properly called inter-woven or interlaced flower. But I like the way the "braided flower" sounds. So, that is what it is called. I got the idea for this flower from the internet. I don’t remember where or who did it. So I cannot claim the design of it as my own. But I will show you how to do it the easiest way I know.
Blow up two different colored balloons. I like to use the opaque colors for this sculpture because it seems to be more durable for particular sculpture. Dusting your hands with baby powder before you start will help keep the thing from popping. You will blow them both up completely. But remember, before you tie them closed, let out some air. You need these balloons to be relaxed to reduce the loss of bubbles. You will want them to be different colors to make it easier to interleave the pedals properly.
Other Balloon Links by Dr. Andrew
- How to Make a Basic Flower Balloon
This is a great 1 balloon flower. It is good for those occasions where you need to mass produce balloons. It does not take long to make and is good looking. - Armor of God Balloon Skit
The Bible says that if we are Christians, we are engaged in warfare, spiritual warfare. Ephesians 6:10 says, "Finally, my brethren, be strong in the Lord, and in the power of his might. 11 Put on the whole armour of God, that ye may be able to stand - Andrew Grosjean's Web Site
- YouTube - andrewsballoons's Channel
My YouTube Balloon Channel


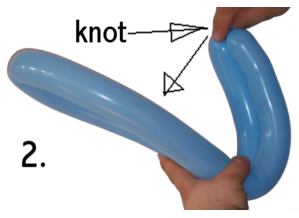
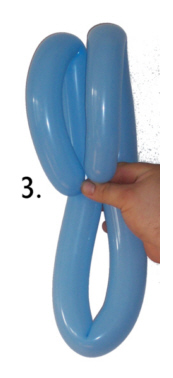
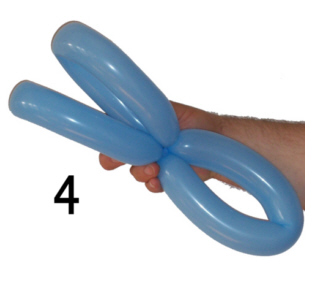
In 2. take the first balloon and pull it into halves. Grab the knot in one hand and pull it up to about halfway between you second hand and the other end of the balloon. This will divide the balloon into three pedals. When you have the three pedals equal in size (picture 3), twist that knot around the other two bubbles to make three pedals as shown in 4.
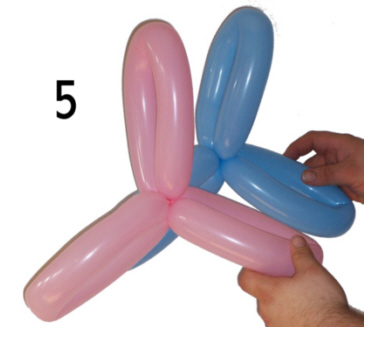
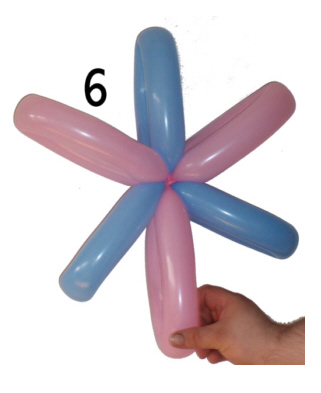
Follow the same procedure for the second balloon so that you have two balloons, each with three even size pedals, 6 pedals total. Then you take the two balloons and combine them at the centers. Arrange the pedals so that there are alternating colors as seen in 6.
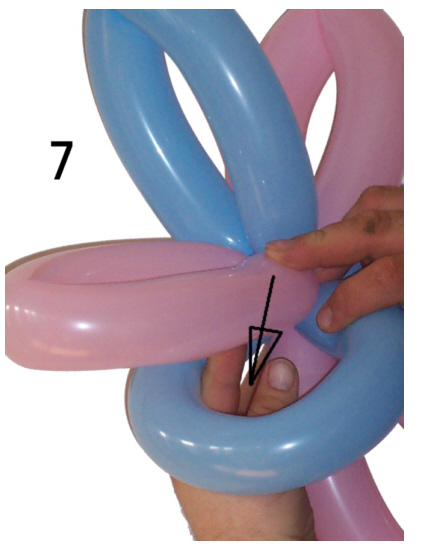
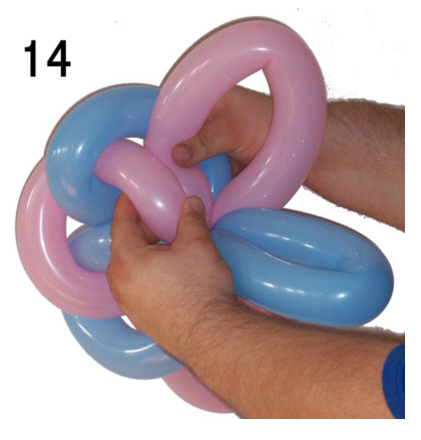
So far, so good. Next comes the hardest part. Interleving the pedals is the most challaging thing. Notice in 7, I took a blue pedal and open it up. Then I take one side of the pink pedal (next to it) and push the pink pedal down through the blue pedal.
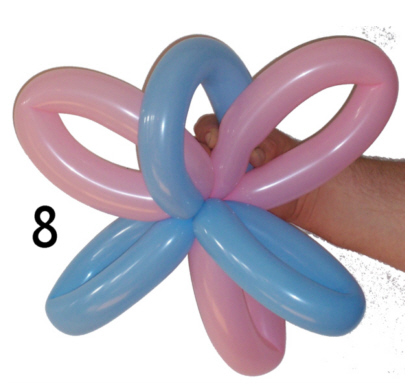
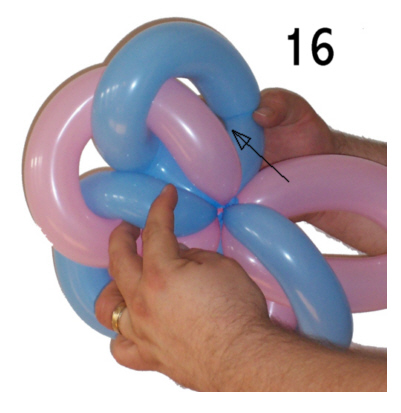
Then you will take a pink loop from the other side of the blue pedal and push it up on top of the first pink loop. You can see this in 8. When you start, you have blue and blue on each and pink on pink. After you are done interleaving them, that is what you will have again.
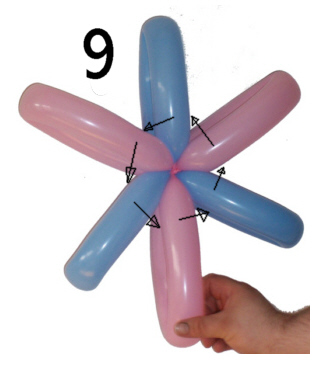
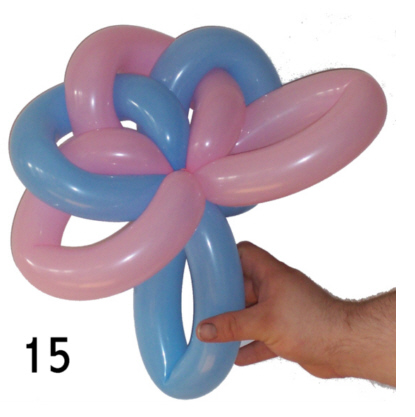
As seen in 9, the top of each pedal will go through the pedal to the left. But the bottom of each pedal will go through the pedal to the right. Watch the progression of the pictures as I demonstrate the interleaving process.
How to Make a 1 Balloon Simple Flower

Finishing up.
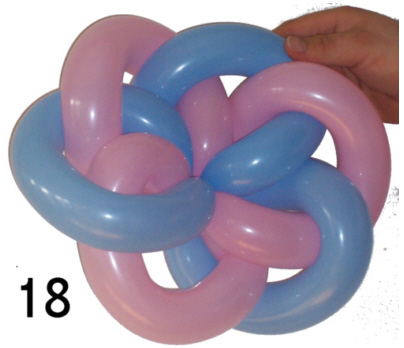
Once you get to the stage shown in picture 18, the hardest part is behind you. What you want to do next is make sure that all pedal sides are neatly stacked on each other. Make sure that everything is symmetrical.
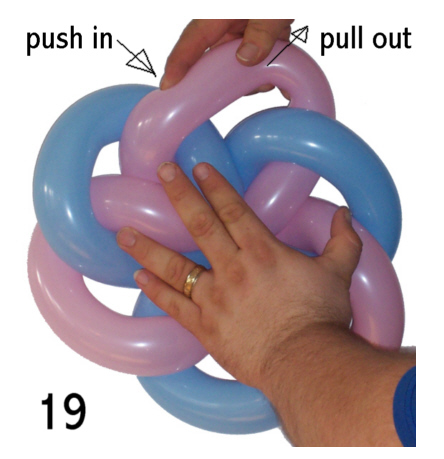
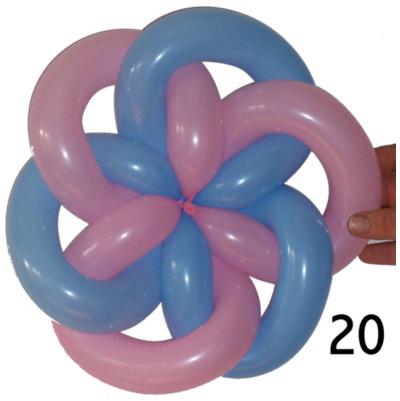
As shown in 19, you can take the lobes of each pedal and stretch it to give it a better look. You can push the side an index finger while you are pulling out the other side of the lobe. This will give uniformity and circularity to the flower top. Look at the finished product in 20.
Notice that at the center, all "spokes" if we can call them that, are equally spaced. The lobes are balanced so that the whole thing is like a big circle.
From here, you can use any style stem you want.
Once the top is done, I usually give the flower top a little toss and spin it in the air. It looks cool. This formation of the flower can also be used as a big skirt or dress for a princess or girl. You will probably want to push the pedals so that they are more in a cone formation. The way the pedals are in this picture show them basically flat for the flower top. It looks very pretty that way too.