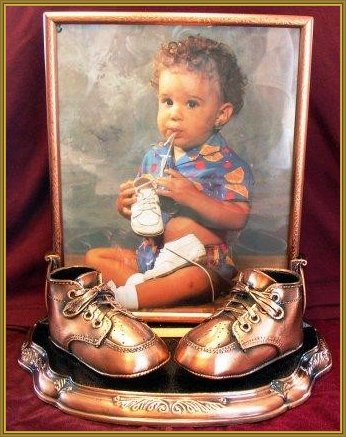
Bronzing Baby's First Shoes

Man has been using bronze ever since, well, the Bronze Age. It was used for a variety of purposes such as a building material making tools, weapons and armor. It also found a niche in sculptured art. In its infancy bronze was made out of copper and arsenic. Later it was found tin was easier to work with, made a better product and didn’t have the dangers associated with arsenic.
The earliest objects made with tin-alloy bronze date to the 4th millennium BC in what is now Iran and Iraq as well as some sites in China. Before the introduction of stainless steel, bronze was used in boat and ship fittings because of its resistance to corrosion by salt water. It’s still used in ship propellers and submerged bearings. It’s rumored someone recently even bronzed a cheeseburger!
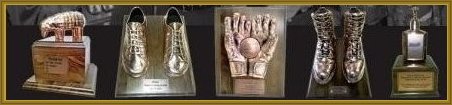
However, modern man has found yet another use for it…bronzing items representing treasured memories. Things like a baby’s first shoes, gloves, mitts, hats and other significant objects of importance. Bronzed items also make great gifts.
One may ask, isn’t that expensive? It can be if done by a professional business. But many people have discovered they can easily do it themselves for a lot less. Materials needed are easily found in most craft and hobby stores.
Baby shoes are one of the most popular items people bronze, other types of shoes such as bridal or ballet shoes, cowboy boots, or athletic shoes can be done just as easily. Learning this skill can be used to make a profit-making business or lay the groundwork for a satisfying hobby. Here are the items needed to bronze a pair of baby shoes, depending on the desired end product:

· Cotton swabs
· Denatured alcohol
· Rubber cement
· Black or umber-colored spray paint
· Bronzing kit, bronzing powder or liquid bronze
· Fast-drying varnish
· Wire or string
· Paintbrush
· Plaster
· Rubber bands
Several items can be bronzed as it won’t take all of these materials to do a pair of baby shoes.
If the shoes are tiny and need extra weight for support and balance, add plaster to the inside of the shoes before bronzing. Mix the plaster, and fill to within 1/2 inch of the top each shoe. Wait for the plaster to dry. Here’s what to do next:
· Clean shoes thoroughly, removing all dirt, wax and polish, top to bottom paying special attention to the creases around the ankles and toes. If there are shoe laces remove and wash separately.
· Allow to air dry completely.
· Use a swab and denatured alcohol to complete the cleaning and allow time to dry.
· Set the shoe tongues and lace the shoes in the position desired and cement them into place. Let the glue dry. If the laces are tied into a bow, use a rubber band to keep them in place until the glue has completely dried.
· Make a hole in the bottom of each shoe and run a string or wire through them. This is done so they can be hung later to dry.
· If using bronze powder mix with varnish until the consistency feels like thick paint.
· Paint the shoes and hang to dry.
· Add more coats until all dull spots are gone.
· Create an antique look by spraying with a black or umber-colored paint and then wiping it off with a clean cloth. The remainder left behind in the creases will give the desired effect.
This is the way to do it inexpensively. However, there are those who prefer to go all out, purchase an electroplating machine, and actually electroplate the shoes with real metal.


