- HubPages»
- Arts and Design»
- Photography»
- Photography Instruction & How-Tos
Build Your Own Camera Monopod
A Useful, Durable Accessory Under $30
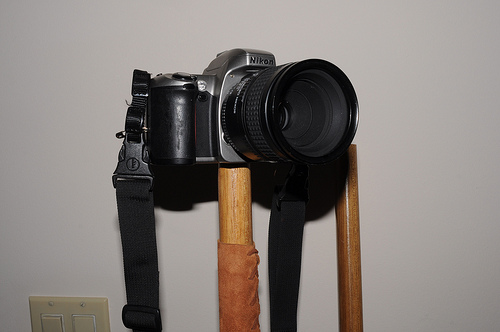
A camera monopod is desirable for many reasons. They offer improved camera stability yet are lighter and easier to carry around than the traditional tripod. Some public places that ban tripods still allow monopods. But monopods are surprisingly expensive - up to $350! This guide shows you an inexpensive alternative especially suited to nature photography.

Simple Supplies and Tools
To create the monopod you will need a few supplies:
- a wooden shovel handle ($6 at Home Depot)
- 1/4-20 threaded rod
- 1/4-20 threaded insert x 2
- epoxy
- threadlocker
- optional 1 ft. square suede for handgrip
- optional suede tie for handgrip
- optional piton for base
You will use the following tools:
- a chop saw, hand miter, table or radial saw
- a drill with a bit size matching your threaded insert
- hammer
- optional leather punch

Project Steps
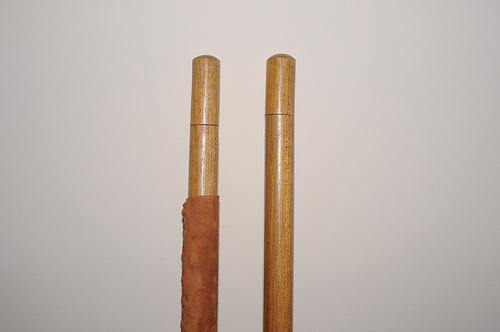
- Cut the top two inches off the handle with your saw.
- Use the drill to drill a hole for your threaded inserts in the base and the top.
- Drill a larger hole space for a countersink for your insert at the top of the base so it sits flush.
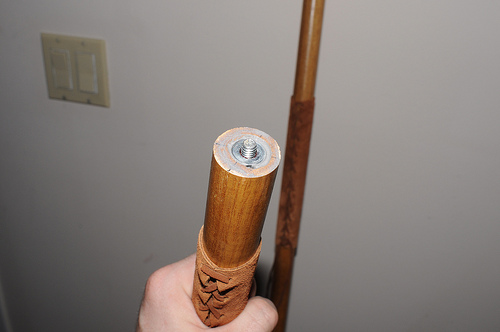
- Place your threaded rod into one insert with approximately 1/4 inch sticking out the top. Test fit your intended camera to the rod, making sure it fits securely. Mark where the rod sticks out of the bottom of the insert and cut the excess off.
- Coat rod with threadlocker and place into the insert. Allow to dry.
- Coat the drilled hole in the base with epoxy and tap the insert in.
- Coat the drilled hole in the cap with epoxy and tap the other empty insert in.
Optional Directions for Handgrip
- Measure circumference of pole and subtract 1/4 inch.
- Cut suede to pole dimensions by 8 inches.
- Use a leather punch to punch holes in opposite long edges at each half inch.
- Wrap pole with punched leather.
- Thread suede tie through holes. Suede will stretch with use.
Optional Directions for Piton
The shovel handles come with a dulled taper but you can add a metal piton for added stability. Install the piton as directed by the manufacturer; either by drilling and using epoxy or drilling and tapping in.

The cap prevents injury from the exposed screws when not in use. You now have a very durable camera monopod that also functions as a hiking staff at a fraction of the cost of purchasing a plastic monopod!
This project takes approximately 1 hour plus 24 hours drying time to complete.


