- HubPages»
- Arts and Design»
- Drawing»
- Drawing Tutorials
Child Portrait

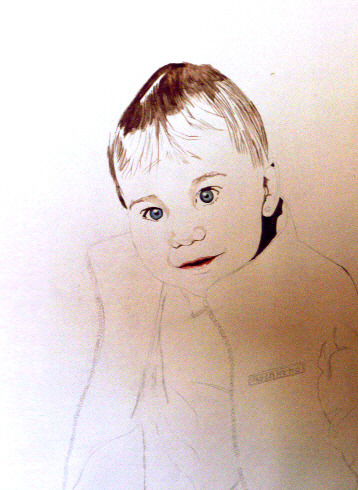
Stage one, fine pencil and gouache.
This is a sequential display of the stages and progress of a portrait of a child that has been completed in mixed media, using, graphite pencil, pastel and gouache on cartridge paper.
I always stretch the paper onto boards for working on so as to minimise the wrinkling effect that happens when paper has been wetted.
The portrait size is 16 inches or 41 centimeters wide by 20 inches or 51 centimeters in height this is because picture frames can be easily obtained off the shelf at this size in abundance so there is plenty of choice for people.
I always try to use as much of the white of the paper as possible and only make the necessary amount of marks needed to achieve the likeness I work from the premise that less is more.
The first stage is to draw a very light pencil line drawing in order to make certain the work is in proportion and positioned well on the paper for best effect.
Once this is achieved I then start filling in the different areas with detail using gouache and a very fine sable or nylon brush this is usually a size 0 or a 1 so as to reduce the risk of making too many marks in places that wont work.
If I do make too many marks that don’t work with a small fine brush then I can more easily lift them back off the page to hide any mistakes. Where as if they are made with a bigger brush they tend place more paint on the paper making them more difficult to lift off.
I work the eyes first from right to left because I am left handed when working on fine detail and this means I always work away from the marks I have made helping to ensure I do not spoil the work with my hand leaning on the paper.
Stage one, fine pencil and gouache detail.

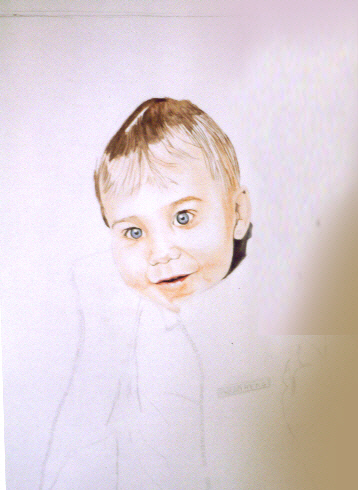
Stage two, more gouache.
Here I have added more detail to the hair using the same brush size 0 or 1 and also a size 3 to more quickly cover slightly bigger areas creating heavier lines for greater definition.
Stage two detail.
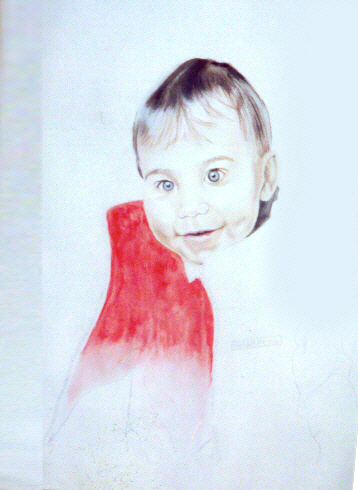
Stage three, adding pastel.
At this point I have added pastel for creating form and softer tonal modeling to the image for the illusion of flesh textures.
This is achieved because of the nature of pastel being a chalk substance that is easily blended using a smudging tool I always use a range of different sized smudging tools of rolled up paper for different effects.I never smudge with my hands or fingers because our skin produces oils, salts and acids that over time damage the work causing uneven stains and bleaching.Stage three, detail.
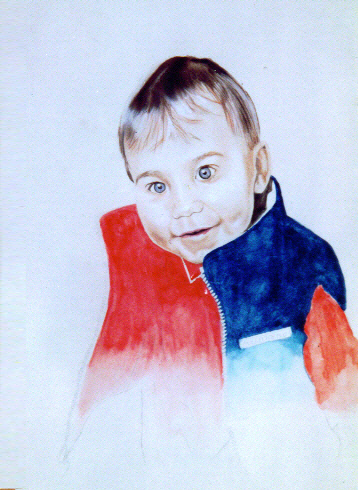
Stage four, more gouache and pastel.
Now I have added more gouache to create the clothing and pastel shades these have been added to the hair to create softer definition and shading for a more photo realistic effect giving the illusion of a sheen to the hair.
Stage four, detail.
Stage five, refining the detail with gouache and pastels.
Now adding more highlighting to the hair and flesh tones with pastels for tonal modeling thus creating more form to the image for greater photo realism that will be better defined with final eliminates added to frame the facial features.
The meaning of this will be more apparent when the final image is viewed after the next.
Stage five, detail.
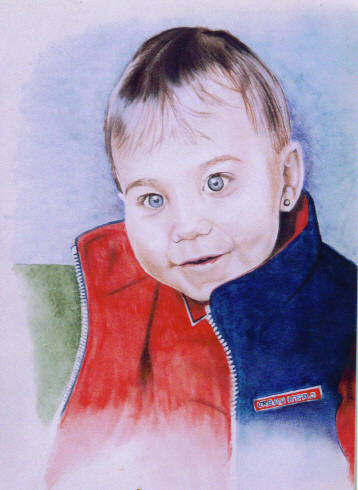
The end result.
Here hopefully you will be able to understand what was meant when I stated that adding final elements to frame the face would create better and more well defined features between photo realism contrasting with more obviously painted areas.
The finished work.
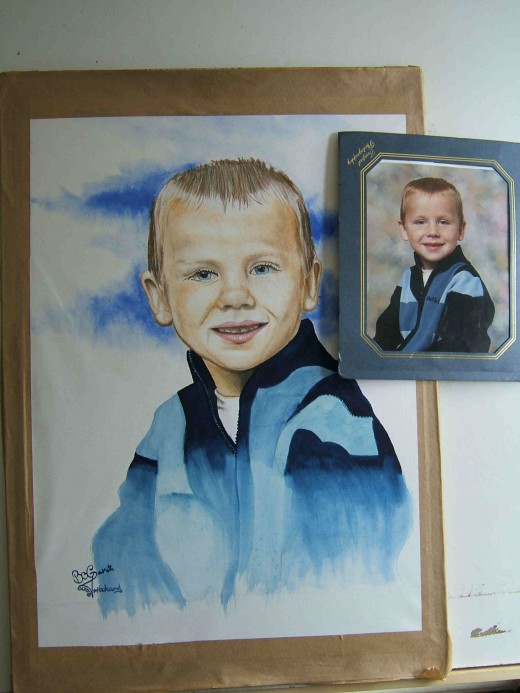
This work as with many other pieces was created from photograph but unfortunately I do not have the photograph for comparison but there is another image with a photo comparison for viewing below
- Car drawing or video duplicity?
There are two types of car drawing videos on YouTube or any other video hosting site that show short films of people drawing cars, one is of people using a graphics tablet and pen with the other means being a...


