Christmas Crafts for Kids - 6 Easy Projects
Craft Projects for Kids
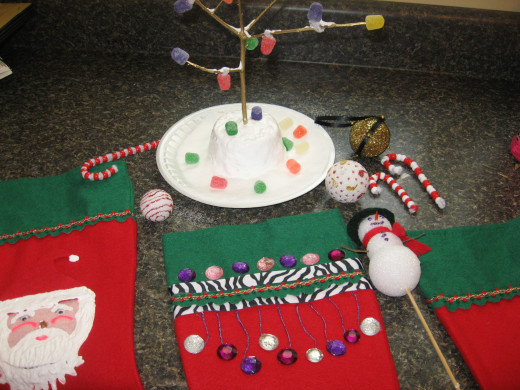
Does your family enjoy Christmas crafts for kids? My grandkids, for the most part, are pretty artsy-craftsy. I’ve always been creative, too, and I encourage creativity with the grandchildren. On school holidays, the kids often stay with me while their parents are at work, and we sometimes complete easy crafts. Yes, I said easy crafts. Please place more emphasis on the “easy.” I don’t enjoy working on complicated projects with kids. They get overwhelmed and frustrated, and when they don’t enjoy an activity, I don’t usually enjoy it, either. I much prefer easy projects for kids, and I’m already testing out some to use with the grands during the week before Christmas, when I’ll have four of them all day, every day that week. We’re going to make Christmas stockings, tree ornaments, and at least one gumdrop tree. The ideas I’ve presented here about craft projects for kids are just some suggestions to get you started. I’m sure that once you see my simple creations, you’ll start to come up with some of your own Christmas crafts for kids.

Christmas Tree Ornaments
When my girls were small, they sometimes made tree ornaments. They were so proud of them that for several years, we bought a Christmas tree just for them, so that they could display their ornaments. We had another larger, more formal tree, but I think I actually liked the kids’ tree better!
All the kids I know enjoy making their own Christmas tree ornaments, and some are pretty easy projects that even small children can make. The four examples below are all easy crafts that don’t require any sewing, drilling, nailing, or stapling. In other words, they’re safe Christmas crafts for kids. Everything is held together with glue, and one of the tree ornaments doesn’t even require that. For the Styrofoam tree ornaments, I used Elmer’s school glue. For the other instances when I needed glue, I used E6000, which works on fabric and just about everything else.
Styrofoam Ornaments
You’ll need:
Styrofoam balls
Glue
Small art brush
Glitter or glitter paint
Sequins
Acrylic stones
Ribbon
Wire ornament hangers
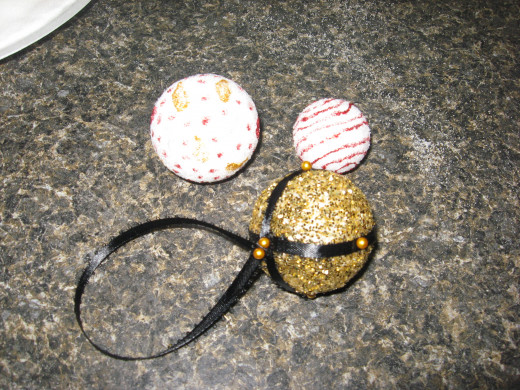
Directions: If you’re using a glitter pen, just make designs on the balls. Once the glitter dries, insert a wire hanger into the top of the ball.
If you’re going to use plain glitter, paint the balls with Elmer’s glue, using a small paint brush. Allow the glue to dry for just a minute or two, until it gets “tacky.” Sprinkle glitter on a piece of foil or waxed paper and roll balls in glitter to cover completely. When glue and glitter are dry, you might want to add some ribbon and attach it with colored ball-head pins. Attach a hanger and display on tree.
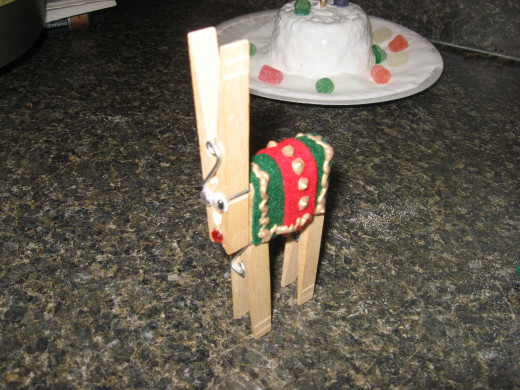
Reindeer
You’ll need:
Wooden clothespins
Glue
Felt
Wiggly eyes
Small red pompom or stone
Wire hooks or narrow ribbon
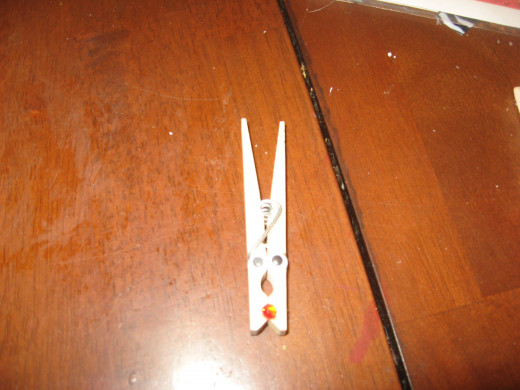
Directions: These work best with the old fashioned clothespins – the ones without a spring. If you can’t find these, use the wooden ones with the spring. Glue two clothespins together, side by side. This creates four “legs” and a back. Glue another clothespin on, upside down. This makes the head and the antlers. Cut out a square or rectangle of felt for a blanket/saddle. Attach wiggly eyes. Use a small red pompom or stone for the nose. Attach a wire or ribbon to serve as a hanger.
Okay, the above is the standard version of clothespin reindeer. I tweak it just a little. I like for the deer to have a “body.” I use two short sections of a cinnamon stick between the front and rear clothespins. I glue the pieces between the clothespins, with the top cinnamon stick curved-side up.
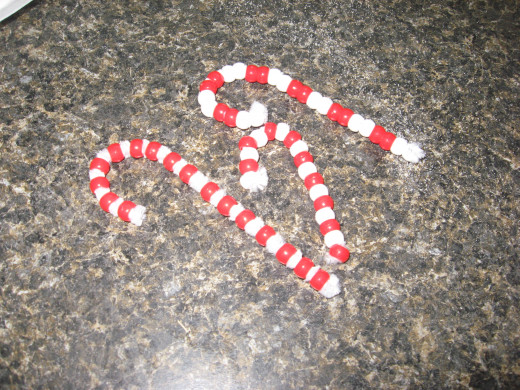
Beaded Candy Canes
You’ll need:
Red pony beads
White pony beads
Pipe cleaners
Thin ribbon or wire ornament hangers
Directions: These are such easy Christmas crafts that you really don’t even need directions! All you do is to thread the beads onto a pipe cleaner and make a small crook at both ends of the wire to keep the beads from falling off. You can also use red beads only, placing them on two white pipe cleaners. Leave a small space between each bead so that the white flocking shows.
Pinecones
You’ll need:
Pinecones
Gold glitter pen
White paint
Small paint brush
Ribbon for hanging
Glue (optional)
Directions: Choose pinecones that are sturdy and whole. Shake the cones vigorously to remove any dirt and debris. Stick a small brush into the pinecone to clean between the layers. Using a paint brush or a paint pen, tip the edges of the cones with white or gold paint. Allow to dry completely before handling. When paint is dry, attach a ribbon for hanging. If the stem of the pinecone is still intact, you can use that for attaching the hanger. If not, use glue. To make a door hanger, tie several embellished cones together and place an attractive ribbon at the top.
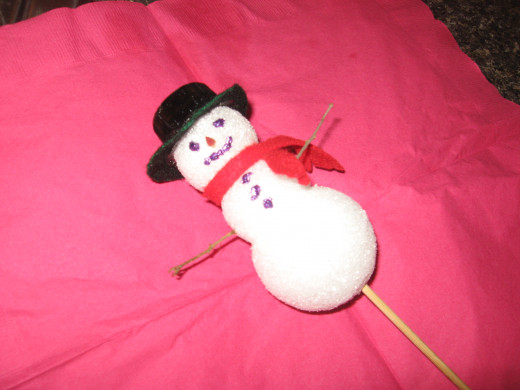
Snowman
You’ll need:
3 styrofoam balls in different sizes
Wooden skewer
Glue
Orange paint
Black slick paint
Red felt
2 small twigs
Directions: Stack the three balls on top of each other and estimate the height. Cut a wooden skewer so that’s it’s slightly shorter than the three balls. Thread the largest ball onto the skewer and push it all the way down the length of the wooden shaft. Dot some glue on the top part of the ball. Do the same thing with the second and third balls. Push the balls together so that they “squish” a little. Allow glue to dry. OR…thread the balls on the skewer and glue them together, leaving the remainder of the wooden shaft sticking out the bottom. This serves as a handle as you work on the snowman. If you use this method, just clip the stick once you’re done.
While the glue is drying, snip a pointed end of a skewer and paint it orange. This is the carrot nose. Cut out a long, narrow strip of red felt for the scarf.
Once the glue is dry, use dots of black slick paint to make “coal” for the eyes, mouth, and buttons. Glue the scarf around the snowman’s neck. Stick the nose into the face, and stick the twig arms into the middle ball. Attach a hanger. Under the scarf is a good place for this. If you want to add a hat, paint a soda bottle top black. Cut a donut shape out of black felt and glue it on top of the snowman’s head. When the paint is dry on the bottle cap, glue it on top of the black felt donut.
Since these snowmen are designed to be Christmas tree ornaments, they don’t need to be able to stand up. If you want to make a larger snowman to stand on a table or shelf, slice a small section from the bottom of the largest ball so that Frosty can stand alone.

Christmas Stockings
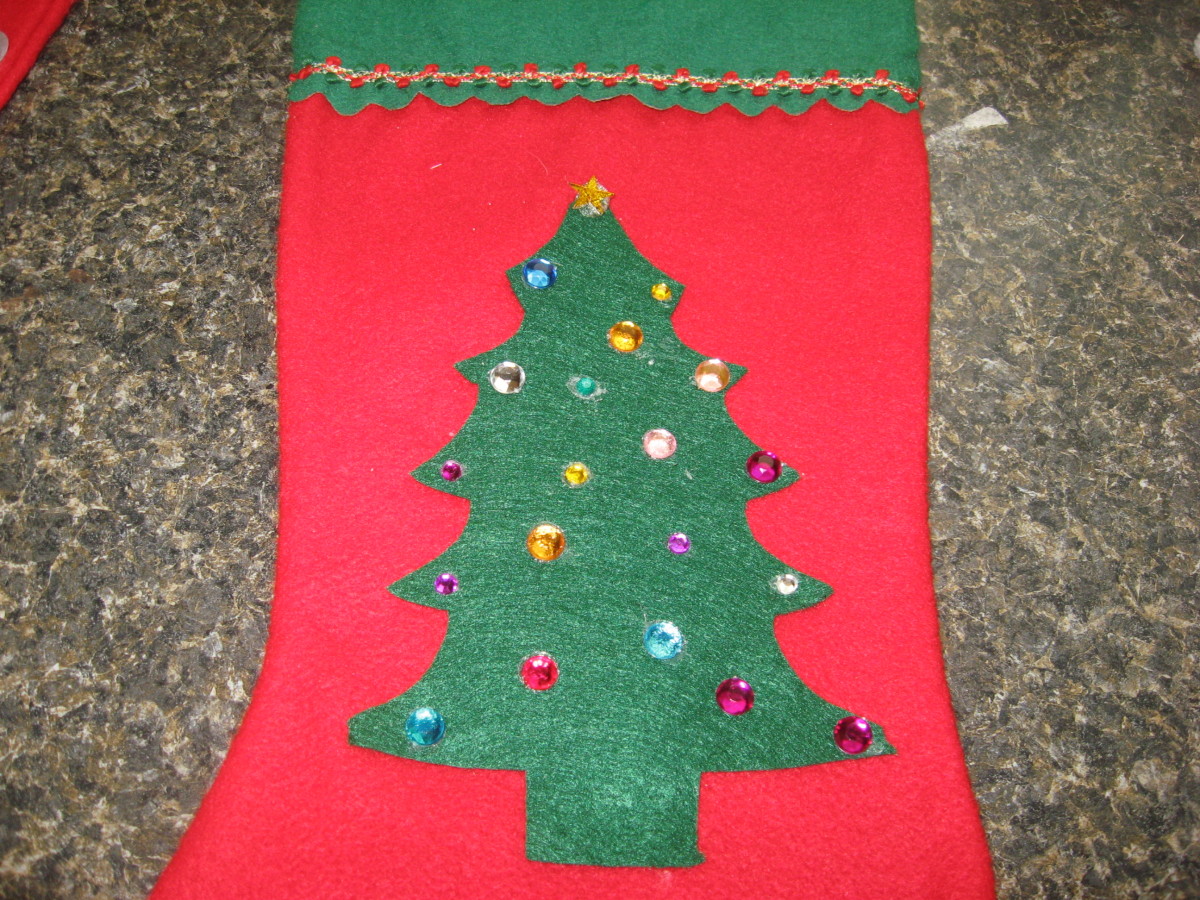
Why not let your kids make Christmas stockings this year? Okay, by “make Christmas stockings,” I don’t mean for the kids to use a needle and thread or a sewing machine. The idea is to buy plain, cheap stockings and let the kids decorate them as they wish. You can use either the fuzzy stockings or the felt versions, but the felt stockings work better for these Christmas crafts. It’s easier to attach items to the felt.
Some of the things the kids might like to use on their Christmas stockings include acrylic jewels, acrylic craft paint, slick paint, puff paint, beads, glitter pens, and/or appliqués. For paint, I suggest using paint pens with kids. The paint is much easier to guide and control with a pen than it is with a brush. As for appliqués, make your own! Buy some felt squares and cut out simple shapes of Christmas trees, Santa hats, holly leaves, etc. The kids can add the shapes to their stockings and embellish them with pompoms, paint, or jewels.
To make a Christmas tree stocking, cut out the tree from green felt. Fold the felt in half and make a basic tall, narrow right triangle, cutting through both layers of felt. Open the tree, smooth it out a little, and glue it to the stocking. Add acrylic jewels or rhinestones for tree ornaments.
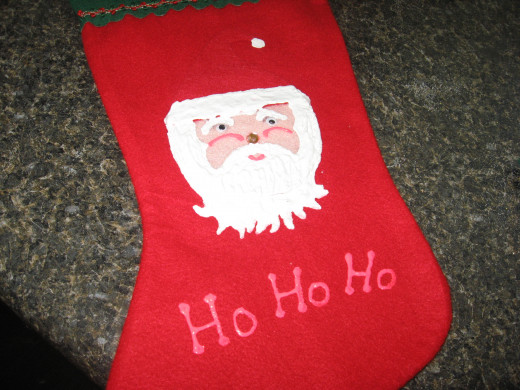
To make a Santa face on Christmas stockings, you’ll need pink felt, red felt, two wiggly eyes, a small pink acrylic stone, and white slick paint. Cut out a circle from the pink felt for the face, and cut out a triangle from the red felt to make Santa’s hat. You might want to make a triangle with a “droopy” point at the top, as I did. You can see what I’m talking about in the photo. Glue the face onto the stocking, then add the hat. Glue on the wiggly eyes. Add the pink stone for the nose. Use the slick paint to add fur to the hat, a fur ball at the end of the hat, and Santa’s hair, eyebrows, and beard. When the paint and glue have completely dried, fill in the mouth with a red marker or paint pen.
These are just a couple of examples of Christmas stockings you and your kids can make. The possibilities are endless! Girls might want to use more jewels on theirs to really “bling it up.” They can form their name or their initials from the stones, or they can create simple shapes or random patterns. They might also want o add some tiny bows or trailing ribbons. Boys and girls alike might enjoy writing messages on their stockings with slick paint. By the way, slick paint has some texture to it, so it sort of “stands up” from the fabric to which it’s applied.
Craft Supplies:
Gumdrop Tree
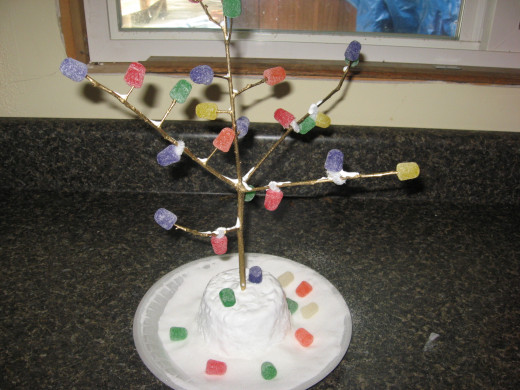
Most kids enjoy making a gumdrop tree. These are easy Christmas crafts for kids and they’re quick, too. Furthermore, they can be inexpensive to make. You can buy a plastic gum drop tree, and if you do, all you’ll have to add is the gumdrops. But why buy a plastic version when you can find a real one, thanks to Mother Nature? Choose a natural branch that has short limbs and plenty of tips. Finding an appropriate branch is the hardest part of the process. Most limbs that are too green will be too supple to support the gumdrops, but limbs that are two dry will snap easily. I’ve tried branches from dogwood trees, crepe myrtles, and several different shrubs, but live oak seems to work best. Remove any bark and wipe the branch clean with a soft cloth. Spray paint the tree in any color you like. I think gold and white are my two faves for these Christmas crafts.
While the paint is drying, attach a block or circle of Styrofoam to a plate with E6000 glue. Allow to dry until block is secure. Insert base of branch into Styrofoam. Cover Styrofoam with white slick paint. Add a little white paint to the branches to resemble snow. Pour salt, sugar, or fake snow on plate and around base. Add gumdrops to ends of branches. Place a few candies around the base of the tree. Now all you have to do is try to keep folks from eating all the candies before Christmas Day!
If you’re not happy about the number of branch tips you have, you can add a few. Just twist a short section of white pipe cleaner to a branch and add a gumdrop on the end of the wire. You can camouflage the pipe cleaner when you add the “snow” paint to the branches.
Obviously, if you use glue and paint on your tree, it won’t be completely edible. If you want an edible gumdrop tree, use white icing for snow and for glue.
Christmas Crafts for Kids
Christmas crafts for kids are a lot of fun, and they can be quick and easy to complete. They don’t need to be expensive, either. I found several of the items I needed at our local Dollar Tree, where everything in the store is one dollar or less. The rest of the supplies I got from Walmart. Just remember to keep things as simple as possible for the kids, but allow them to do most of the work themselves. Allow them to make their own designs and to make their own mistakes. Whatever we’re working on, I like to keep a few extras on hand, just in case. If the project turns out to be a total disaster in the child’s eyes, I try to let them start over with a fresh item. Easy projects can help kids with self-expression, and it gives them a chance to be creative. It also provides them with a sense of accomplishment and pride. Yes, I still think like a teacher, even though I’ve been retired for several years. Christmas crafts for kids can even be good for enhancing small motor skills and hand-eye coordination!


