- HubPages»
- Arts and Design»
- Crafts & Handiwork»
- Textiles
Chunky Rainbow Crochet Blanket Tutorial
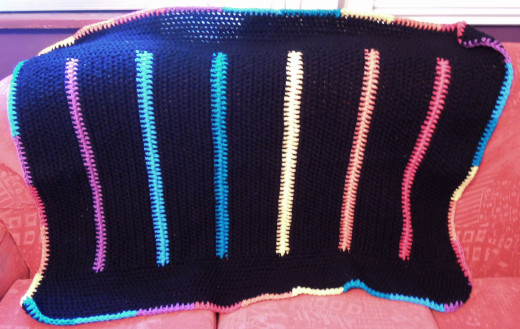
Materials and Tools
8mm/size 0 crochet hook
Approx 100g double knit wool in each colour of red, orange, yellow, green, blue and purple
Approx 600g double knit wool in black
Wool needle
Note – yarn use will vary due to personal stitch tension.
This blanket is crocheted using two strands of yarn throughout. You can either use two bought separate balls of each colour or wind one ball into two yourself depending on your preferences and available yarn.
How to crochet the main blanket
Step 1. Using two strands of black wool chain 79. The easiest way to do this is to work from two separate balls at once.
Step 2. Count back two chains and in the third chain add one single crochet stitch.
Step 3. Continue adding one single crochet stitch into each of the chain stitches until you reach the end of the row. This one row of single crochet helps to create a neater tight edge for the blanket.
Step 4. Chain one and turn the crochet round.
Step 5. From now on all rows are created using double crochet stitches. Add one double crochet stitch into each space until you reach the end of the blanket.
Step 6. Continue adding rows of double crochet by repeating steps 4 and 5 until you have 12 rows of double crochet in total.
Step 7. Change wool colour to red and chain one.
Step 8. Turn the blanket and crochet two rows of double crochet using red.
Step 9. Change back to black wool and add twelve rows of double crochet above the red stripe.
Step 10. Change to orange wool and add two rows of double crochet to the blanket.
Step 11. Continue to repeat steps 9 and 10 to add two row stripes in each colour in the following order: yellow, green, blue and finally purple. Add in new balls of black wool as needed using the same technique as in adding the colours. This can be done at any point along the rows.
Step 12. Change to black and complete a final set of twelve rows of double crochet.
Step 13. Cut off the black wool leaving a tail several inches long. Remove the crochet hook from the last stitch and thread the wool tail through the stitch. Pull the tail to pull the stitch tight to secure the crochet piece. Sew the remaining wool tail into the fabric of the blanket.
Step 14. Turn the blanket so that it is on its side (all the stripe ends should be pointing up towards you). Reattach the two stands of black wool at the right-hand side of the blanket.
Step 15. Add one double crochet stitch to each space until you reach the end of the blankets side.
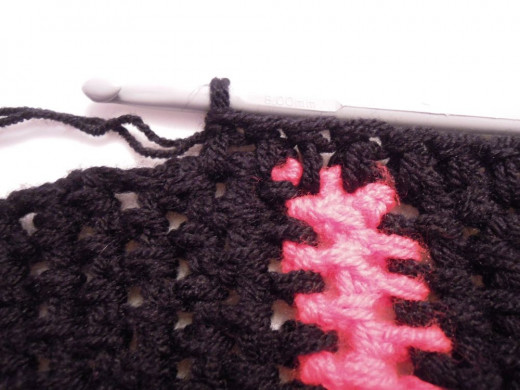
Step 16. When you reach the end, turn the blanket and continue adding rows of double crochet until you have twelve in total.
Step 17. At the end of the twelfth row secure the stitches as in step 13 and sew the wool end into the blanket.
Step 18. Repeat steps 14 – 17 to add twelve rows of black double crochet to the opposite side of the blanket.
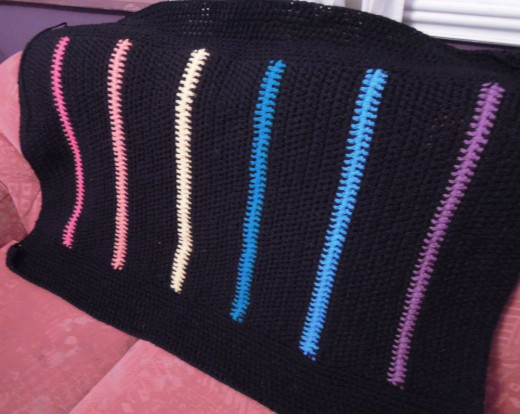
How to add the rainbow edging
The blanket should have 95 spaces along the two long sides and 70 on the two shorter sides.
To create the rainbow edging one row of double crochet stitches is added using the six differently coloured yarns. Each colour section will be eleven stitches long.
Step 1. Starting at the end of the blanket closest to the red stripe, join the red wool to the corner and crochet eleven double crochet stitches.
Step 2. Now change to orange wool and add eleven double crochet stitches. If you need to you can refer to the video in step 7 to remind you how to change colours.
Step 3. Continue in this way until you have added eleven double crochet stitches in yellow, green, blue and purple.
Step 4. Change to red yarn and continue to add eleven stitches of each colour in turn until you have crocheted all the way around the blankets edge.
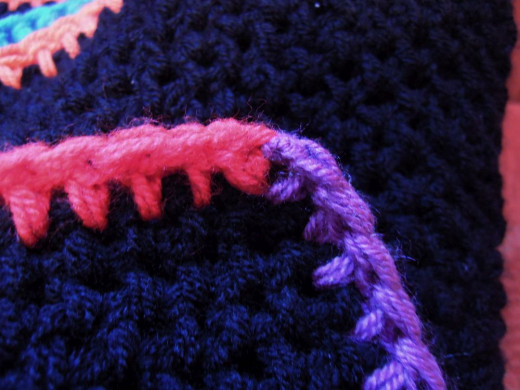
Step 5. When you have completed the final set of purple stitches, cut off the wool leaving a tail several inches long. Remove the crochet hook from the last stitch and thread the wool tail through the stitch. Pull on the tail to pull the stitch tight and secure the crochet piece. Use the tail of yarn to stitch the final purple stitch to the first red stitch and join the edging into a continuous row.
Step 6. To complete the blanket now securely stitch all the yarn ends from changing colours into the fabric of the blanket and trim off any excess yarn.
© 2015 Claire


