Cleaning and Framing Cross Stitch Projects

Cleaning your finished cross stitch project
After spending hour upon hour working on your cross stitch project, getting it just right, you spread it out on the table before you and step back to admire your work. Oh no, what is that mark over there? Oh, and that smudge over here? I was so careful, how did this happen? Unfortunately no matter how many times you wash your hands or how carefully you treated the aida cloth you are bound to leave behind a few marks. So what do you do now?
The first thing you do is calm down. It really isn't as bad as you think. Even if there were no visible marks left behind it would be a good idea to wash your finished project before you frame it. We all leave behind oil from our skin and it is a real possibility that it will show up some time in the future, after you project is framed. It is truly depressing when that happens. In any case, cleaning your projects freshens the colors.
Before you begin you need to test your cotton floss. You simply place a couple strands of the floss you used onto a damp paper towel. If the color runs, it is NOT a good idea to wash your cross stitch. If you have used DMC, Anchor or Madeira floss you are in luck, these flosses are made to be colorfast. I am sure there must be other floss brands that do not run but these are the ones I have used and know how they are.
Once you have checked your floss for colorfastness (is that a word?) its time to begin the washing. Fill a clean basin with lukewarm water and a little bit of mild soap. Swish the piece around in the water to help loosen the spot. Rinse in warm water and then in cool water. Remove exceess water by laying your cross stitch piece on a clean dry towel and lightly pat with anothertowel. Take your piece and lay it flat onto a new clean dry towel to air dry naturally. Never, never, never wring your cross stitch piece to get out the excess water. It will be next to impossible to get all of the wrinkles and creases out that you leave behind.
Now you are ready to frame.
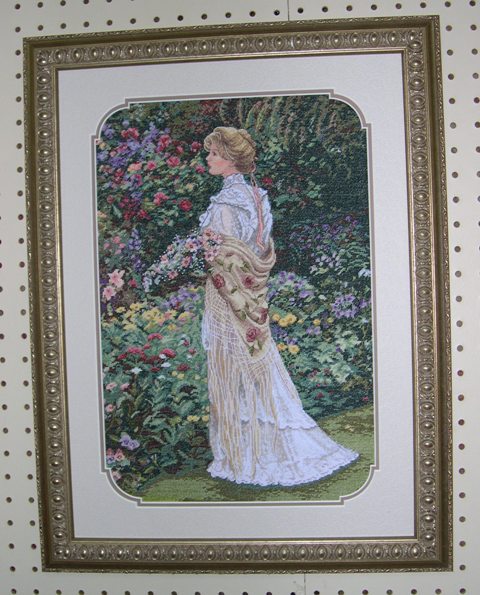
Framing your cross stitch project
Before you begin framing it is always a good idea to gently iron your piece to remove any wrinkles or creases. A light mist of water will help.
Your first step is to gather all of your materials you will need. For example, masking tape, scissors, acid free mounting board, frame and matting, if use decide to use it.
Matting boards come in both padded and unpadded and it is important to use acid free. If you don't you run the risk of uneven color changes on your piece down the road. Padded mounting boards are generally used when you do not intend to cover your piece with glass. One side of the mounting board is sticky. This is the side you place your finished piece on. First you need to center your piece on the board. Smooth adia and gently press it to the board to secure it. Cut off excess aida around the edges leaving about one inch of fabric. Fold the aida smoothly on back of board and secure with masking tape. Place the glass (if using), then matting (also if using) then mounted piece into frame. You now have a beautifully framed peice to place on your wall.
If you choose not to cover your piece with glass you can help keep dust off by lightly spraying with Scotch Guard. And cleaning and dusting this piece will be a breeze when you use your blow dryer to wish the dust away.