Alligator Craft Project

Family Craft Project
The Ultimate Alligator
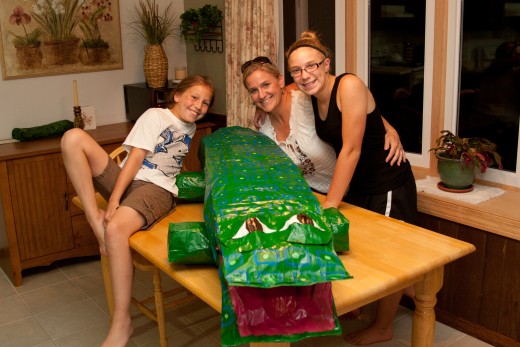
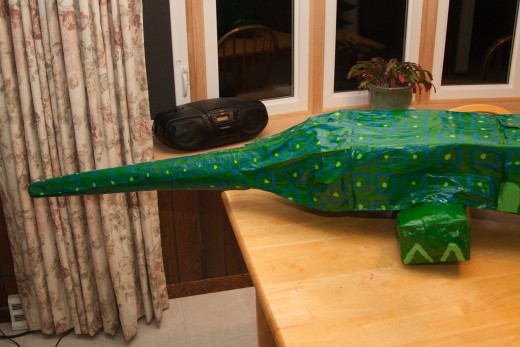
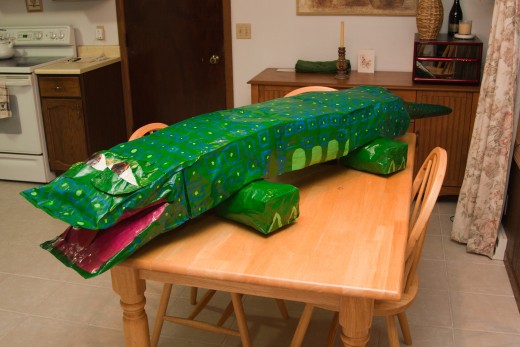
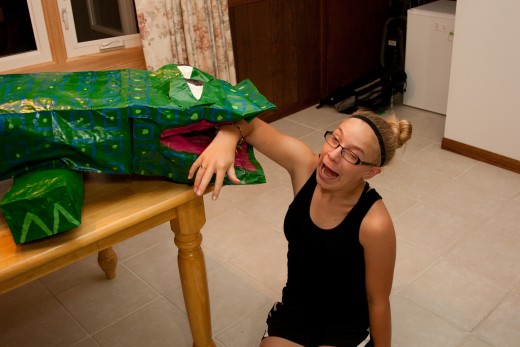
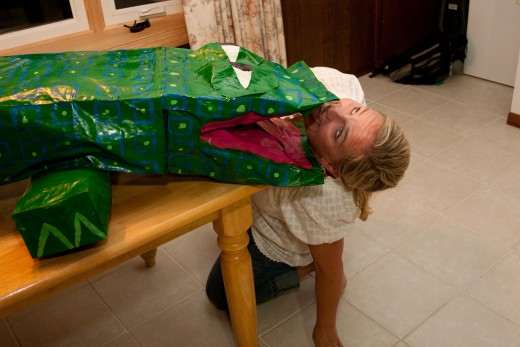
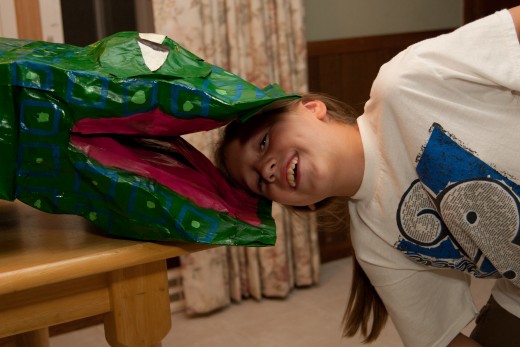
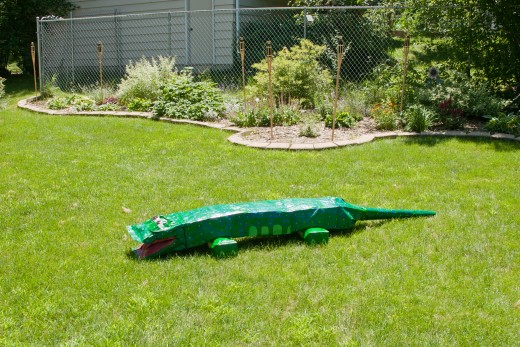
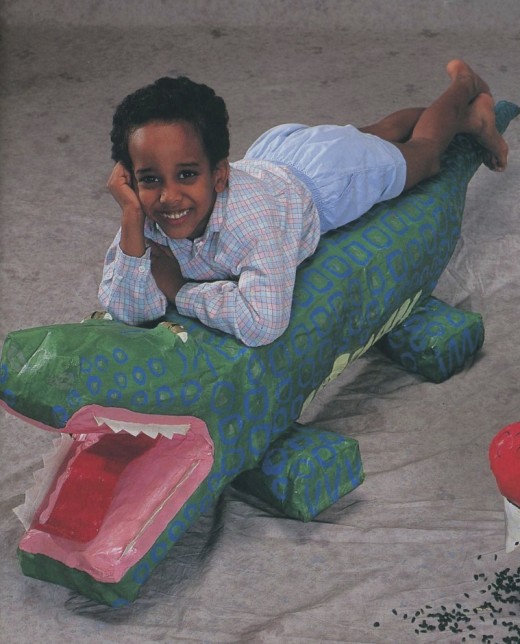
If you’re like me, you love to do projects with your kids. The projects I enjoy are typically fairly easy, inexpensive and creative. My kids have always loved working on things together and even today, at 16 and 11, that tradition continues. One of our favorite projects was an alligator that we made for our garden. I found the idea in an old library book from the 1970s, but the idea was fresh and unique to us. It is a bit involved and took us three days to make because of the time needed to allow paint and glue to dry, but it was a great bonding experience. Going through the process together gave us a great opportunity to talk, laugh and listen to music. The project was appealing because I had most of the items I needed to make it lying around the house.
WHAT YOU’LL NEED
- Elmer’s Glue
- 9 large brown paper grocery bags
- 8 small brown paper lunch bags
- Scissors
- Roll of brown packaging paper (or you can use additional large brown paper bags)
- Shellac
- Paint brush
- Lots and lots of crumpled newspaper
- Acrylic Paints (Green, blue, red, pink, white, brown, black, or other colors of your choosing)
GETTING STARTED
The Body
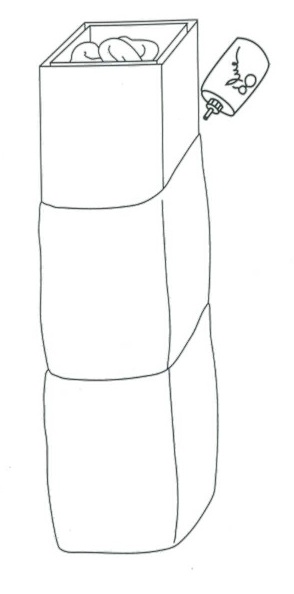
Spread glue on outside of one brown paper grocery bag and smooth inside another to make a double bag. Make 3 double bags.
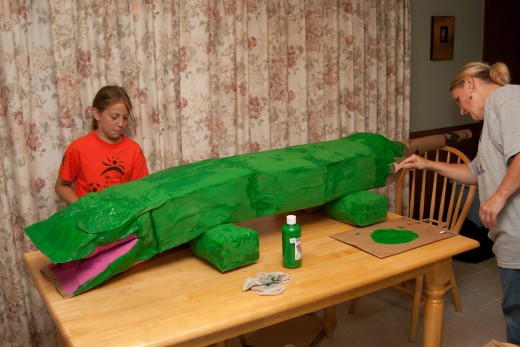
Stuff one bag with crumpled newspaper. Glue bottom of second bag inside the open end of stuffed bag. Stuff second bag with crumpled newspaper. Attach third bag in the same manner and stuff with crumpled newspaper. Leave end open. These three bags make the alligator’s body as in the first photo below.
The Head
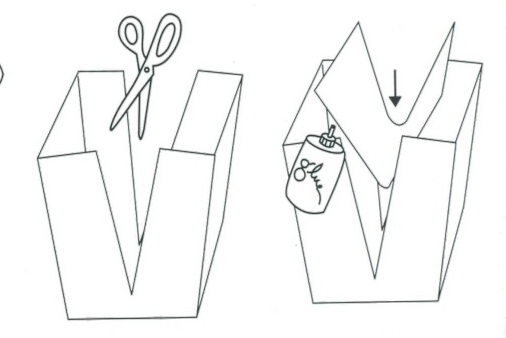
Make a cut in the middle of each narrow side of another brown grocery bag. Do NOT cut all the way to the bottom.
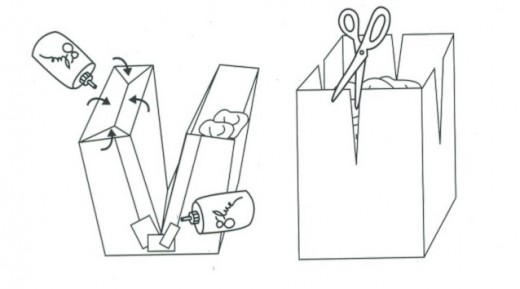
Cut a piece of brown paper as wide as the bag and twice as long. Fold in half lengthwise, and fit into the opening of the bag. Glue edges down to make two separate bags.
Reinforce the joins and corners with small pieces of brown paper and glue. Stuff the bags with crumpled newspaper. Glue the open ends shut. This is the head.
The Tail
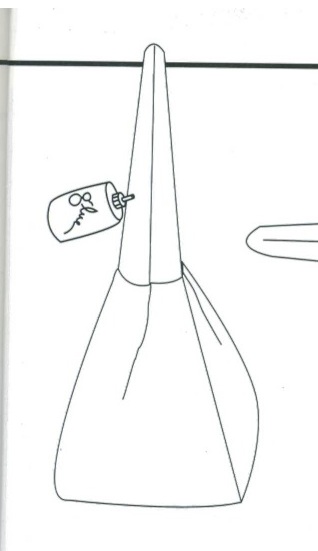
Cut halfway up the middle of each side of another brown paper grocery bag. Half-fill bag with crumpled newspaper.
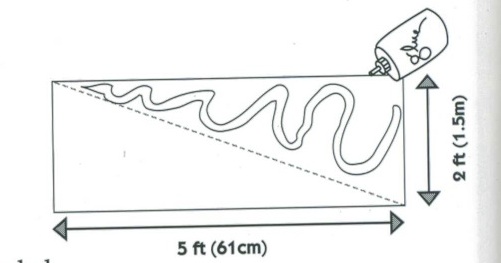
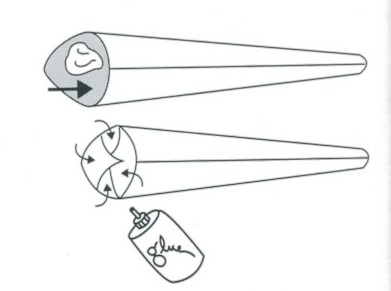
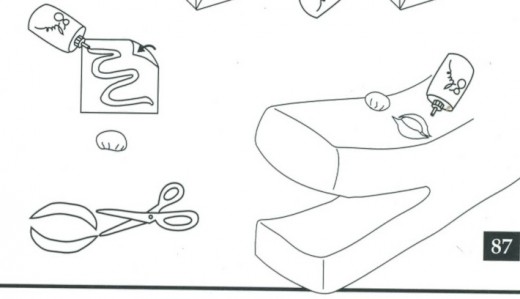
Cut a piece of brown paper 2 ft. by 5 ft. (61 cm. x 1.5 m). With pencil and ruler, draw a line from corner to corner diagonally. Spread glue over half of paper. Starting from the unglued corner, roll into a long cone. Allow to dry.
Stuff with crumpled newspaper and glue opening closed. This is the alligator’s tail.
Place the wide end of the tail into the stuffed, cut bag. Overlap the edges of stuffed bag to wrap around the tail and glue into place to complete the tail section.
Putting it Together and Adding Feet
Carefully lay body section on its side and place wide end of tail section into the open end of the body section. Glue opening closed. Glue head to the other end of body.
Spread glue on outside of one brown paper lunch bag and smooth inside another bag. Stuff double bag with crumpled newspaper. Glue opening closed. Make 4 of these double stuffed bags. These are the feet. Glue feet to the underside of alligator body.


The Face & The Finished Product
Spread glue over sheet of newspaper. Crumple into a ball. Make 2 and glue to the head for eyes.
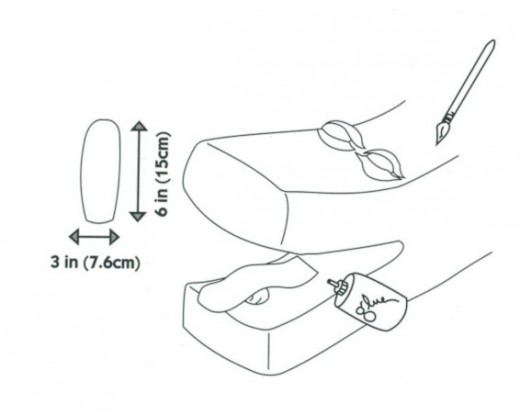
Glue 2 pieces of brown paper 6 in. (15 cm) square, one on top of another. From this double paper, cut 4 crescent shaped pieces of brown paper 2 in. (5 cm) longer than the eyes. Glue one over top and another over the bottom of each eye. These are the eyelids.
Cut 3 pieces of brown paper 6 in. x 3 in. (15 cm x 7.6 cm). Glue one on top of another. Round the corners to make a tongue shape. Glue end in place in mouth. Let tongue curl over a ball of crumpled paper. When dry, remove the paper from under the tongue.
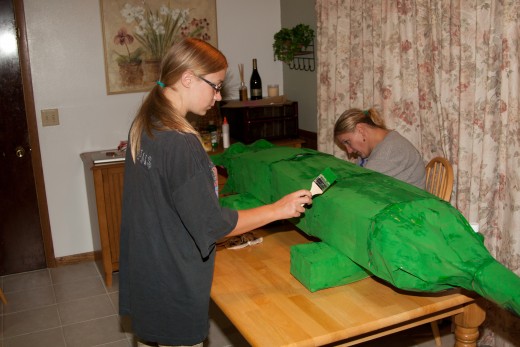
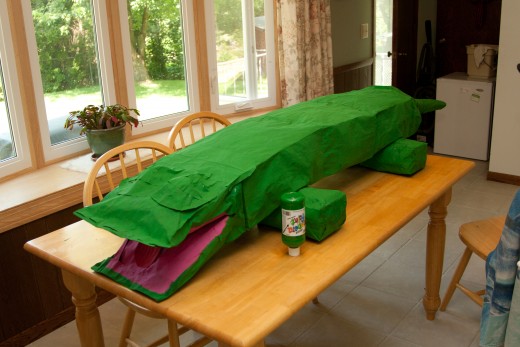
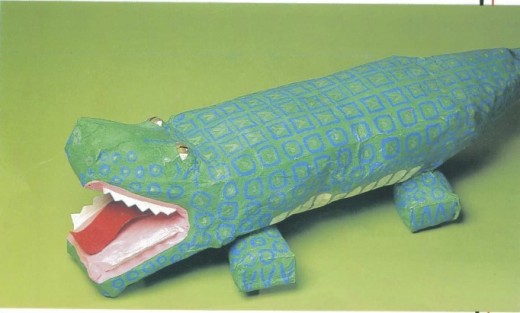
Paint and shellac the alligator.

Tips
The photo from the book shows an alligator with teeth, however, try as I might, I could not fashion proper teeth, so we left them out. The book did not offer instructions on how to make the teeth.
I had never used shellac before and had a hard time finding it. I finally went to a small hardware store to find it. The directions called for adding alcohol to partially dilute the shellac, which I assumed meant that you needed to do so. That assumption was incorrect, as using the diluted shellac would not allow our alligator to harden the way it appears in the picture. Next time I wouldn't dilute it.
More Amazing Family Time Hubs
- Adolescence: Raising Successful Teenagers
Adolescence: Raising SuccessfulTeenagers Lets face it. Adolescence is a tough time. Our kids arent quite adults, yet neither are they the little children they once were. As they struggle to fit in at... - Family Mealtime: The Importance of Eating Dinner Together
Creating a Healthy Family Mealtime Routine The family dinner table is the place where loved ones gather at the end of a long day, talk about school and work, make plans for the future and truly learn to... - Autumn Fun: 10 Ideas for Enjoying the Fall Season
Fall Fun Ideas Autumn is my favorite time of the year. The kids are back to school, the air is crisp and clean; brilliant leaves cling to their last breaths of life and those that have lost their battle... - Creating the Perfect Thanksgiving Place Settings
Place Setting Decorations For Your Thanksgiving Table One of the joys of any season or holiday is inviting family and friends to your dinner table for a festive celebration. If you love entertaining like I...
Rate this Hub
© 2010 Jaynie2000


