Crafts Made From Beachcombing Finds

Recycling Crafts
Making crafts with found items collected on vacation make great souvenirs and are fun to create with kids or grandkids. Our family loves to collect seashells and have ended up with quite a few baggies full. We also pick up shells along the Great Lakes as well. When we hike we often find interesting tidbits bits, like acorn caps, pretty leaves , stones, arrow heads or even a tiny skull once in a while.
We haul our treasures out when the kids start getting bored at the end of summer break from school. This is when it's fun to remember where we found the items and get creative with ways to use them to make crafts.
FRAMES:
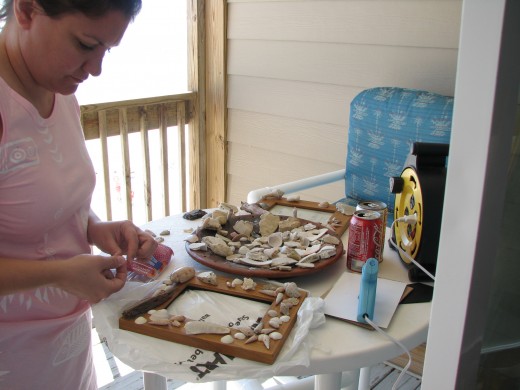
Picture Frames are the favorites because we can put photos from the trip where we collected the items in the frames we've made. Seashell frames are beautiful mementos of tips to the beach. Purchase plain wooden frames from a craft store, or find them at garage sales or thrift shops. The color or design doesn't matter as you'll be covering them up. We paint our frames white for shells as it seems to make them show up best and looks good if there are spaces between shells. Lay the frame in front of you and place your bits and pieces around the edges until you like the way they look. Then glue your items on, starting at the upper left corner and work your way around. I usually take the finished frames outside and spray them with a couple of coats of spray-on clear sealer. A wee bit of silver, white or gold glitter adds a whimsical touch, but just a little or the frame will look fake and cheap.
Small framed mirrors are also good for this project and look particularly nice on bathroom walls.
TREASURE BOX
Find an old cigar box or purchase one at the craft store. Line the inside with felt and glue it down. Paint the outside of the box, we've used flat black or brown to go with the natural items we glued to them, but you can use whatever color you like. Aqua is nice for a sea-shell theme. Place a photo from your trip (or a copy) in the center of the lid (or wherever you like) and glue it in place. Place your twigs, leaves, seeds, acorns, acorn caps, peoples, and even little bones or arrow heads on the box lid until you find a pleasing design. Then glue each item in place, it's sort of like putting a puzzle together. Spray the completed project with two coats of clear sealer.
PENCIL HOLDER
Use an empty soup can or any suitable sized can. Paint it or cover it with fabric like burlap or something natural looking. Follow the same procedure as for the frames or treasure box. I made one by using small twigs placed vertically around the can, which looks really decorative and natural.
These crafts are great because they combine memories, free (found) objects and everyone enjoys making them and remembering the vacation or outing.
A Cordless GLue Gun Makes Crafing Much Easier!


