Create Grunge Background with Textures, Brushes and Custom Shapes

From this short tutorial you will learn an easy way to create cool grunge style backgrounds. In the process of work you'll be using two textures- Frost and Graffiti, Custom Shapes, Brush and adjustment Layer. You have to do some work in the Adjustment Layer Mask too.
I have used Grime 2 and Artistic 6 custom shapes which could be replaced with brushes or another shapes if they are not exclusive for your Photoshop version. Just use your imagination to create something unique. The Dashed Circle 2 Brush I have used to border the canvas and to brush in the layer mask is exclusive for all Photoshop versions.
Both Textures added to the Background- Frost and Graffiti are my own photos and unrestricted stock.
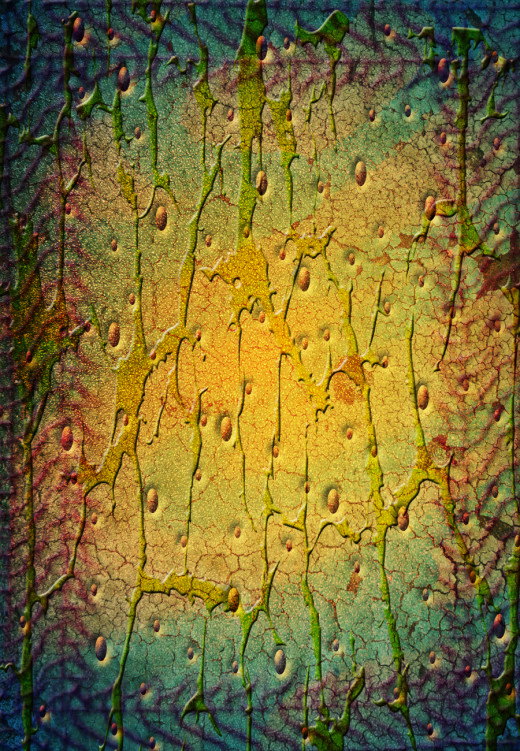
This is the final result:

![Adobe Photoshop Elements 2018 [Old Version]](https://m.media-amazon.com/images/I/51AQ4wl7eOL._SL160_.jpg)
STEP 1
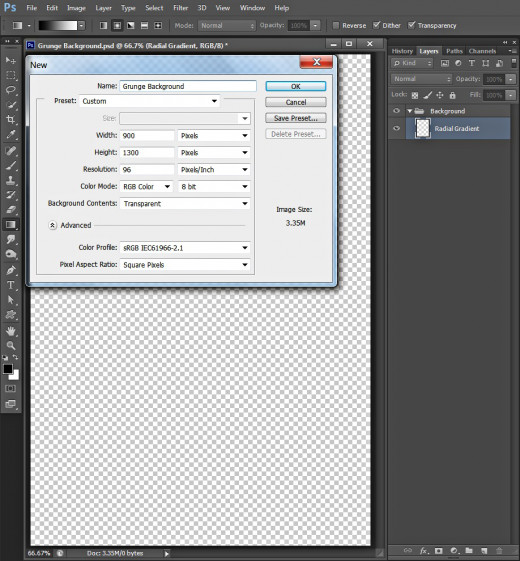
Create a new .psd document of 900 Pixels Width and 1300 Pixels Height. Name it Grunge Background. Set the Resolution to 96 Pixels/Inch, select RGB Color for Color Mode and choose Transparent for Background Contents.
Rename Layer 1 to Radial Gradient and put it in a group (Ctrl+G) called Background.
Colorize the Background and Blend it with Both Textures
In Steps 2-8 you should fill the first layer with awesome orange to navy blue Radial Gradient. After that you are going to Paste both stock textures in your .psd file, resize them and change their blend modes.
STEP 2
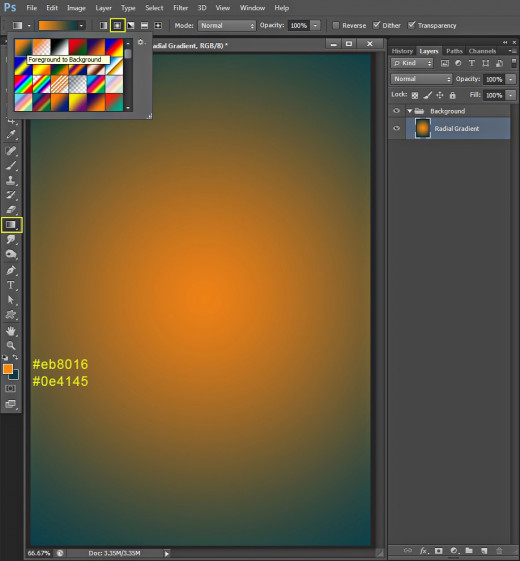
Set Foreground Color to #eb8016 and Background Color to #0e4145 then press G to select Gradient tool- select Foreground to Background Gradient from the Gradient Picker in the Options bar and click on Radial type of Gradient icon. Colorize your canvas by dragging from middle to any corner of it.
STEP 3
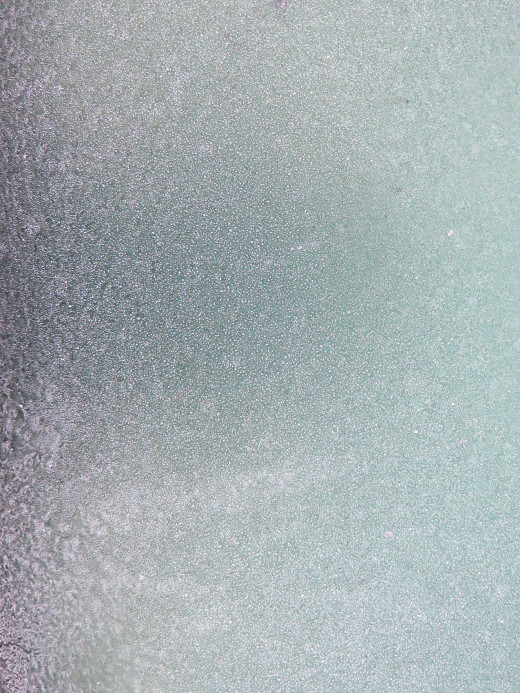
The first photo you have to download is this Frost Texture. Click on it to get it in high resolution then right click and select Save As to save it in your folder.
STEP 4
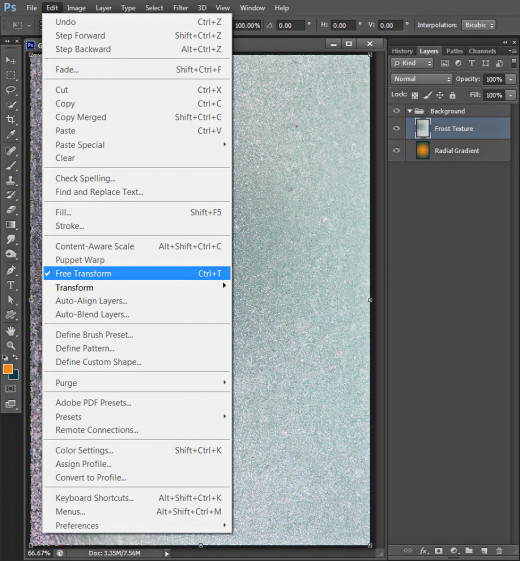
Create a New Layer above the Radial Gradient layer in Background group and name it Frost Texture. Open in Photoshop the Frost Texture you already downloaded then press Ctrl+A, after that press Ctrl+C to select and copy it, go back to your Grunge Background .psd file, select Frost Texture layer and press Ctrl+V to paste the Texture there.
Apply Edit, Free Transform and move the nodes so that the texture covers your canvas. Press Enter to apply the Transformation.
STEP 5
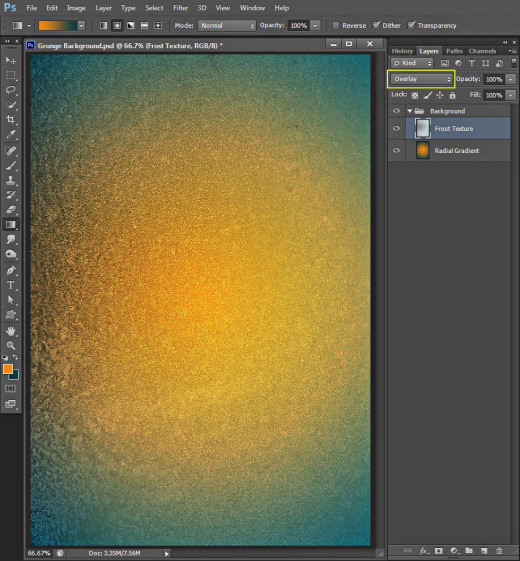
Change Blend Mode of Frost Texture layer to Overlay.
STEP 6
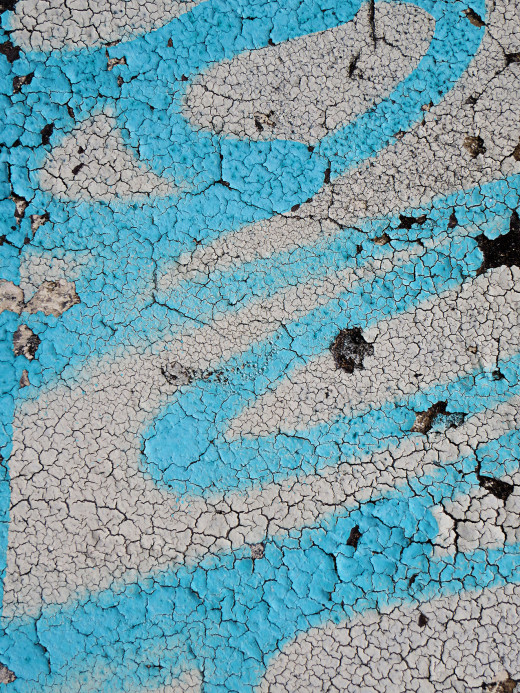
Now download this Graffiti Texture the same way you downloaded the Frost Texture in Step 3.
STEP 7
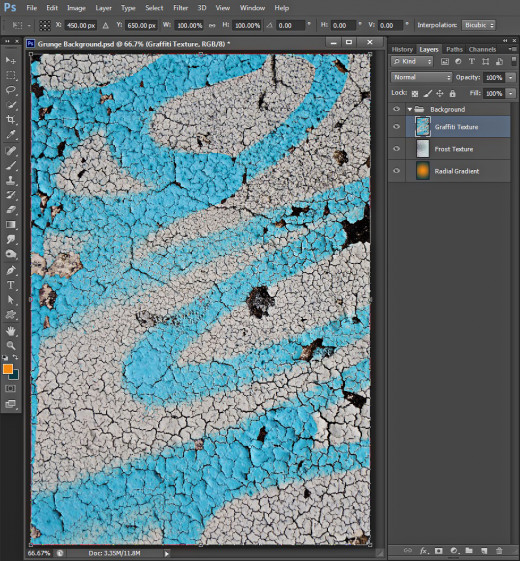
Create a New Layer named Graffiti Texture and place it on top of Background group. Paste there the Graffiti Texture (see Step 4) and apply Edit, Free Transform to shape the Texture so that it covers your canvas. Press Enter when you are ready with the Transformation.
STEP 8
Change Blend Mode of Graffiti Texture layer to Overlay and lower its Opacity to 50%.

Draw two Custom Shapes and Create Border with Default Brush
In Steps 9-17 you have to draw two custom shapes- Grime and Artistic, change their blend modes and add slight 3D Effect. After that you are going to create cool textured border with the help of Dashed Circle Brush.
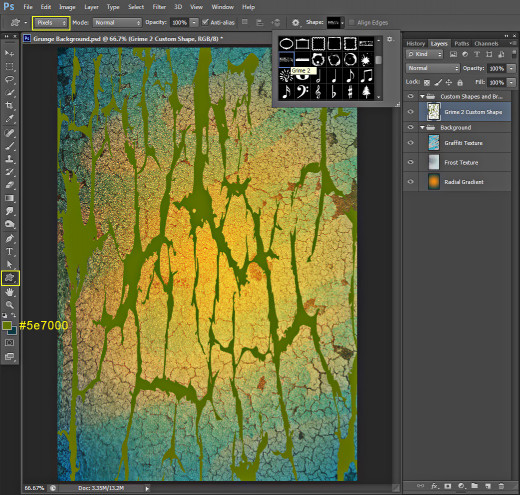
STEP 9
Create a New Layer on top of Layers panel and name it Grime 2 Custom Shape. Put it in a group called Custom Shapes and Brush.
Set the Foreground Color to #5e7000, then take Custom Shape Tool, in the Options bar select Pixels for Color Mode and find Grime 2 Shape in the Custom Shape Picker. Draw the Shape (while Grime 2 Custom Shape layer is highlighted) so that it covers your canvas.
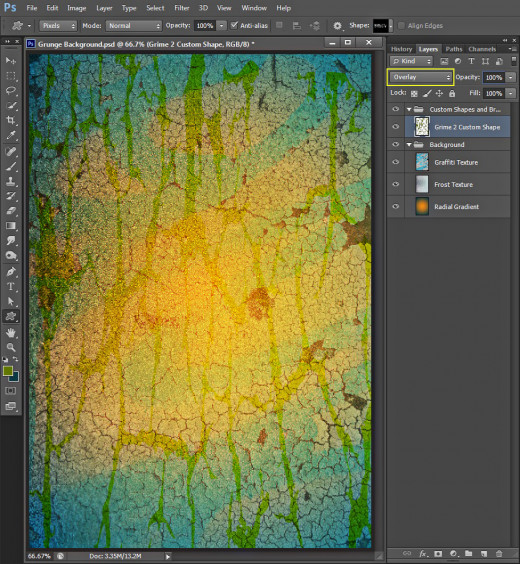
STEP 10
Change Blend Mode of Grime 2 Custom Shape layer to Overlay and you'll get this outcome:
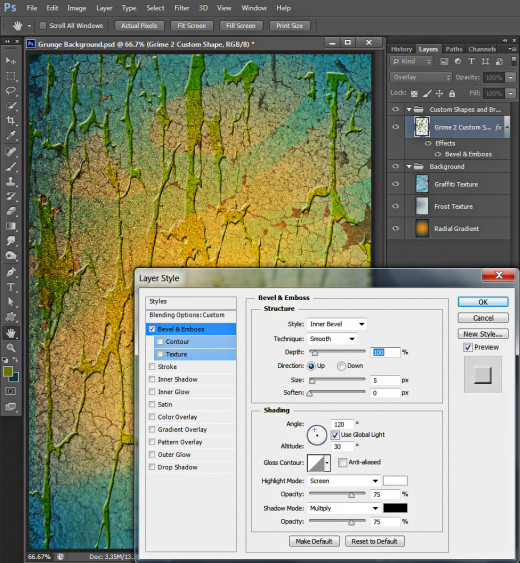
STEP 11
Double click on Grime 2 Custom Shape layer's thumbnail to call Layer Style dialog box (Layer, Layer Style, Blending Options). Only check Bevel and Emboss and leave all its settings as given by default.
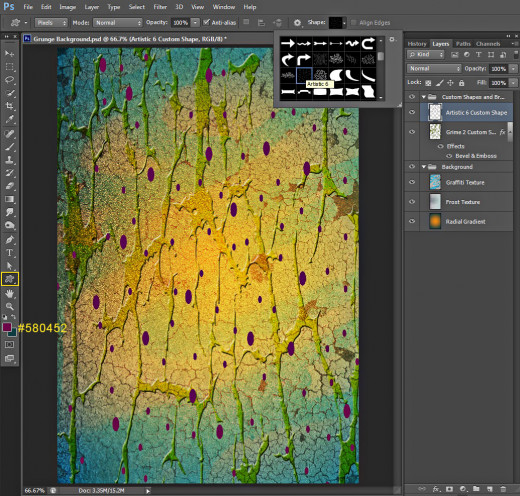
STEP 12
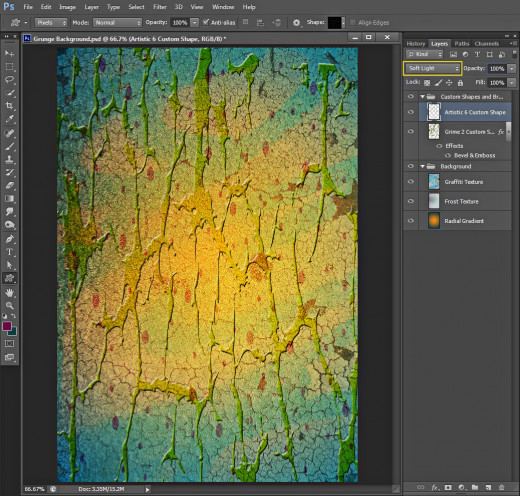
Now change Foreground Color to #580452, create a New Layer on top of Custom Shapes and Brush group and name it Artistic 6 Custom Shape. Take Custom Shape Tool in Pixels Mode, select Artistic 6 Custom Shape from the Picker and draw it on your canvas so that its spots cover it.
STEP 13
Change Blend Mode of Artistic 6 Custom Shape layer to Soft Light. The spots now are almost invisible but in the next step we'll change it.
STEP 14
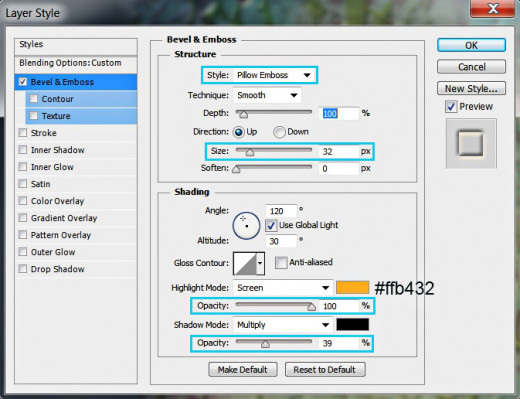
Double click on Artistic 6 Custom Shape layer's thumbnail and check Bevel and Emboss to add 3D Effect. Change the Style to Pillow Emboss and increase Size to 32px. Set Color for Highlight to #ffb432, increase Color for Highlight Opacity to 100% then reduce Color of Shadow Opacity to 39-40%.
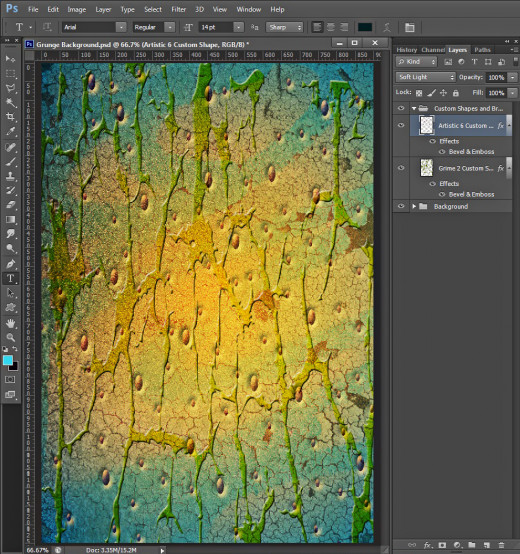
This is the outcome you should get after applying 3D Effect on Artistic 6 Custom Shape layer:
STEP 15
It is time to create another layer on top of Custom Shapes and Brush group. Name it Dashed Circle 2 Brush after the brush we have to use in this step.
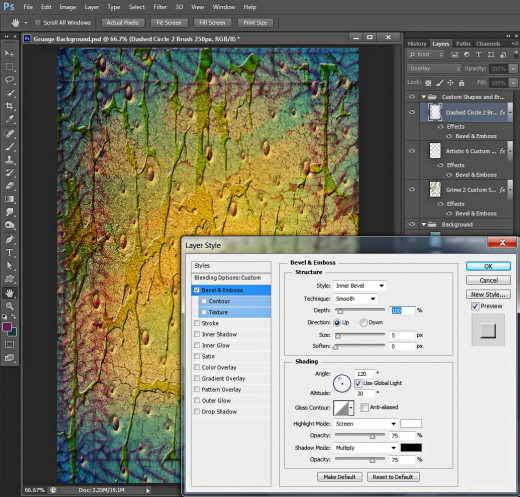
Change Foreground Color to #6d154f, grab Brush tool, find Dashed Circle 2 Brush of 41px Size and increase its Size to 250px. Brush the edges of your canvas to enframe it with this awesome brush as you see on the screenshot below.

STEP 16
Change the Blend Mode of Dashed Circle 2 Brush layer to Overlay.

STEP 17
Double click on Dashed Circle 2 Brush layer's thumbnail and tick Bevel and Emboss in Layer Style box to add relief to the brush border. Leave the settings of Bevel and Emboss as given by default.
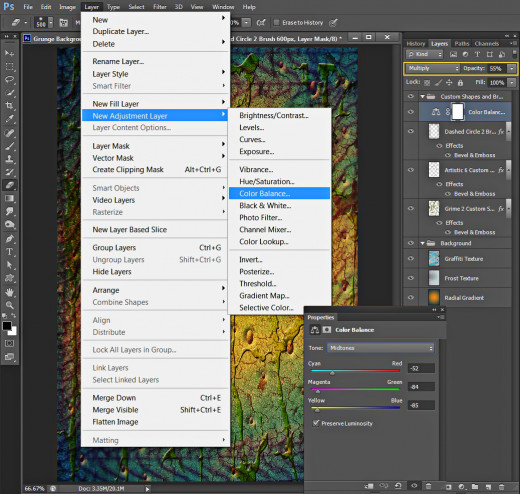
Apply Color Balance Adjustment Layer and Brush within its Layer Mask
You will finish the work on this tut with adding Color Balance Adjustment Layer on top of your Layers panel. In order to improve the colors of your Grunge Poster, you’ll have to select its Layer Mask thumbnail and brush within it with the same Dashed Circle Brush we already used in Step 15.
STEP 18
While Dashed Circle 2 Brush layer is selected go to Layer, New Adjustment Layer, Color Balance and change only the settings of Midtones option like this:
Cyan-Red: -52
Magenta-Green: -84
Yellow-Blue: -85.
Change the Blend Mode of Color Balance Adjustment layer to Multiply and reduce its Opacity to 55%.
STEP 19
Keep the layer mask thumbnail of Color Balance Adjustment layer selected. Now firstly press D key to set Foreground/Background color to Black/White then take Brush tool, select again Dashed Circle 2 Brush but this time increase its Size to 600px.

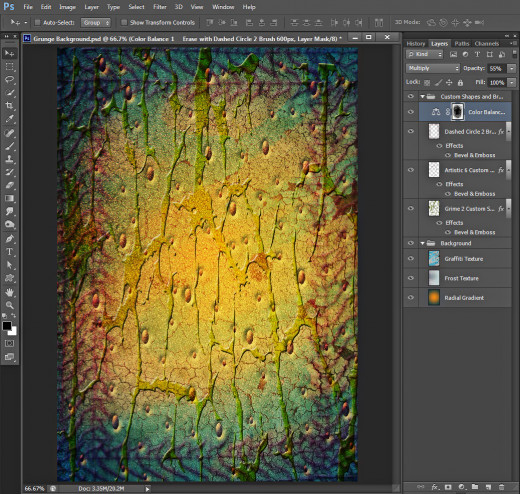
STEP 20
Start brushing with rotation movements of your hand with the previously chosen brush in the middle of the image leaving the borders intact and you will get the result shown below. If you want to darken more the borders of the image, just increase the opacity of the Adjustment layer.
We finished our work on this cool background. You should have these two groups of layers in your Layers panel:
- Background group which includes three layers: Radial Gradient, Frost Texture and Graffiti Texture layer and
- Custom Shapes and Brush group with these four layers in it: Grime 2 Custom Shape, Artistic 6 Custom Shape, Dashed Circle 2 Brush and Color Balance Adjustment layer.
STEP 21
This is my Grunge Style Background saved in .jpg format.
Hope you find this tutorial awesome and enjoyed it.
My advice is not to be afraid to use your imagination. You can create more amazing results if you decide to change the textures or experiment with another custom shapes and brushes.
Thank you very much for reading and God bless! :)