Create Old Worn-Out Text with Brushes and Fisheye Warp in Photoshop

You will learn from this Adobe Photoshop tutorial how to create distorted Retro Style Text with brushes and awesome Timber Texture which you are going to blend with the Background. In the process of work I will also show you how to create cool effects using Bas Relief and Mosaic Tiles filters and how to change the shape of your Text using Fisheye Warp.
Both brushes used: Mesh-Large and Plastic Wrap-Light and the Impact Font are exclusive for Photoshop. If you can’t find the same brushes in your Layers panel (concerns the older versions of the program), you can replace them with similar ones which you can download from the web.
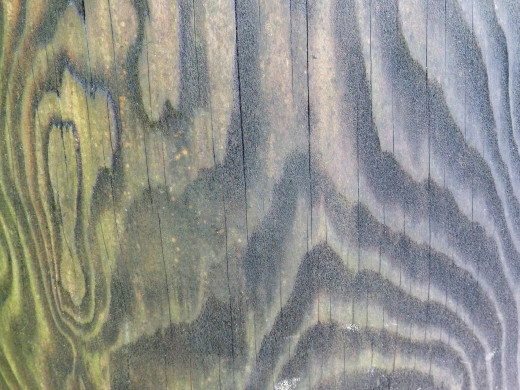
The Timber Texture added to the Background is my own photo and unrestricted stock. Feel free to use it for your own projects.
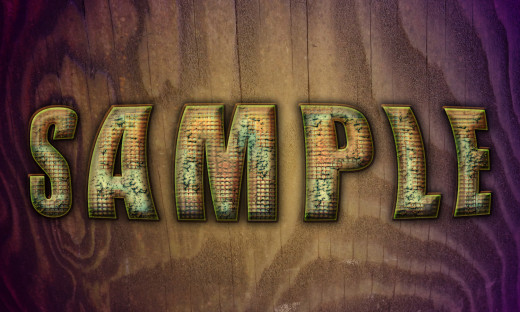
This is what you are going to create:

STEP 1
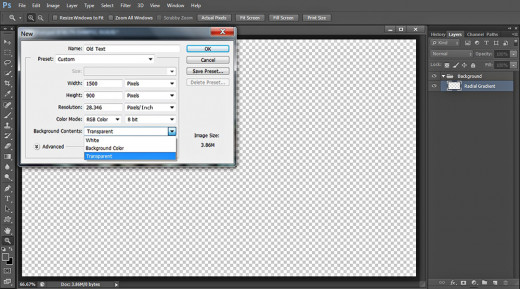
Open Adobe Photoshop and create a new .psd document. Name your new file Old Text, then set its Width to 1500px and Height to 900px. Set the Resolution to 96 Pixels/Inch, select RGB for Color Mode and Transparent for Background Contents. (or those who would like to print the text, the Resolution should be set to 300 Pixels/Inch and CMYK selected for Color Mode. After you press OK button, you'll have transparent Layer 1 in your Layers panel.
Double click on Layer 1 name and write Radial Gradient in the white space to rename the layer. Press Ctrl+G to place the Radial Gradient layer in a Group and call the newly created Group Background.
Create Cool Background with Orange to Purple Radial Gradient and Timber Texture
In Steps 2-5 you have to colorize your first Radial Gradient layer with Orange to Purple Gradient, then you should add Timber Texture with Soft Light Blend Mode to achieve the final effect- Background with colorful waves and scratches.
STEP 2
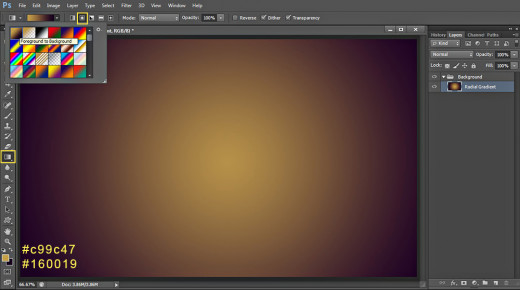
Click once on Set Foreground Color swatch in the Tools bar and when the Color Picker box pops up on your screen, change the Foreground color to #c99c47. After that click on Set Background Color swatch and change the Background Color to #160019.
Now select Gradient Tool (or press G) then go to the Options bar to change the settings of the instrument. Select Foreground to Background Gradient from the Gradient Picker, select also Radial Gradient type and drag by holding down left mouse key from the middle to any side of the image. See the screenshot below for a reference:
STEP 3
Click on the Timber Texture below to get it in high resolution in a new window then right click and select Save Image As to save it in your file.
STEP 4
Create a New Layer above Radial Gradient layer and name it Timber Texture.
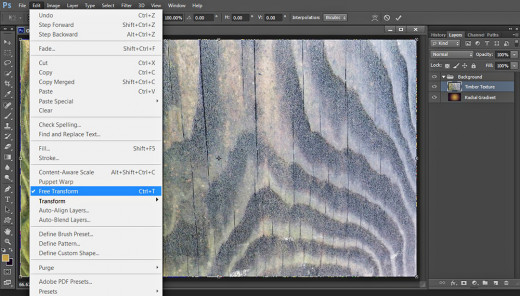
Open the previously downloaded Timber Texture in Photoshop, press Ctrl+A to load selection on the whole image then press Ctrl+C to copy it. Go back to your Old Text .psd file (check if Timber Texture layer is highlighted) and press Ctrl+V to paste the Texture. Go to Edit, Free Transform and drag the nodes vertically and horizontally in order to resize the texture so that it covers your canvas. Press Enter key to apply the Transformation.
STEP 5
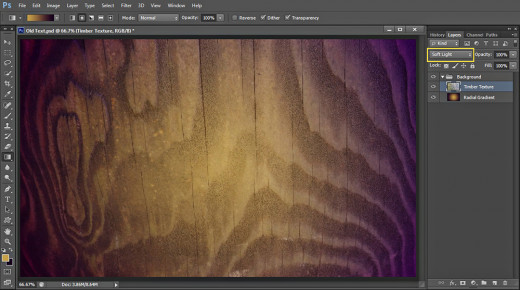
Change the Blend Mode of Timber Texture layer to Soft Light. Your work will look like this so far:
Create Beautiful Glossy Text Effect Using Fisheye Warp and Layer Styles
In Steps 6-14 you have to implement the main part of this tut- you will type the Text, then warp it and add Blending Options. For the purpose you should duplicate the original Text layer and apply layer styles on both duplicate and original layers.
STEP 6
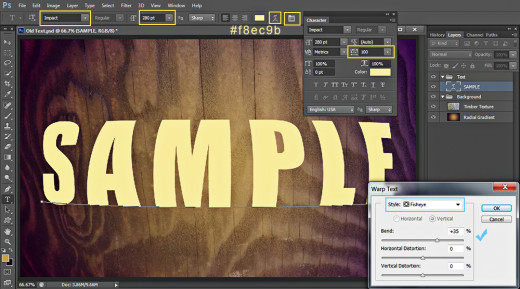
In this step we'll start creating the Text Effect itself. Grab Horizontal Type tool from the Tools bar (hot key T). From the Font Family drop down menu choose Impact default Font and Set its Font Size to 280pt. Set #f8ec9b for Text Color then type Sample in Capital Letters.
When your text is ready, highlight it then click on Toggle the Character and Paragraph Panels icon in your Options bar and Set the Tracking for the Selected Characters to 100.
Keep the Text highlighted, then click on Create Warped Text icon in the Options bar (the one to the left of the Text Color swatch). When Warp Text dialog box pops up on your screen, select Fisheye from Style drop down menu then set Bend Option to +35%.
After you are ready with the Text settings, move Sample Text layer on top of Layers panel and press Ctrl+G to put it in a group. Call the new group Text.
STEP 7
While Sample Text layer is selected, press Ctrl+J to duplicate it then lower Fill Opacity of Sample copy layer to 0%.

STEP 8
Reselect the original Sample Text layer, double click on its layer's thumbnail to activate Layer Style dialog box. Firstly check Drop Shadow Layer Style and change three of its settings as follows:
Distance: 0px
Spread: 33%
Size: 40px.
Keep Layer Style dialog box active as we are going to add more Blending Options in the coming steps.

STEP 9
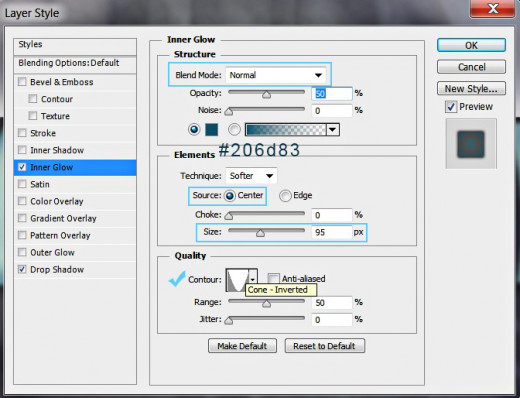
The second Layer Style to be applied on the original Sample Text layer is dark blue Inner Glow. Check Inner Glow in the dialog box and change the following settings:
Blend Mode: Normal
Color of Glow: #206d83
Source: Center
Size: 95px
Contour: Cone-Inverted.
STEP 10
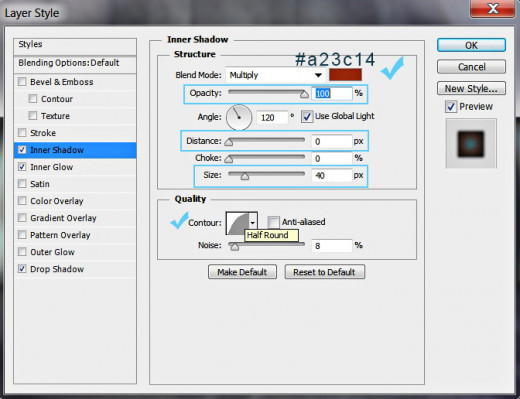
In order to darken the borders of the Text and to give it more volume, tick Inner Shadow Layer Style and modify these settings:
Color of Shadow: #a23c14
Opacity: 100%
Distance: 0px
Size: 40px
Contour: Half Round.
STEP 11
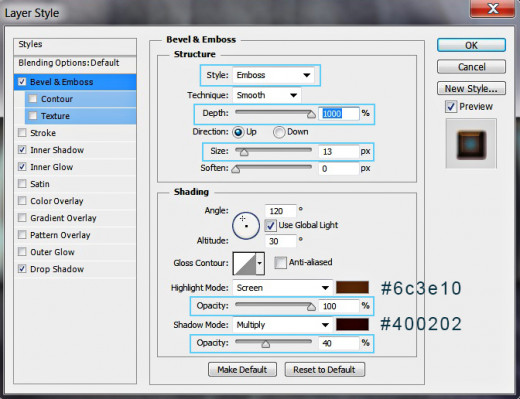
The last Layer Style to be applied on Sample Text layer is Bevel and Emboss. Insert the following settings:
Style: Emboss
Depth: 1000%
Size: 13px
Color for Highlight: #6c3e10
Color for Highlight Opacity: 100%
Color of Shadow: #400202
Color of Shadow Opacity: 40%.
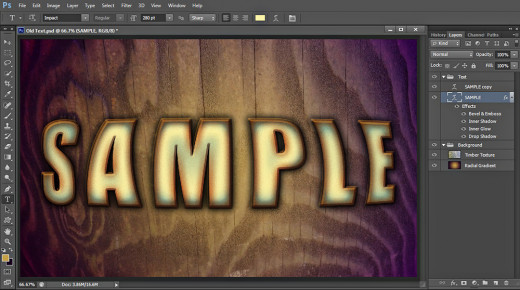
This is how your Text Effect will look after applying all four layer styles on the first Text layer:
STEP 12
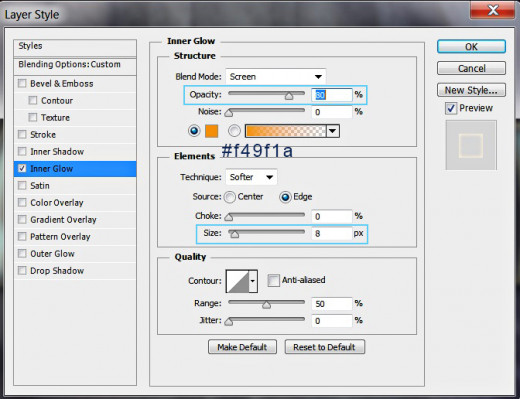
Now double click on Sample copy layer's thumbnail. The first Layer Style to be applied is Inner Glow. Increase its Opacity to 80%, change Color of Glow to #f49f1a and set the Size to 8px.
Still don't close the Layer Style box because we have to add two more Blending Options in the coming steps.
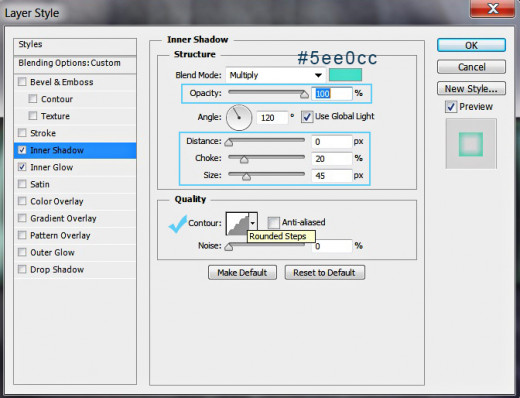
STEP 13
Now we have to add green-blue shade to the Text borders so tick Inner Shadow Layer Style and change these settings:
Color of Shadow: #5ee0cc
Opacity: 100%
Distance: 0px
Choke: 20%
Size: 45px
Contour: Rounded Steps.
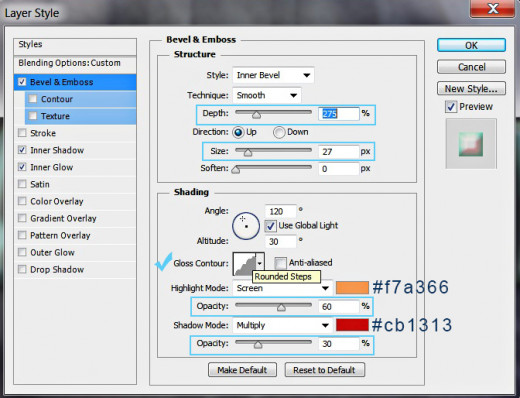
STEP 14
We have one more Layer Style to add to the duplicated Text layer. Check Bevel and Emboss and insert these settings:
Depth: 275%
Size: 27px
Gloss Contour: Rounded Steps
Color for Highlight: #f7a366
Color for Highlight Opacity: 60%
Color of Shadow: #cb1313
Color of Shadow Opacity: 30%.
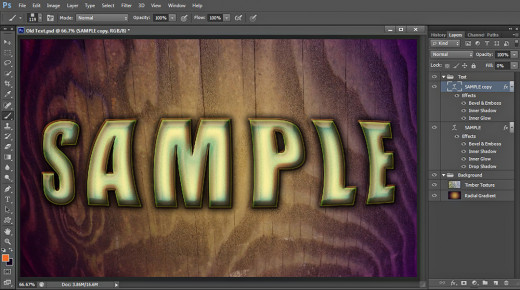
This is how your Old Worn-Out Text will look so far:
Add Brushes and Apply Filters to give the Text Grunge Worn-Out Look
From Step 15 till the end of the tut you will have to create the final embellishment. In this part you are going to add a few dabs with Mesh-Large Brush then will apply Bas Relief and Mosaic Tiles filters to its layer. After that you will add Plastic Wrap- Light Brush and apply Blending Options.
STEP 15
Now Create a New Layer named Mesh-Large Brush and place it between both Text layers in Text group.
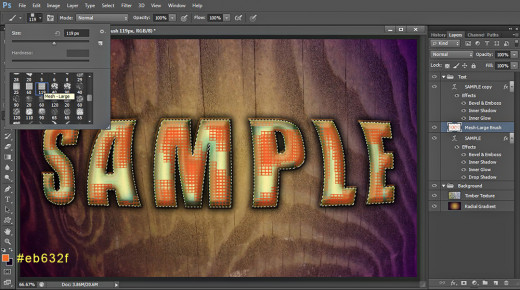
Set Foreground Color to #eb632f.
Hold down Ctrl key and click on Sample layer's thumbnail to Load Selection on the Text.
While Mesh-Large Brush layer is highlighted, grab Brush tool and find Mesh-Large Brush of 119px in the Brush Preset Picker. Start brushing within the Selection until you get similar result:
STEP 16
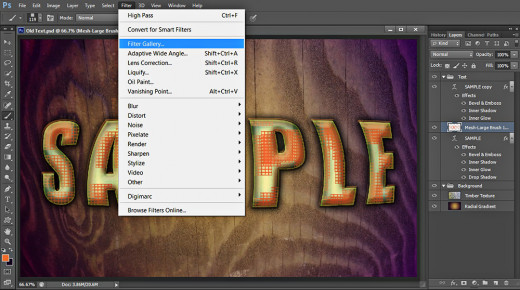
Navigate to the Menu bar and select Filter, Filter Gallery.
STEP 17
When Filter Gallery window appears on your screen, click on Sketch filters drop down menu, then select Bas Relief Filter. Detail option should be set to 15 and Smoothness to 1. Select Bottom for Light and press OK button to apply the Filter.
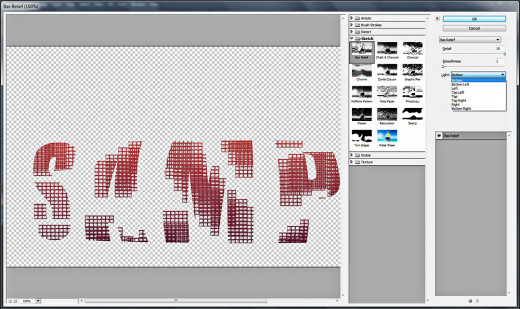
You should get similar result after using Bas Relief Filter on the Mesh-Large Brush:

STEP 18
Open again the Filter Gallery but this time select Mosaic Tiles Filter from Texture filters set. Tile Size should be set to 11, Grout Width to 4 and Lighten Grout to 10.
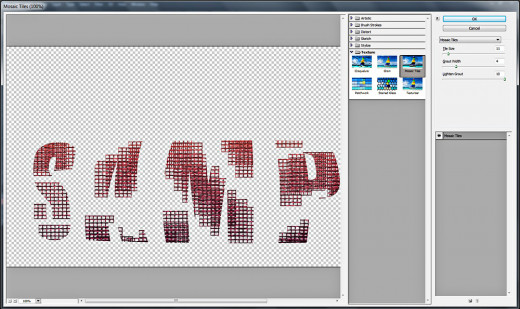
This is my result after applying Mosaic Tiles Filter:
STEP 19
Change the Blend Mode of Mesh-Large Brush layer to Hard Light and lower the Fill Opacity to 60%.

STEP 20
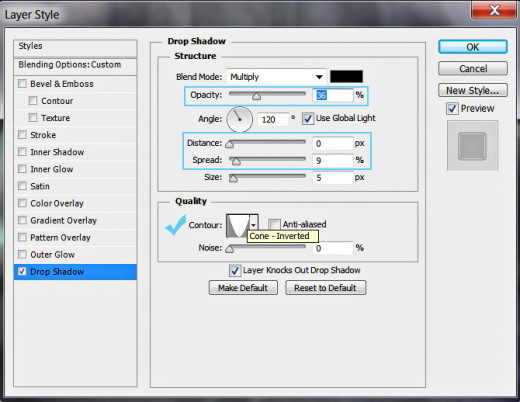
The Mesh Brush added awesome texture to the Text. Now we are going to improve its relief. For the purpose double click on Mesh-Large Brush layer's thumbnail and firstly tick Drop Shadow. Change the following four settings:
Opacity: 36%
Distance: 0px
Spread: 9%
Contour: Cone-Inverted.
STEP 21
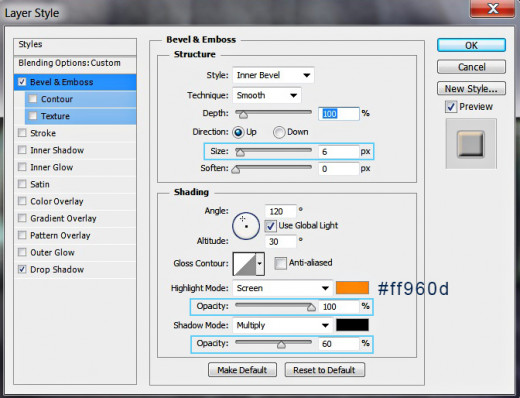
In this step we are going to add subtle 3D Effect to the Mesh Brush texture. Check Bevel and Emboss Layer Style and modify these settings:
Size: 6px
Color for Highlight: #ff960d
Color for Highlight Opacity: 100%
Color of Shadow Opacity: 60%.
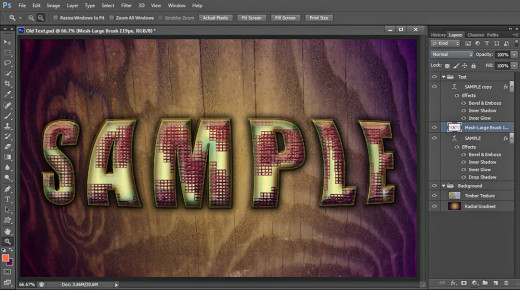
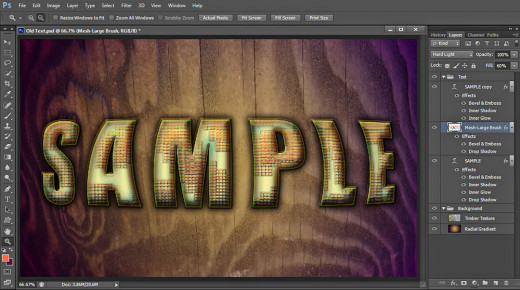
This is the result of adding Blending Options to Mesh-Large Brush layer:
STEP 22
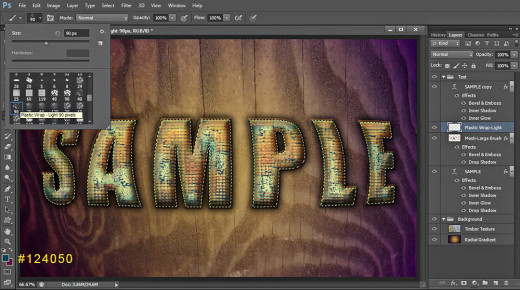
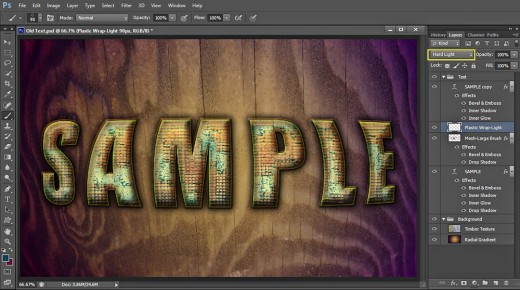
Now Create a New Layer above Mesh-Large Brush layer in Text group. Call it Plastic Wrap-Light after the Brush we are going to use.
Select Brush tool and find Plastic Wrap-Light brush of 90px Size in the Brush Preset Picker.
Change the Foreground Color to #124050 then hold down Ctrl and click on Sample layer's thumbnail to Load Selection on the Text.
Start making dabs with the chosen brush within the Selection. You should get similar to my result shown on the screenshot below:
STEP 23
Press Ctrl+D to remove the Selection from the Text then change the Blend Mode of Plastic Wrap-Light layer to Hard Light.
STEP 24
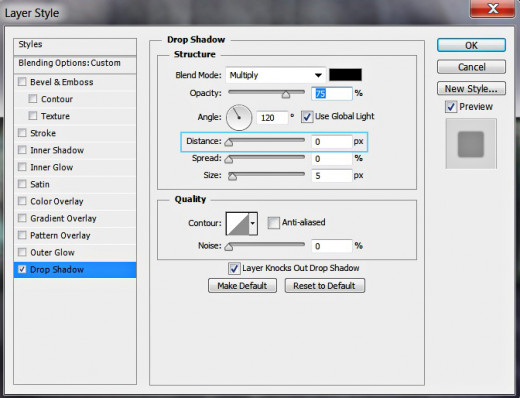
Blending Options are coming again. Double click on Plastic Wrap-Light layer's thumbnail and firstly tick Drop Shadow in Layer Style dialog box. Reduce only its Distance to 0px and leave all other settings as by default.
STEP 25
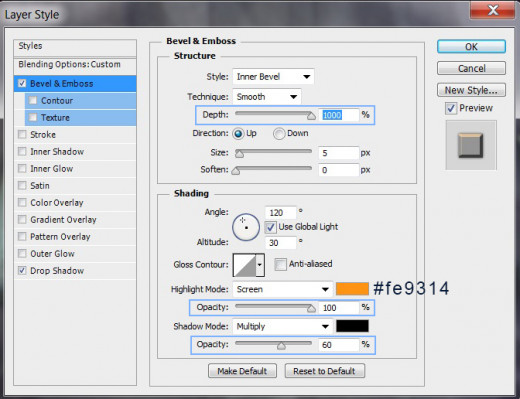
Tick Bevel and Emboss Layer Style and change these four settings:
Depth: 1000%
Color for Highlight: #fe9314
Color for Highlight Opacity: 100%
Color of Shadow Opacity: 60%.
Our Old Worn-Out Text is ready. You should have these two groups with six layers in them in Layers panel (from bottom to top):
- Background group which contains these two layers: Radial Gradient and Timber Texture and
- Text group which includes the following four layers: Sample, Mesh-Large Brush, Plastic Wrap-Light and Sample copy layer.
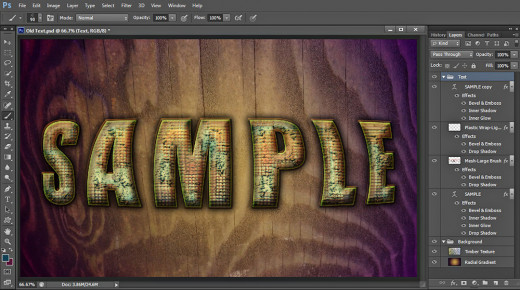
STEP 26
This should be your outcome saved in .jpg or .png if you have chosen to follow all my steps.
Thank you very much for reading this tut and if you have any questions, just leave a comment below. God bless! :)