- HubPages»
- Arts and Design»
- Graphic Art & Design»
- Design Software
Create a Grunge Logo Using Photoshop

If you want to create your own grunge logo please read this tutorial. In just a few simple steps we'll create a cool logo effect.
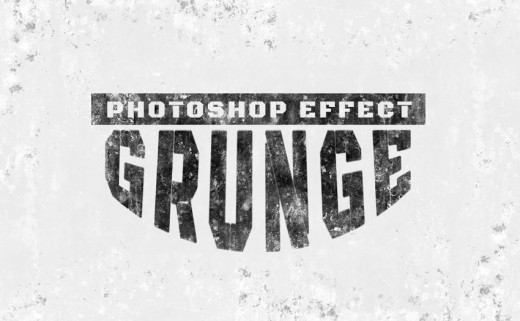
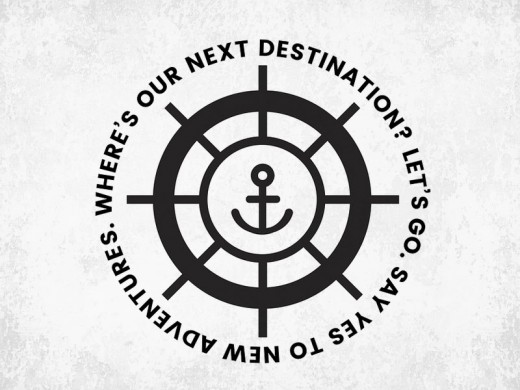
In the image below you can see the result of the grunge logo made from scratch in Photoshop. The logo has a distressed look with lots of scratches, dust and noise.
Grunge Logo
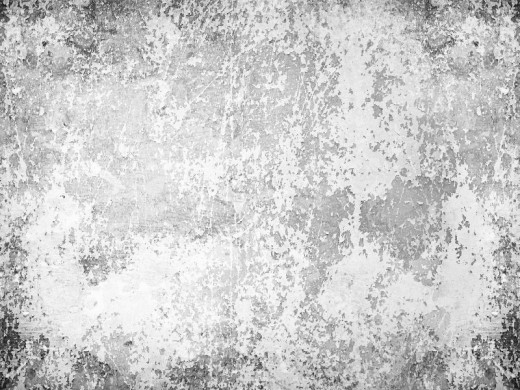
Step 1 - Add The Grunge Paper Texture
Add this grunge paper texture in a new layer. We will use this texture to make a grunge background which will be the base for our logo effect..
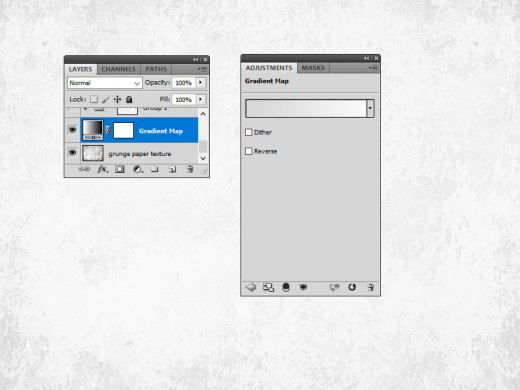
Step 2 - Add A Gradient Map
Add a Gradient Map to make the grunge paper background more subtle. Use these two colors for the gradient (#d7d7d7 and #f9f9f9). You can also use an adjustment layer like Curves or Levels to obtain a similar effect.
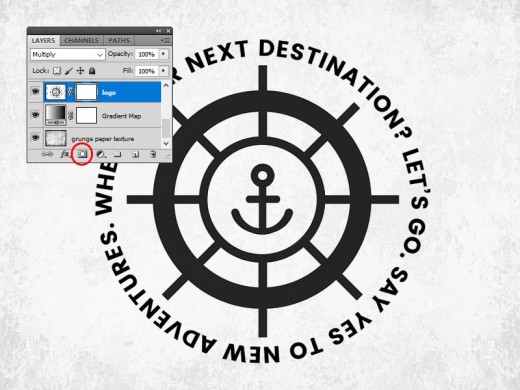
Step 3 - Add Your Logo
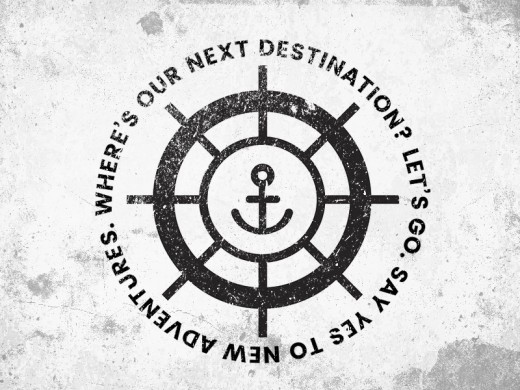
Add your logo in a new layer. You can use any logo. I will use this black and white logo.
If it is not a PNG image with transparent background, set the blend mode to Multiply. Or, use this remove white background Photoshop action to remove the white background of your logo. The downside is that if your logo contains white areas the action will remove those too.
Step 4 - Add A Layer Mask
Add a Layer Mask to your Logo Layer. We will use this mask to create the grunge effect.
The Photoshop masks are usually used to hide parts of the layers in a non-destructive way. So your grunge logo will remain intact. This is the difference between using the Eraser Tool and using a Layer Mask.
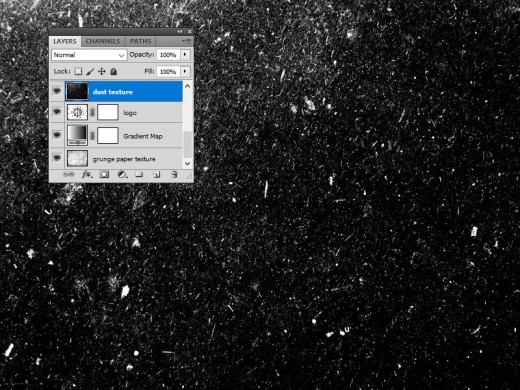
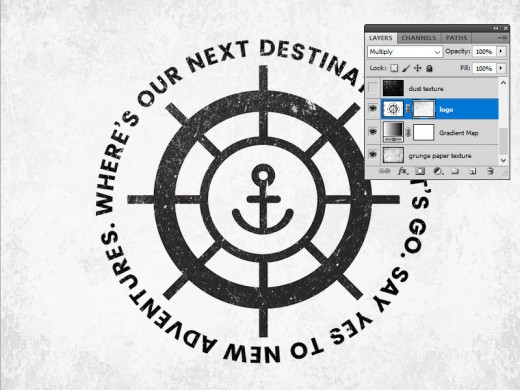
Step 5 - Add The Dust Texture
Add the Dust Texture in a new layer above the Logo Layer.
Choose a dust texture from this pack. Unzip the file and inside you will find 15 textures of dust and scratches. Pick the dust texture that you like.
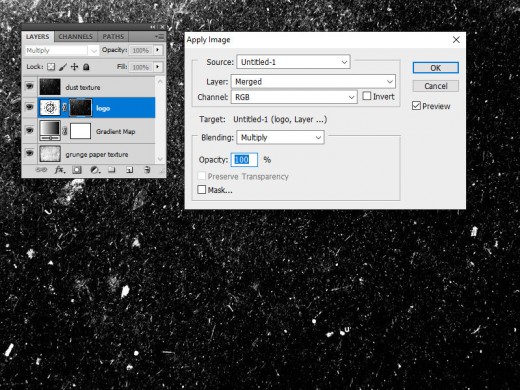
Step 6 - Create The Channel Mask
Use the Dust Texture to create a channel mask for the Logo Layer.
Click on the Layer Mask thumbnail of the Logo Layer.
Go to Image > Apply Image with the following settings.
Step 7 - Invert The Mask Channel
Press Control-I to Invert the mask. Hide the Dust Texture layer to see the result.
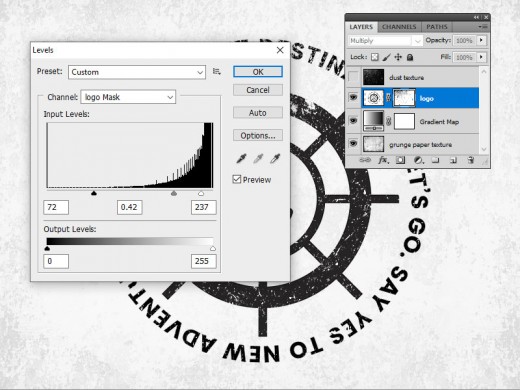
Step 8 - Add A Levels Adjustment
Click on the Layer Mask thumbnail of the Logo Layer.
Go to Image > Adjustments > Levels and adjust the Input levels to increase or decrease the contrast of the channel mask.
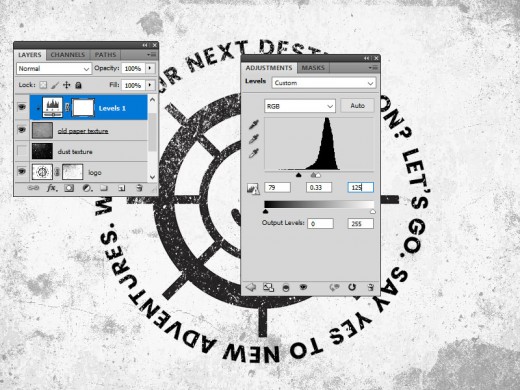
Step 9 - Add The Old Paper Texture
For the final touches you can use an old paper texture to create a distressed old look.
Desaturate the old paper texture and then set the blend mode to Multiply, opacity 30%.
I also added a Levels adjustment to increase the contrast.
Step 10 - Grunge Logo Final Result
So this is the final result for the grunge logo effect made in Photoshop using textures.

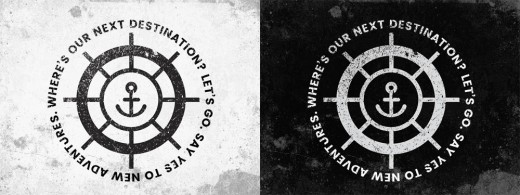
Grunge can portray messy, dirty, rebellious and is often used in typography and logo designs. Grunge logos are great for bands, record labels, clothes and other products.


