- HubPages»
- Arts and Design»
- Graphic Art & Design»
- Design Software
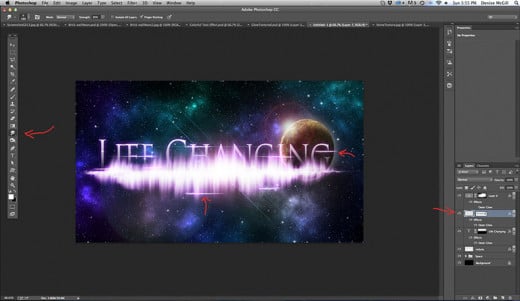
Create a Spacy Nebula Text Effect in Adobe Photoshop

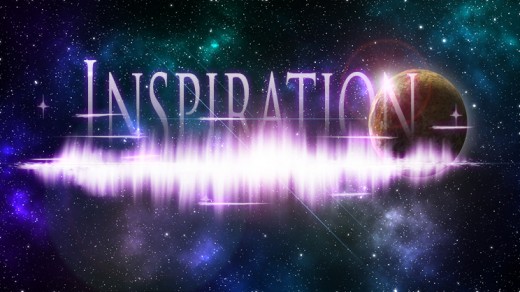
Spacey Nebula With Text
This is an easy to follow tutorial on creating a glowing, colorful space scene perfect for a text effect for headings and images in Adobe Photoshop. I know there are quite a few steps but it is easier than it looks once you get started. I have Adobe Photoshop CS6 but you can also use this technique with older versions. I’m using the Noise Filter to create the stars effect and Clouds Filter to create nebula colors and the Smudge Tool to create the foreground Nebula for the text. I also added a planet using a photo of a stone and the Spherize Filter. Once you have created one of these text effects, you can easily use the same background technique for a number of other projects by just clicking onto the text and typing anything new, even changing the font if you like.
There are many avenues to the same function in Photoshop. I found after months of going the long direction (up to the toolbar, click an option, wait for the drop-down menu, choose one, get another drop-down menu, choose one, etc.) that there are shortcuts to almost all the functions. I will try to give some of these short cuts because the more you use them the easier they are to remember. However, if you can’t remember a shortcut, you can always go the long direction to get to the same place.
This tutorial makes a really beautiful text heading for your flyers or business cards, or even a cover for an e-book. The application possibilities are virtually endless. So let’s get started.

Step 1. New Document
Open a new document in Photoshop. You can use any setting you wish but I am using the following settings set to: 1550 by 870 pixels and desired resolution value. I will use 150 ppi, RGB and White background. Click Ok.
Step 2. Fill with Black
First, you will be making the star-filled sky so let's start. Fill the background with Black by pressing Alt/Option+Delete or you can go to Edit>Fill>Black.
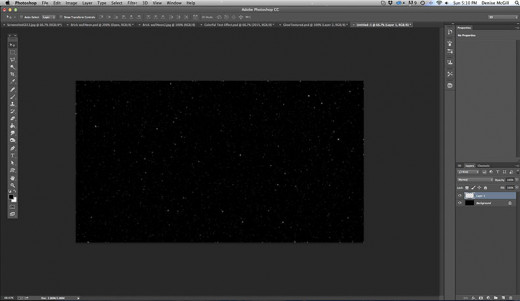
Noise
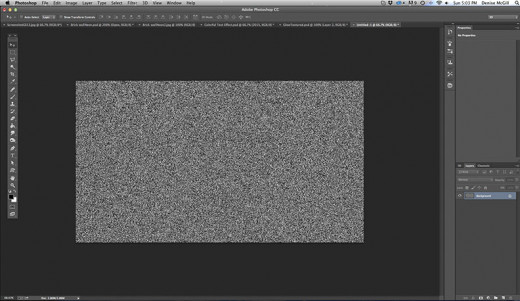
Step 3. Add Noise
Go to Filter>Noise>Add Noise. The Amount should be 400%, Distribution to Gaussian, and Monochromatic is checked. Now you have stars.
Levels
Ever wanted to make a space image?
Step 4. Copy
Make a copy of this layer by pressing Control/Command+J. Click the eyeball to hide the top layer and click onto the thumbnail of the background layer.
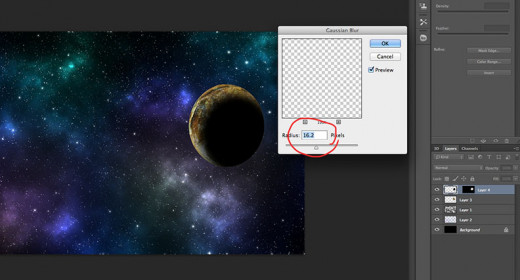
Step 5. Gaussian Blur
Go to Filter>Blur>Gaussian Blur, set the Radius to .5 pixels and click okay. This makes the stars softer and a little farther away looking.
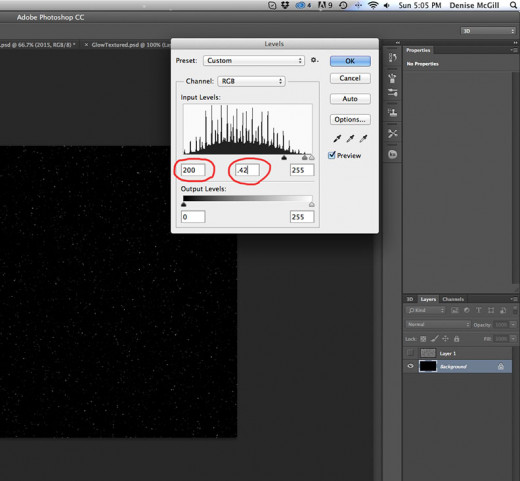
Step 6. Levels
Adjust the Levels by pressing Control/Command+L. For the Input Black, type in 200, and for Input Midtones, type in .42, and click okay. You should see just a few specks in the black field now.
Another Levels Setting
Step 7. Another Blur
Now make the top layer visible by clicking on the eyeball and click on the thumbnail to make it active. Go to Filter>Blur>Gaussian Blur, this time blur it 2 pixels.
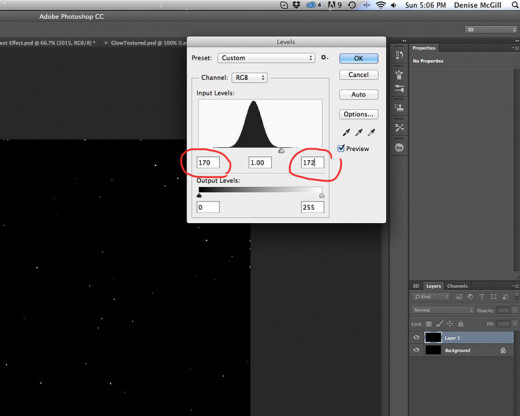
Step 8. Another Levels Setting
Again open Levels by pressing Control/Command+L, this time in the Input black field type in 170, and for the Input white field type in 172. This gives you fewer stars but they are larger. Click okay.
Gaussian Blur

Step 9. Blur
We need to blur these stars just a bit so go back to Filter>Blur>Gaussian Blur and set the Radius to just 1 pixel and click okay.
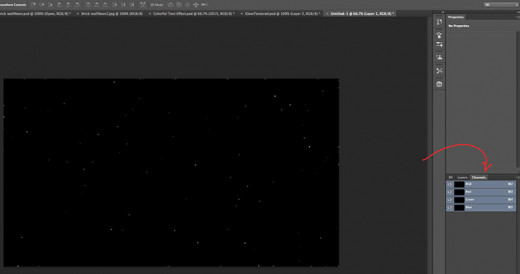
Step 10. Channels
Next, they need a slight outer glow. Go to the Channels tab next to the Layers tab. If you can’t find it, go to Windows>Channels. Click the small circular icon at the bottom of the Channels panel to select all the stars and go back up to the Layers panel. You can delete the layer with the larger stars since you now have a selection of that layer.
Channels
Step 11. New Layer
Create a new layer and with white as the background layer, press Control/Command+Delete. If white was not in the background layer place, nothing will happen, so press X to change the colors from foreground to background and again press Control/Command+Delete. Now Deselect by pressing Control/Command+D or go to Select>Deselect.
Stars
Step 12. Outer Glow
Double click onto the layer to open the Layer Styles dialog box and select Outer Glow. Click the Color box to open the Color Picker window. Change the color to white and click okay. Change the Blend Mode to Normal, increase the Size to 10 pixels. Then click okay.
Clouds
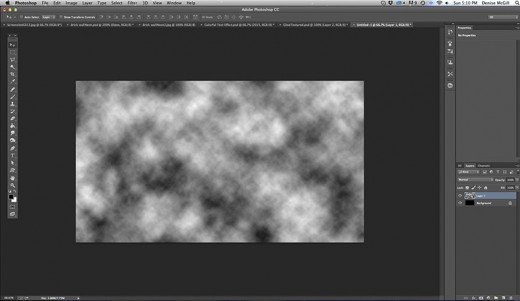
Step 13. Clouds
Merge these two layers now by pressing Control/Command+E. Create a new layer and press Alt/Option+Delete to fill it with black, which is the foreground color. Go to Filter>Render>Clouds, change the Blend Mode to Color Dodge.
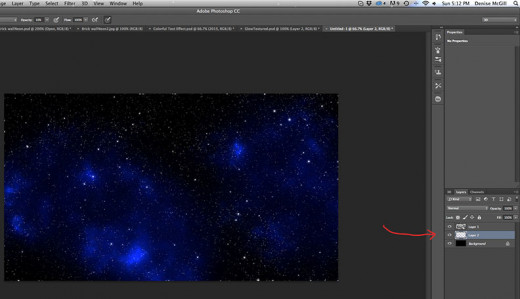
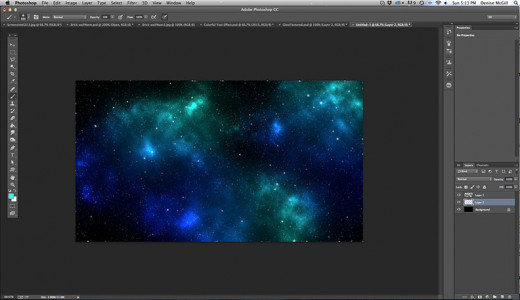
Step 14. Brush Tool and Blue
Create a new layer under the Clouds layer to add colors. Click onto the foreground color icon to open the Color Picker and choose a rich blue color: 0018ff, and click okay.
Open the Brush Tool and make the Size 700 pixels, Hardness to 0%, and Opacity 10%. Press F5 or click the little brush cup icon to open the Brush Preset Panel. Make sure none of the settings are checked except Smoothing and close the panel. Now gently paint over the background to reveal blue nebula clouds.
Next, choose another color by going back to the foreground color icon and opening up the Color Picker, this time pick a brighter color like aqua: 00ffea. Continue to paint over your star field to simulate gasses, constellations, and nebula.
More Nebula color
More Nebula Color
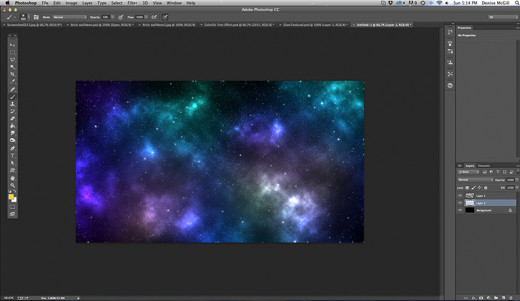
Step 15. Gaussian Blur and More Color
Go to Filter>Blur>Gaussian Blur, and set the Radius to about 80 pixels and click okay. Blurring the color softens it and makes it look more ethereal. Add another color like deep purple: 6000ff. Add this color to the gasses. Add another color, this time a warm yellow: ffd200.
Open Stone Photo
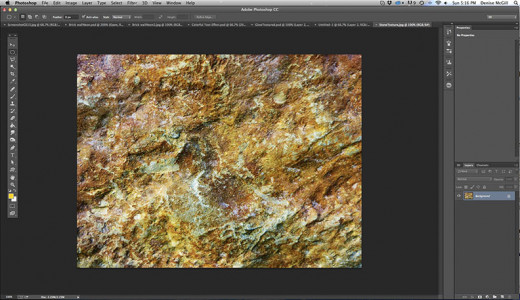
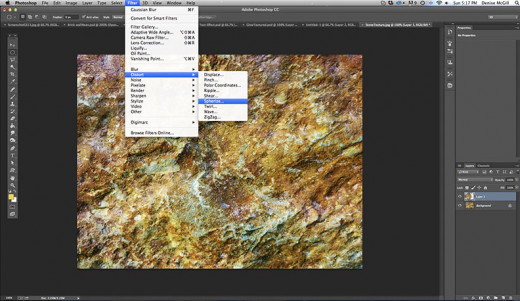
Step 16. Open Stone Photo
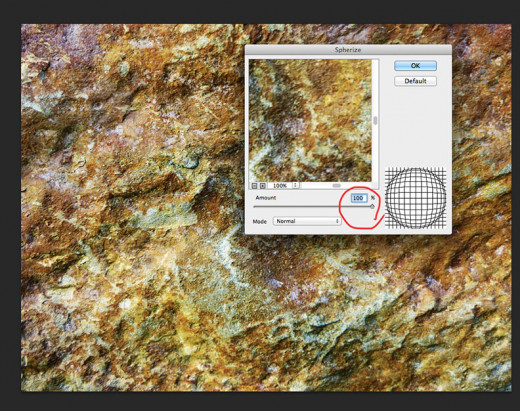
Next to add a celestial sphere. To do this open a rocky photo, choose the Elliptical Marquee Tool, start at the upper left corner and hold down the shift while dragging the marquee tool across to the opposite corner. This will give you a perfect circular selection. Press Control/Command+J to cut and copy the selection onto its own layer. Go to Filter>Distort>Spherize, set the Amount to 100% and click okay. Press Control/Command+F to repeat the Filter. Now you want to move it to your space document.
Spherize
Spherize
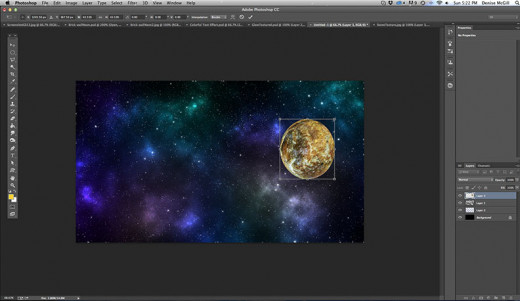
Step 17. Drag to Star Field
Press V to open your move tool and literally drag this sphere up to the tab of your starfield document. Still holding down the mouse, pull this down onto the star field and release. If it isn’t on the top layer, just drag this layer to the top of the layers panel. To resize it open your Transform Tool by pressing Control/Command+T and size it any size you prefer.
Drag to Star field
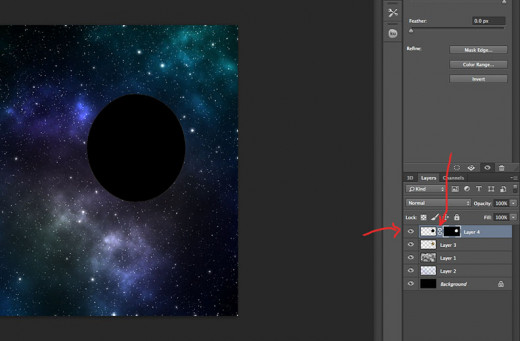
Step 18. Planet Shadow
Create a new layer. Press Control/Command and click onto the thumbnail of the sphere to make a selection. We are going to fill this shape with black on the new layer. Press D to make the foreground and background colors default back to black and white, then press Alt/Option+Delete to fill the selection with black.
Planet Shadow
Drag shadow
Blur shadow
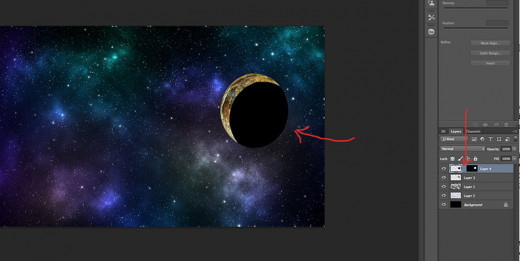
Step 19. Drag the Shadow
Click the mask icon to add a layer mask, click off the chain link between the thumbnail and the mask to unlock the mask. Click on the black circle thumbnail to make it active, and move it to a position to the lower right so a sliver of the sphere underneath shows in the upper left. Go to Filter>Blur>Gaussian Blur, Set the radius to 15 pixels and click okay. To make the shadow less dense, reduce the Opacity to 90% or so.
Outer Glow
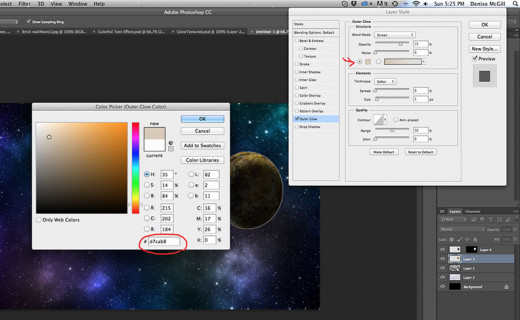
Step 20. Outer Glow and Inner Glow
Go to the sphere layer and double click to open Layer Styles. Click Outer Glow, click the color box to open the Color Picker, type in d7cab8 for the color and click okay. Blend Mode is Screen, Opacity 35%, Size is 60 pixels. Click Inner Glow, and the color box and type in the same color as for the Outer Glow, d7cab8 and click okay. Change the Blend Mode to Lighten, Opacity to 40%, Size is 60 pixels.
Lens Flare
Lens Flare Placement

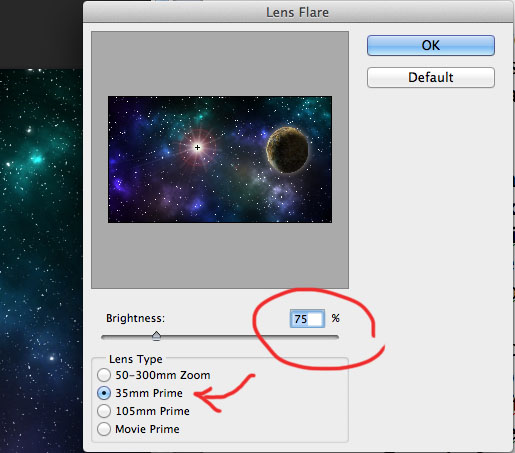
Step 21. Lens Flare
The last effect will make it look like there is a star or sunrise just beyond the horizon of the sphere. From here you make a composite image of all your layers by pressing Control+Shift+Alt+E on a PC or Command+Shift+Option+E on a Mac. Go to Filter>Render>Lens Flare. The Lens Type is 35 mm Prime, and Brightness is 75%. Drag the Lens Flare right to the edge of the sphere and click okay. This finishes our spacey background.
Brush Presets
Flatten Brush

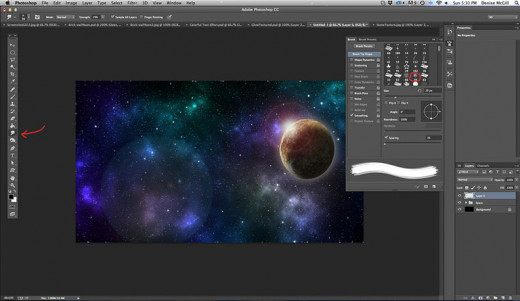
Step 22. Foreground Nebula Brush
Create a new layer. Start by creating a brush. Go to the Smudge Tool from the left-hand tool column and then open the Brush Presets dialog box by clicking onto the little brush cup icon on the right-hand panel. Choose the Dry Brush from the brush presets list. Just hover over the brushes and the names will appear. This one looks like a splatter effect. If Other Dynamics is checked, then uncheck it. Under brush tip shapes, there is a dialog box with a circle and cross hairs. This lets you change the direction of the brush and the dynamics. Grab one of the points, top or bottom and flatten the brush completely by pulling it down or up.
Smudge Up and Down
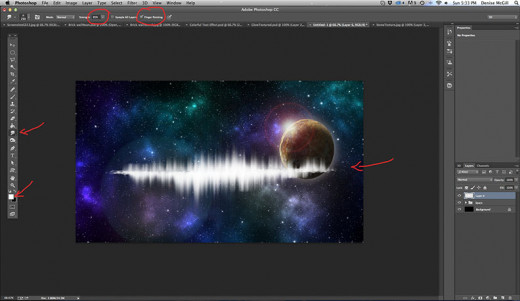
Step 23. Smudge Up and Down
Now go to the upper menu bar where the presets are and check Finger Painting and leave the strength at 85%. You can play with this but a higher number will give you longer streaks. On the new layer, right in the middle with the new long thin smudge brush, click, hold down the shift key and brush upward release. Make sure you have the color set to white. Repeat this along a straight line in the middle of the space field. Then do the same thing brushing down so that you have a number of streaks in your nebula. Take the eraser tool and erase any stray streaks above and below your created nebula.
Add glow
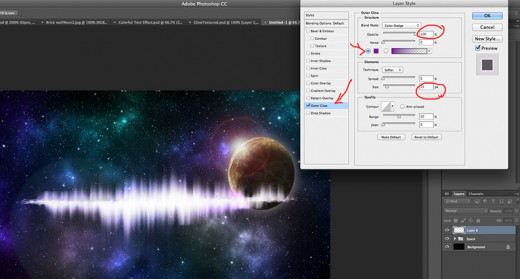
Step 24. Outer Glow
Double click on the layer to open the Layer Styles dialog box and choose Outer Glow. Click the color box to open the Color Picker and choose a pinkish-purple color: 7f049e. Increase the Opacity to 100%, change the Blend Mode to Linear Dodge, increase the Size to 15. Even now after applying the effect, you can add more streaks. Just take the brush and pull more up or down and the effect will follow.
Scale it up if you like and move the nebula wherever you like using the move tool.
Text
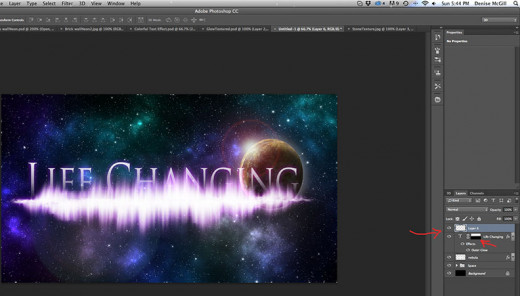
Step 25. Text Tool
Grab the Text Tool and choose a Font of your choice. The standard SciFi movie font is Trojan Pro. You can use this or any other you really like. Type with white, whatever word or phrase you like and then center the word or phrase just above the nebula. To apply the same Layer Style to the text that you used on the nebula just hold down Alt/Option and click on the fx next to the nebula layer and drag that to the new Text layer and release. It is now applied to the text. Boom.
Step 26. Layer Mask
Add a layer mask to the text layer by going to the mask icon at the bottom of the layers panel or right-clicking and choosing layer mask. Go to the Gradient Tool and choose black to transparent, starting at the bottom of the lettering, hold down the shift key and drag upward just a little. It pushes the bottom of the lettering back so more of the nebula is seen. Scale or move these as you like to fit in your artboard.
Another Lens Flare
Step 27. Another Lens Flare
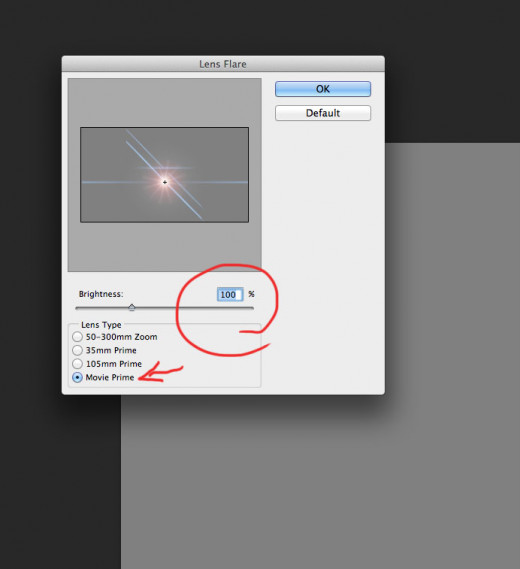
Create a new layer above all these for the Lens Flare. Fill this new layer with 50% grey by going to Edit>Fill>50% grey, or by using Shift+Delete and choosing 50% grey. Now go to Filter>Render>Lens Flare, and 100% Brightness and choose Movie Prime, which gives you lots of cool directional lines as well as the flare. Click okay. Change the Blend Mode to Hard Light.
Finished
Step 28. Mask Ends of Lens Flare
To soften where the lines and angles are getting cut off, add a layer mask to the layer and paint out the ends of the angles with a soft black brush, or using the black to transparent gradient, pull in from the top and up from the bottom to give a soft transition.
Change the Font and Use the Effect Again
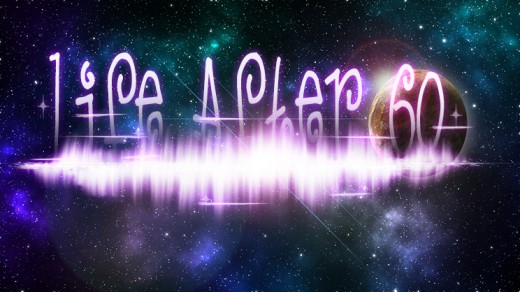
Step 29. Streaks
Create a new layer to add a few more Smudge Tool streaks across the letters from side to side. Click the Alt/Option and hold down the fx on the lower layer, drag up to apply the same Layer style to the streak layer.
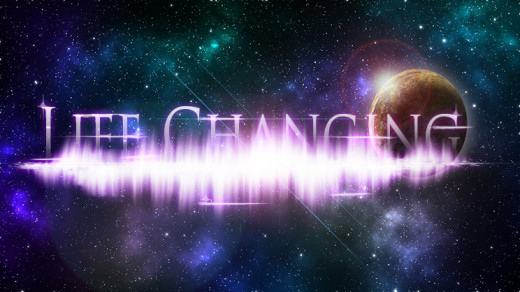
Finished
There you have it. A really cool Spacey Nebula Text Effect, worthy of a SciFi movie or book cover. So cool. Have fun. Let it be so.


