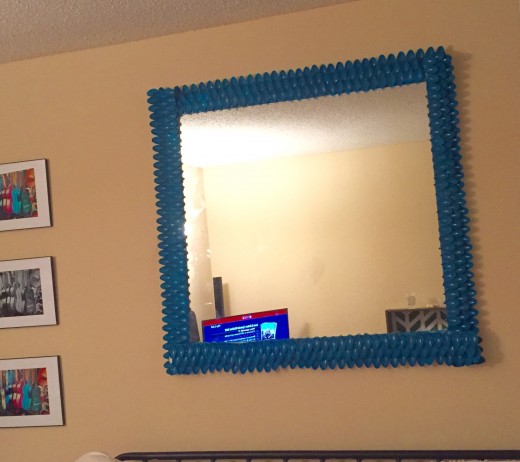
DIY: How To Frame A Large Mirror For Less Than $10

Time: 1-2 Hours, Budget: $8
So, the apartment above mine is currently being renovated. The other day the maintenance man was carrying down the over the sink bathroom mirror and asked if I would want him it before he took it over to the dumpster.
I just moved in last week, and have been at a loss as to what I should put on the huge blank wall above my couch in the living room. I am also a newly independent college grad, and have a literally zero dollars to spend on apartment decor.
Having absolutely no idea what I would do with a 75 pound mirror, I said "bring it on in!" Next I dove into my craft closet and looked for inspiration.
What can I possibly do With a 5' x 5' mirror, some paint, some plastic spoons, and no money? It took a few days before it came to me..but when it did, it became a magical piece that I didn't even know I was missing.
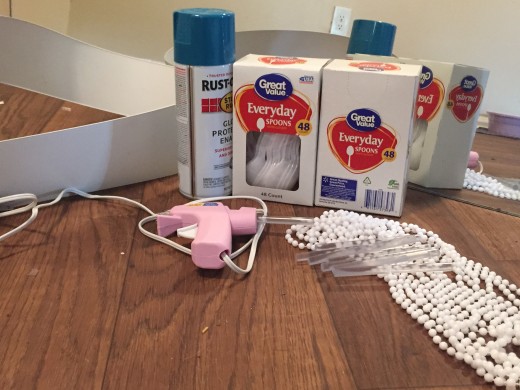
Materials:
1. Hot Glue Gun
2. Hot Glue Gun Sticks (At Least 30)
3. Plastic Spoons (I was surprised with how many I used.. depending on size of mirror and amount of spoon rows you plan to do - I used 450ish)
4. Poster board/ cardboard cut into long strips (as long as each side of mirror)
5. Spray Paint
6. Mirror
7. Beaded chain, rope, etc to border the inside (optional)
8. A Mirror
9. Patience!
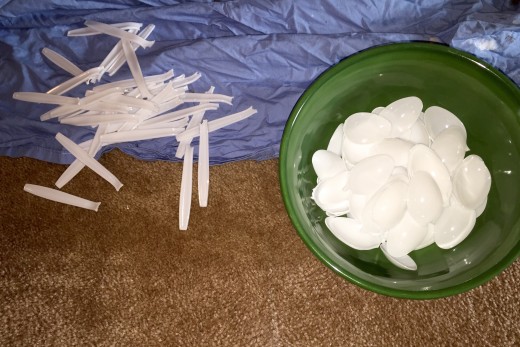
Step One: The Bend And Snap :)
")
This is slightly time-consuming, and was by far my least favorite part. However, in the end,Worth it.
Separate the "head "of each spoon from the "stem."
I honestly cannot say what the best method is for completing this step, but I have a feeling that the way I chose was not it.
I used a "snapping" technique which, unfortunately, lead to frustration as well as a minor injury.. I wish I had an alternative method to suggest, but I ended up just powering through with this approach… Perhaps really powerful scissors?
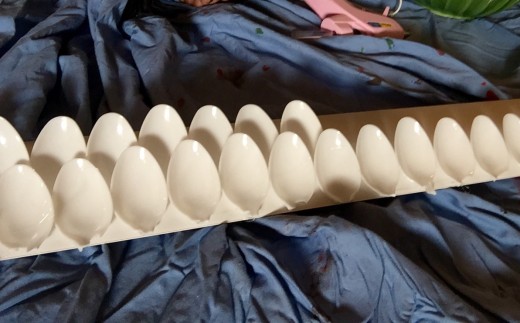
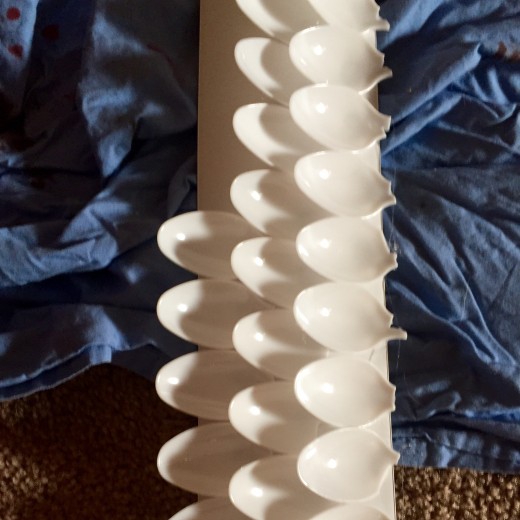
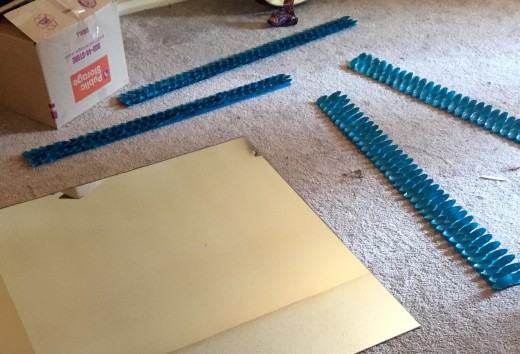
Step Two: Glue Your Rows Of Spoon Heads
Make sure you have measured out 4 posterboard or cardboard strips so that they are long enough to border each side of the mirror and wide enough for your chosen amount of spoon rows
With your hot glue gun, glue a row of spoons (face up) side by side with the broken part on the edge of the poster board.
let the first row dry, and then stagger glue the second spoon row with the spoon heads "peeking" through the gaps between the spoons on row one
Do the same for row 3 ( and row 4, 5, however many you would like)
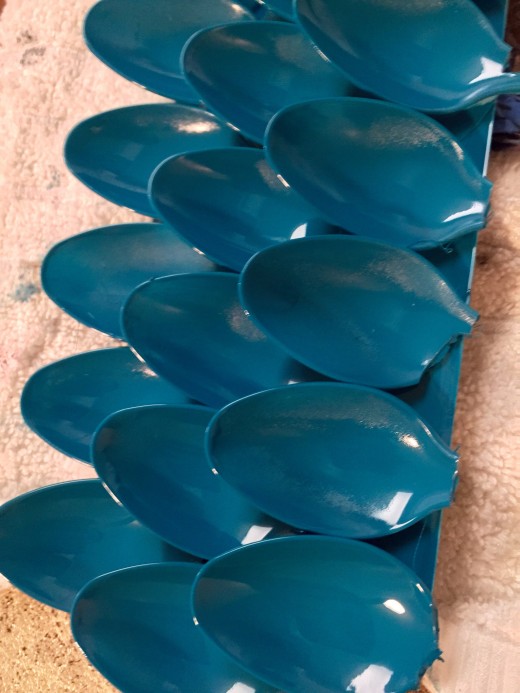
Step Three: Add Some Color!
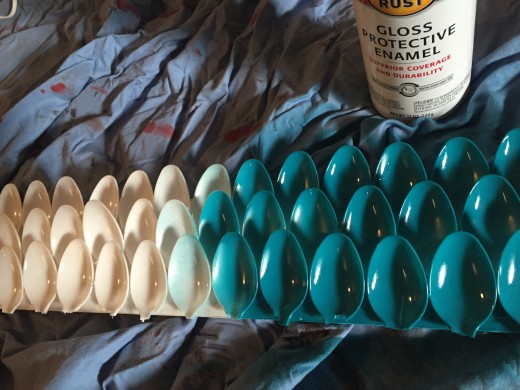
Spray paint each of your strips of spoon rows whichever color you have chosen.
Do a few layers of spray paint from all different angles. There are a lot of nooks and crannies you will need to get into.
*Spray painting is best done outdoors.. Especially if you have pets or children.. The smell can be overwhelming and toxins are dangerous to breath in
Please keep in mind that is you are expecting a "shiny" oucome, you must buy paint that says "gloss" on the label rather than "matte" or something else.
I used Rust-oleum gloss spray paint in "lagoon"

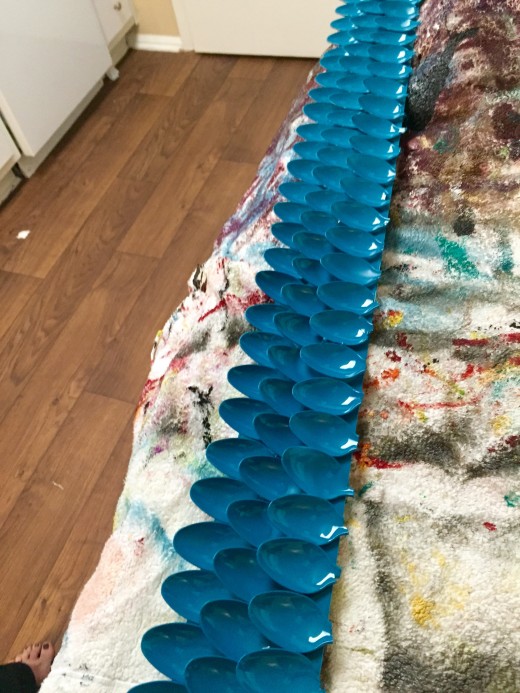
Step 4: Attach Your Borders
if you are using a large mirror like I was, it may be easier to hang the mirror up before gluing on the borders.
I tried doing this in the opposite order and ended up struggling so much to get the mirror on the wall that I crunched my borders and had to go back and re- glue several spoons.
Gorilla Hooks: A God-Send

I attached the strips using a glue gun and let the borders overlap at the corners. I have also seen others cut their borders more exact so they did not have two layers at the corners.. It's really up to your taste :)
If you are struggling to hang your mirror I highly recommend "gorilla hooks." I used two of the 50 pound version of these to hold up my 75 pound mirror by setting the bottom edge of the mirror into a hook on each side.
There are no tools required, it takes 5 seconds to twist them into the wall, and I have had no issues using only 2 to hold up my unreasonably heavy mirror.. I went ahead and posted a link where you can find them :)
Step 5: Tah Dahhh!
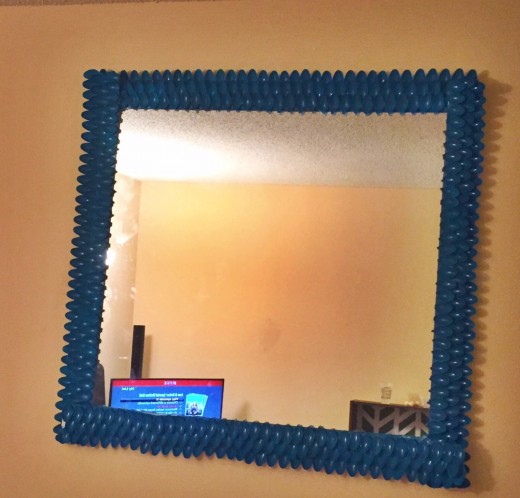
Congratulations!! You did it!
You may also add some extra finishing touches such as a gold border around the inside or using extra spoons to round out the corners :)
Check out my other budget-friendly DIY projects!
- DIY Graduation Gift: The College Survival Kit.
How to make a Quick and cheap homemade gift fora High school graduate or DIY College Survival Kit. An awesome resource for gift giving on a budget! - DIY: Piano Photo Display Made From Clothespins
Piano Photo Frame DIY made out of clothespins! Frame ideas, photo collage, cheap DIY home decor, crafts for under $5, How to display photos


